Support
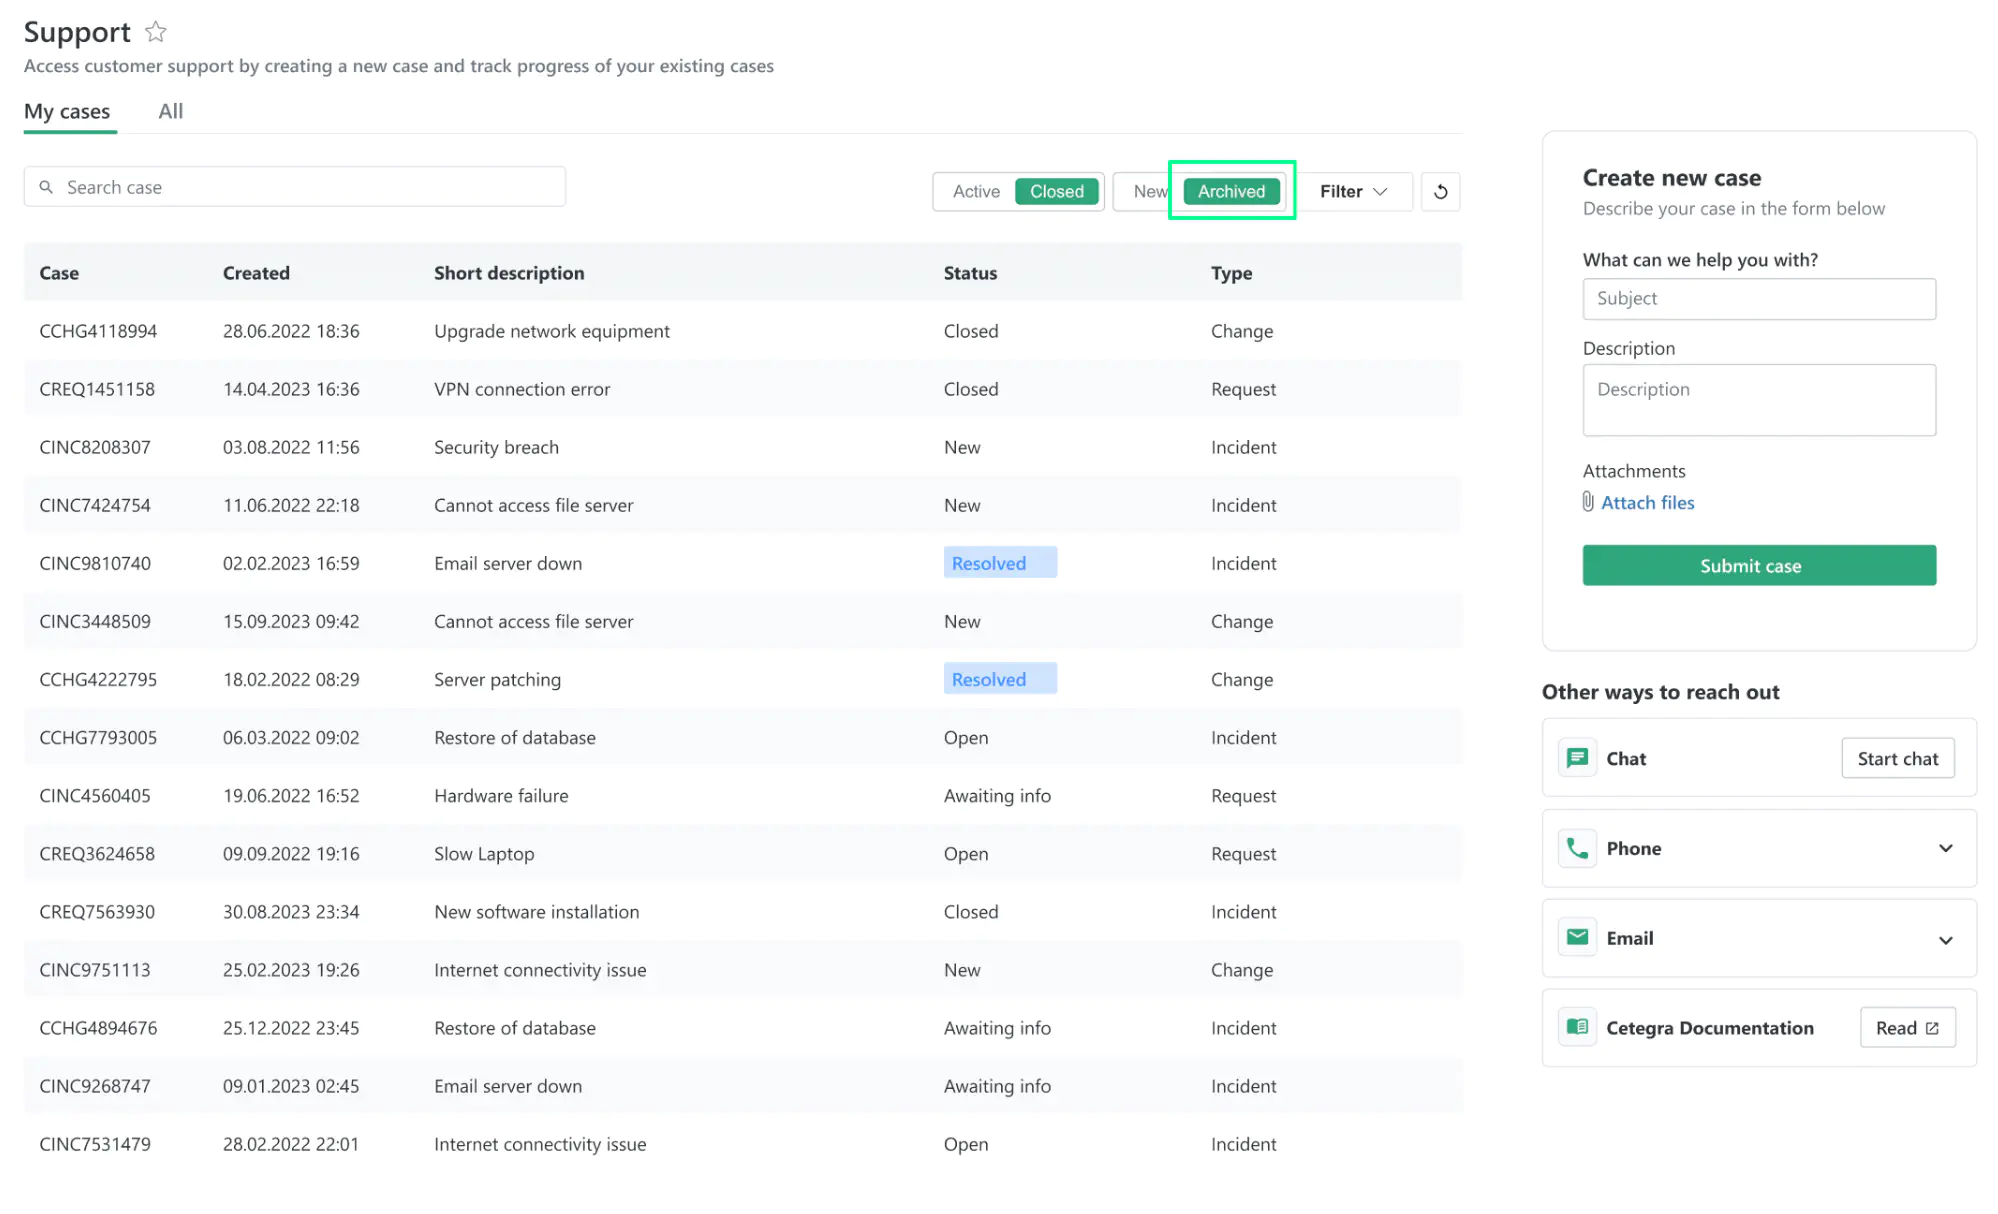
The Support module within Cetegra Workspace functions as the primary access point for the Cetegra Care platform. This easy-to-use interface allows you to generate cases and monitor their progression. Additionally, it offers a thorough summary of all cases, showcasing details such as status, comments, and other vital data.
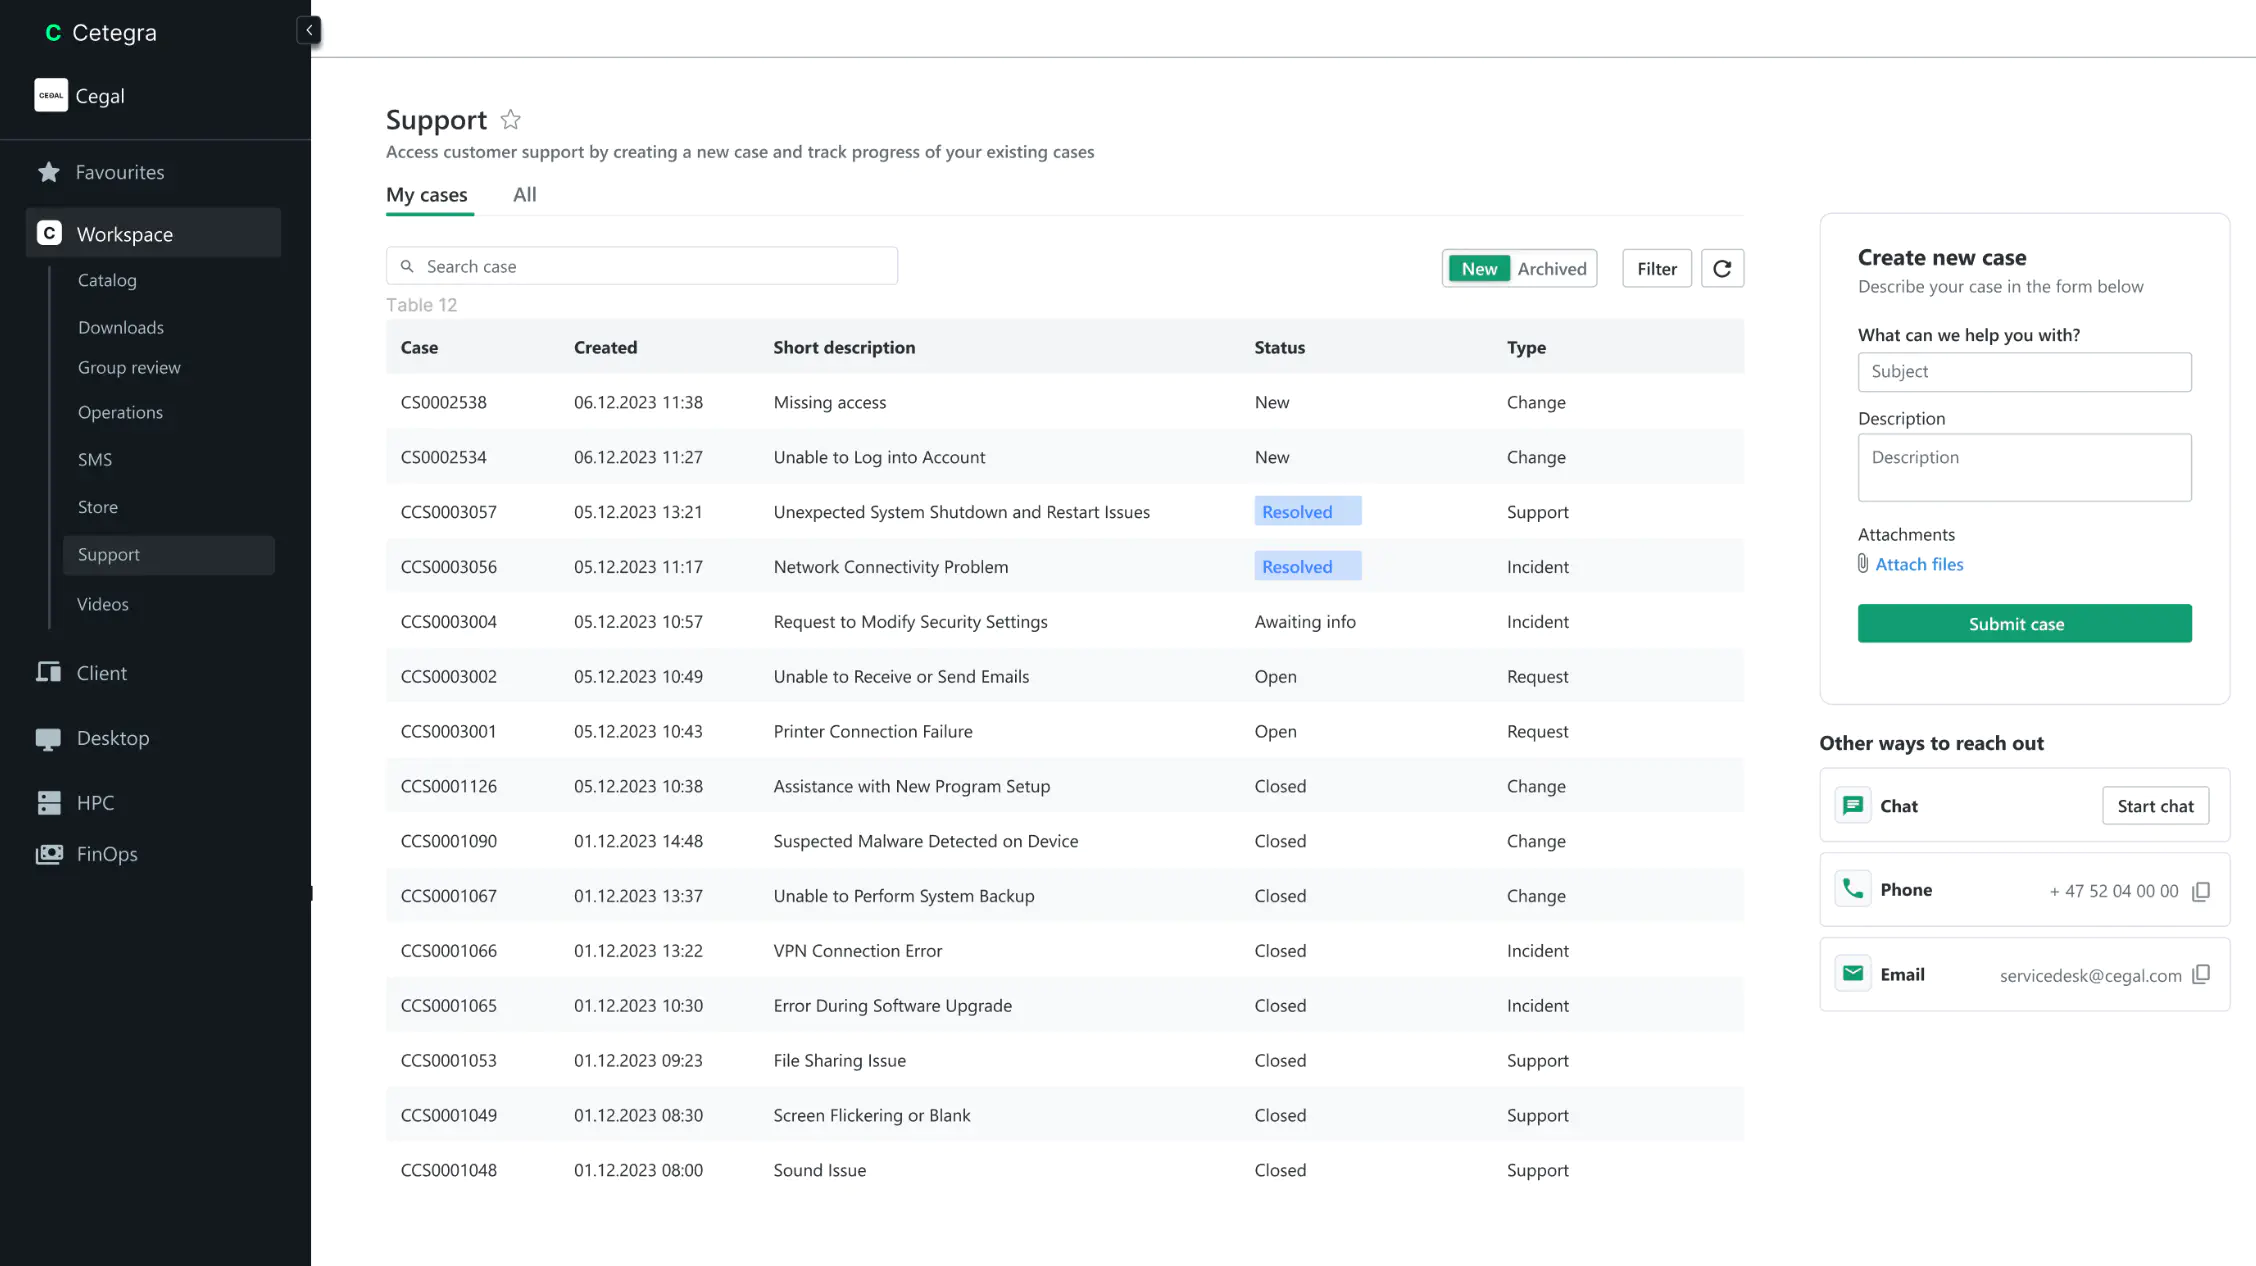
Take a look at the below video to get an introduction to how to use Cetegra Workspace:
Creating a case
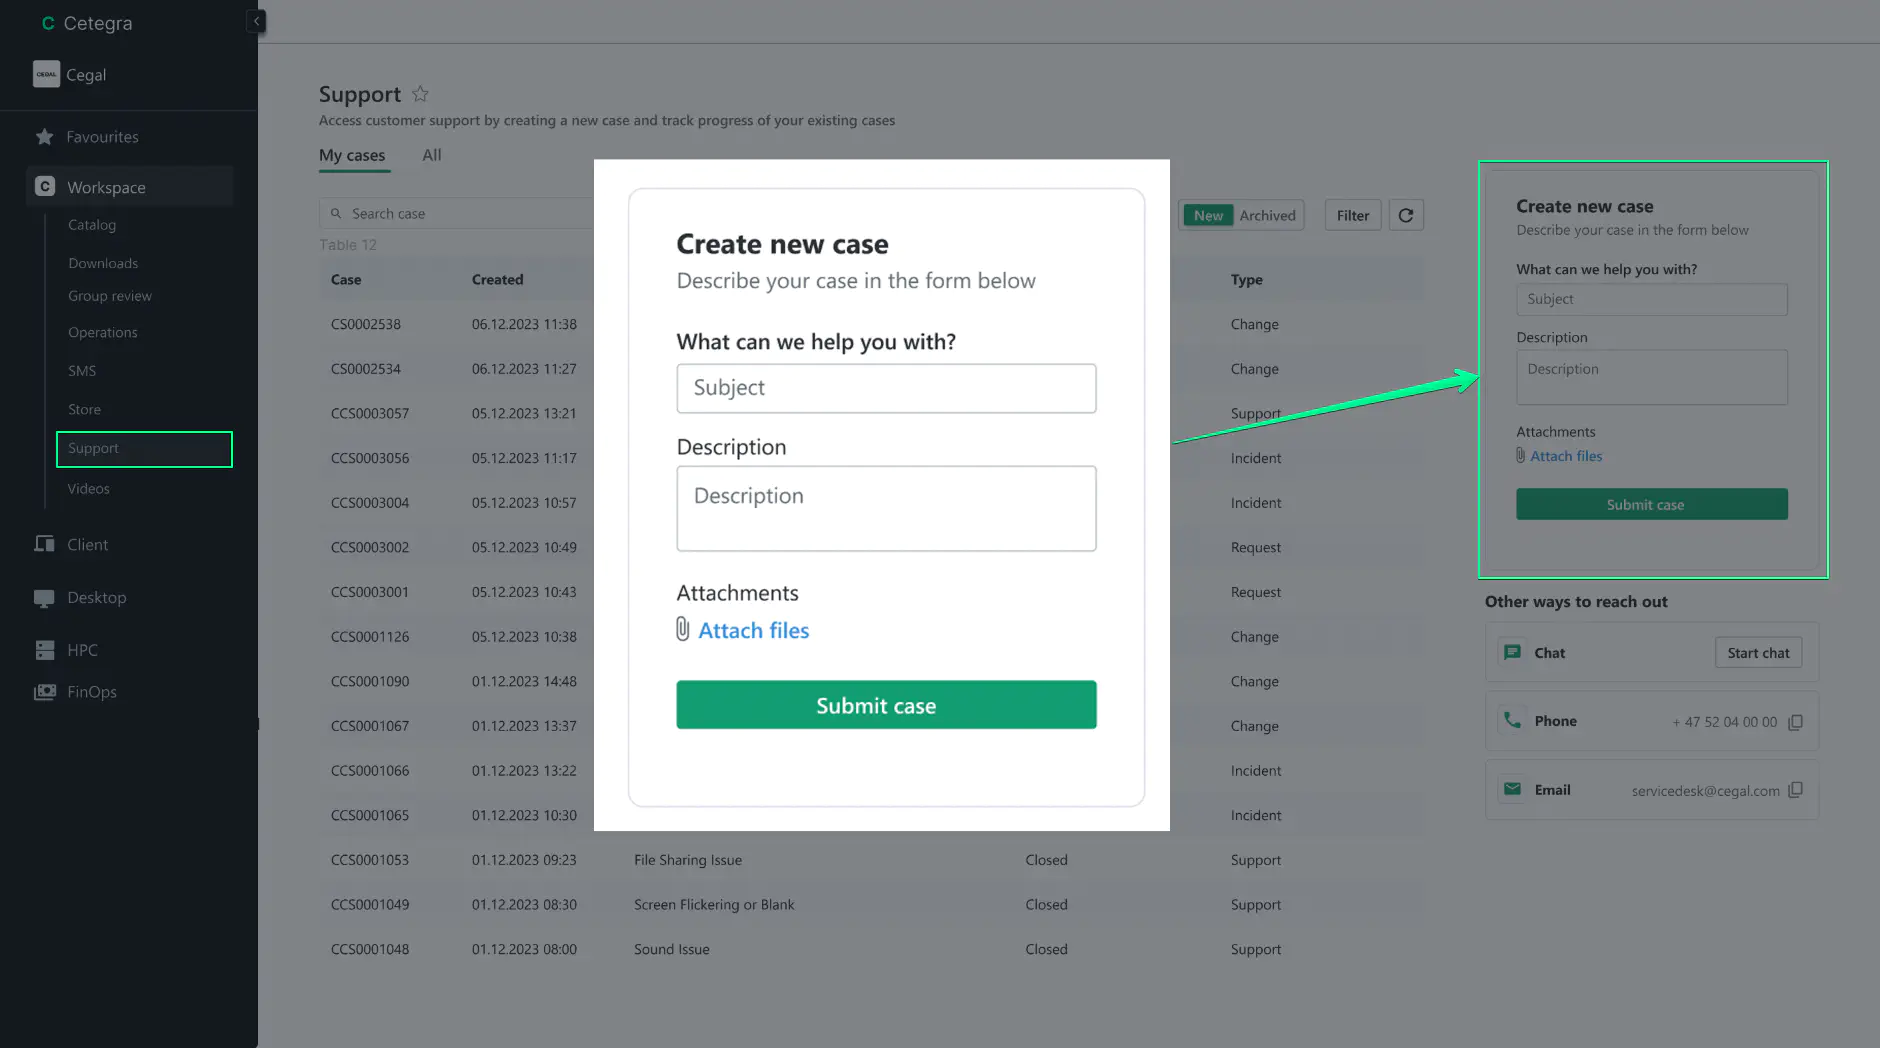
To create a case, fill out the form Create new case with the following information:
- Navigate to the Support module in your Cetegra Workspace.
- Fill out the Create new case form.
This includes a short description of your issue or request in the What can we help you with? field, a detailed description in the Description field, and any necessary attachments under Attachments. - Click on the Submit button to register your case.
Status
You can view all your cases in the My cases table. This table can be sorted by using the Filter button to select your desired filter or searching for a specific keyword in the search input field.
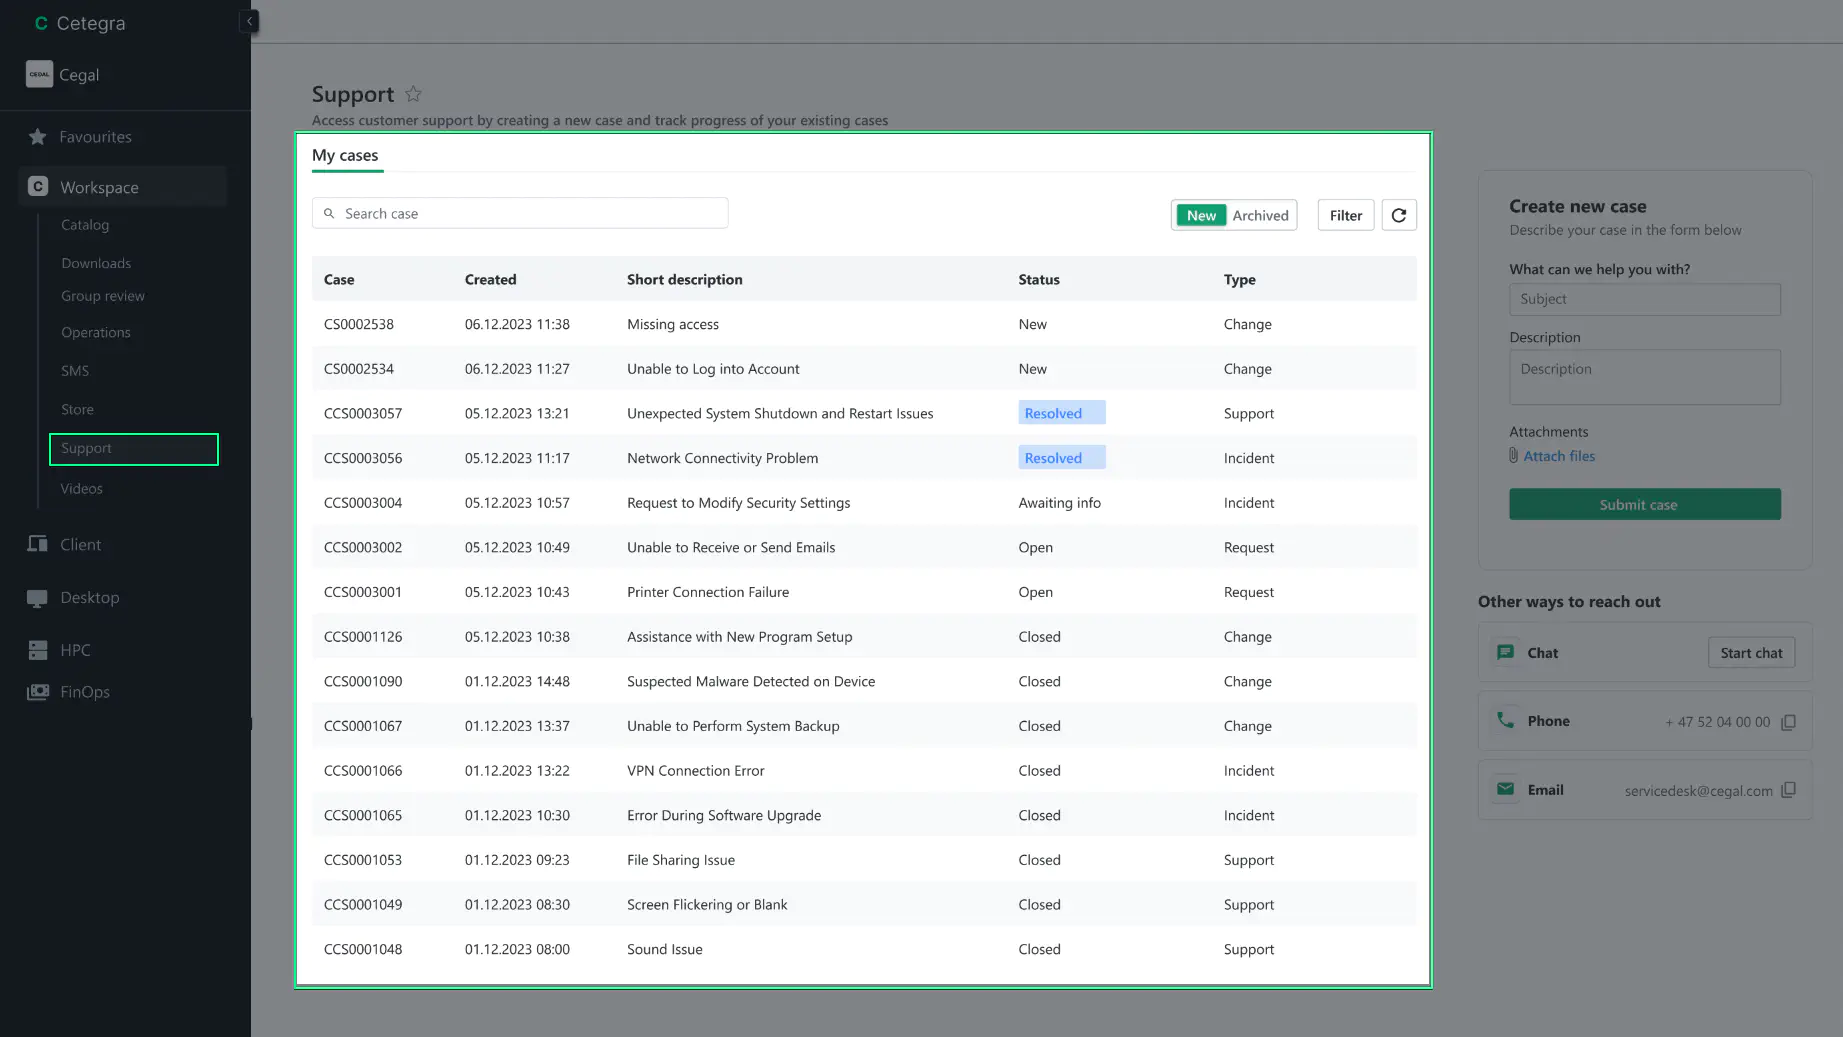
Click on a row in the table to see more details about a specific case.
Case details
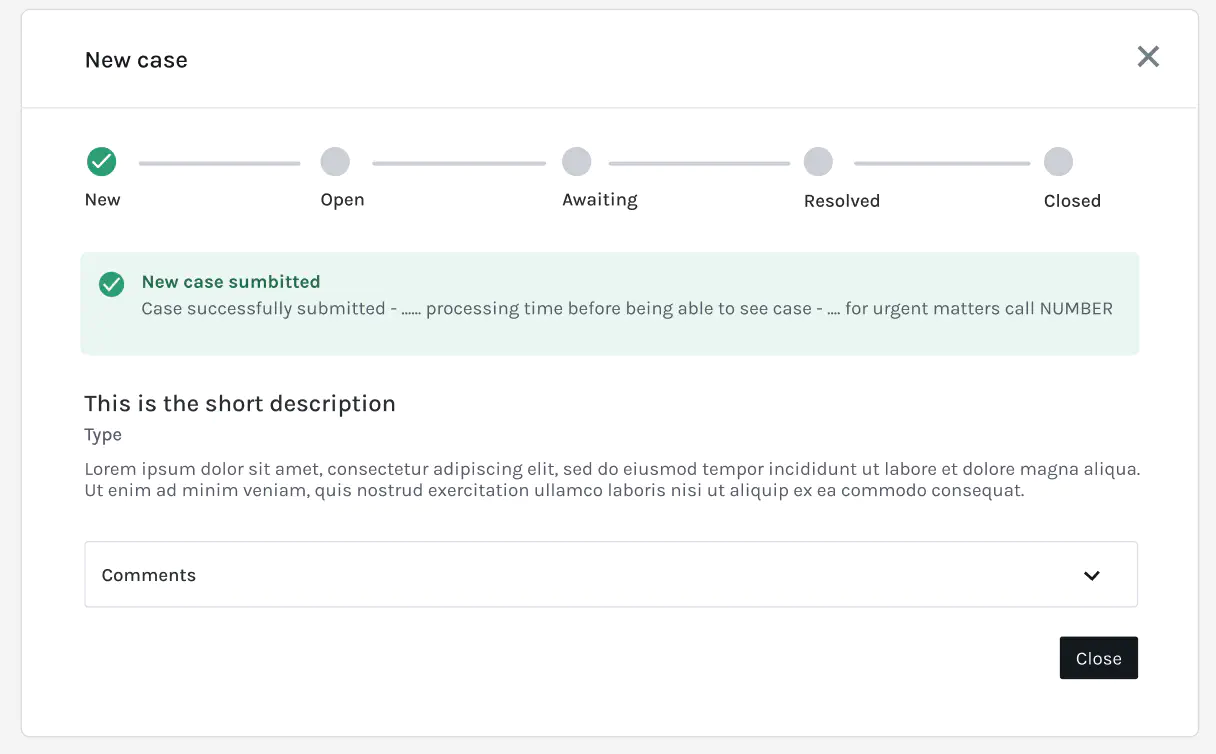
The Case Details window provides more information about your case, including its case number, status, comments, and other relevant information. You can also view the progress of your case and all related updates in the case history.
In the Status section at the top of the window, you can see the current status of the case.
The status of the case can be one of the following:
- New: The case has recently been created and is in the queue
- Open: An agent is working on the case
- Awaiting Info: The case has been sent back to you or a third party for more information
- Resolved: The case is resolved, and you can approve or reject the solution
- Closed: The case solution has been approved, and the case is closed
Comments
Under the Comments tab, you can view and add comments related to the case. These comments will be visible to the assigned agents.
To submit a comment, click the Post button or press Ctrl + Enter.
Approve or reject the solution
When your case is resolved, you can approve the solution by clicking the Approve button, which will close the case. If you are not satisfied with the solution, click the Reject button to reopen the case, and add a comment explaining why you are rejecting the solution.
Read more about Case here.
Tickets
If you have ongoing tickets in the previous version of ServiceNow, you can find them in the Tickets section. This section contains all your ongoing tickets from the old system, and you can view them by clicking on the Tickets button.
You can still view and update your ongoing tickets from the old system, but you cannot create new tickets in the old system. To create new tickets, use the Create new case form in the Support module. Read more about how to create a case in the next section.
