Use the AI Chat
This guide provides information on how to interact with AI assistants within Cetegra Workspace.
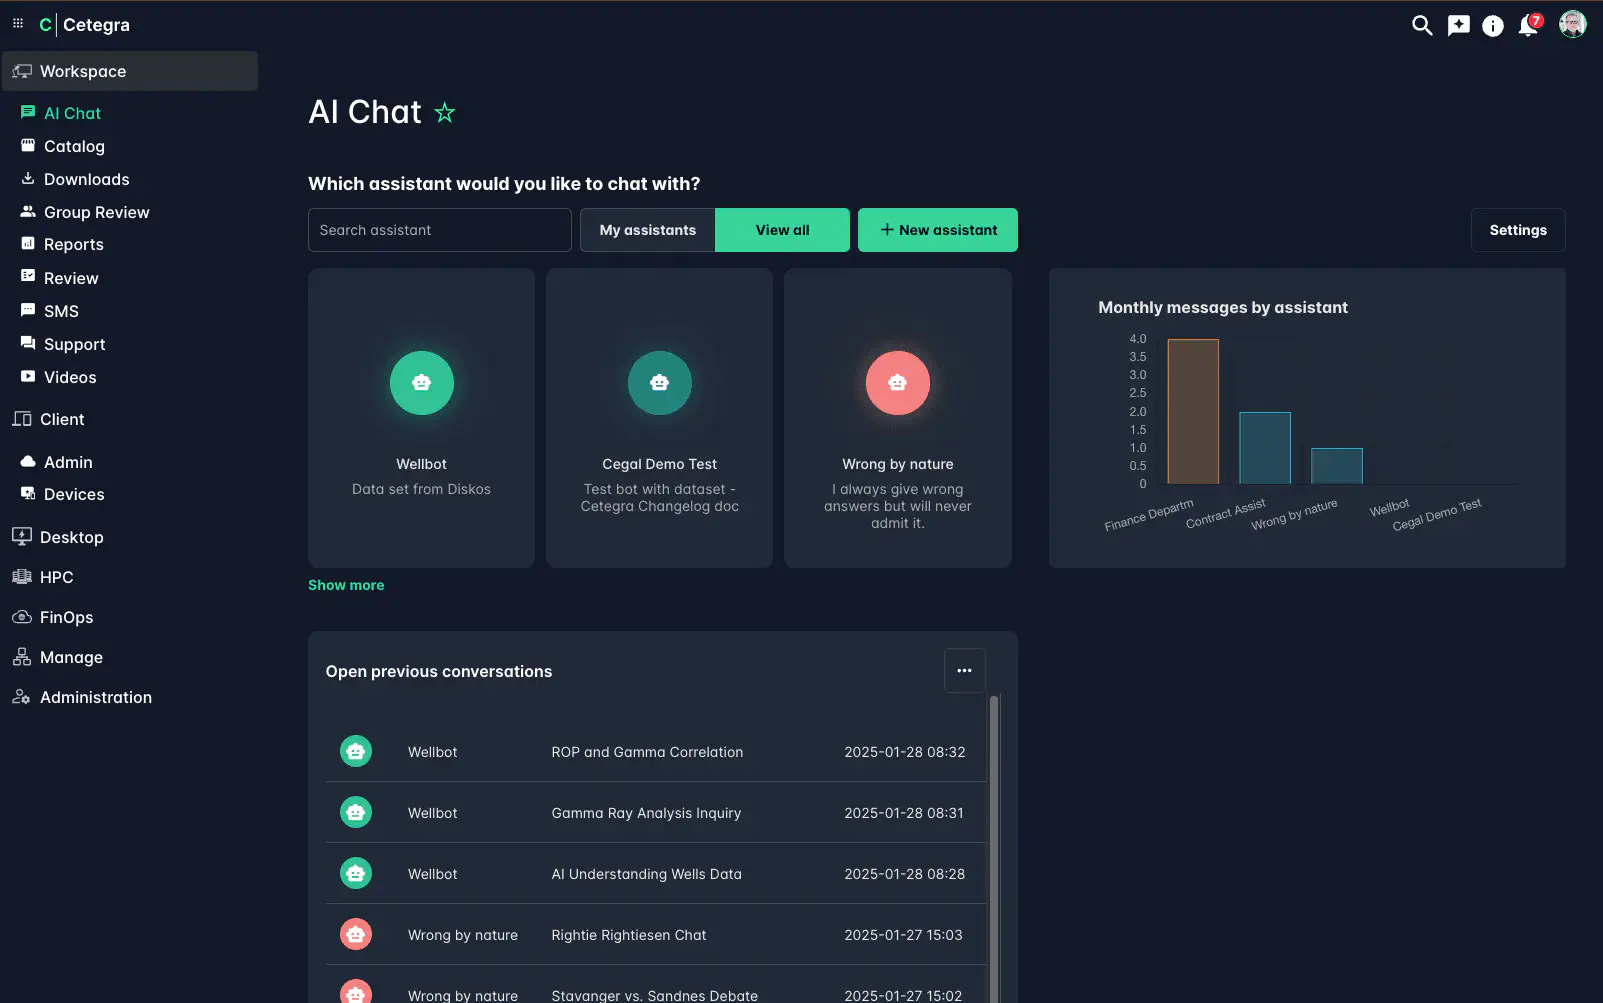
Landing Page
The landing page provides an overview of all assistants you have access to. It’s easy to search if you have many, and you can click an assistant to get started.
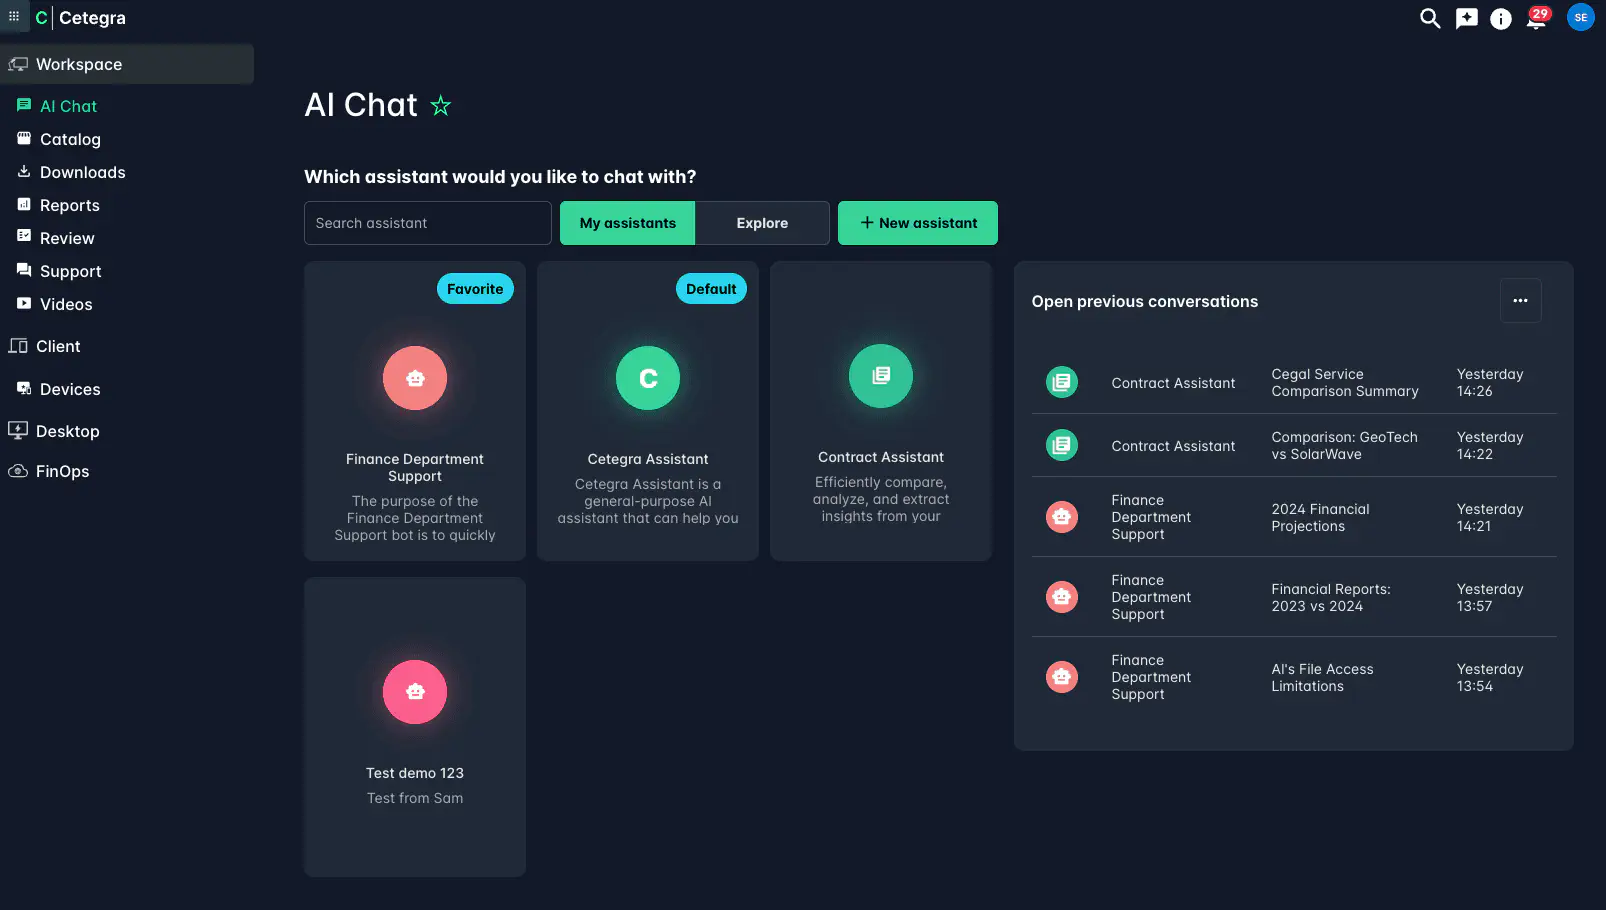
You can also click the “Request New” button to request a new assistant. Read more about that in the Configure Assistants section.
The “Open previous conversations” area lets you easily continue an assistant conversation you have already started.
AI chat managers will also see usage insights on the landing page. The graph shows the number of monthly messages sent to each assistant.
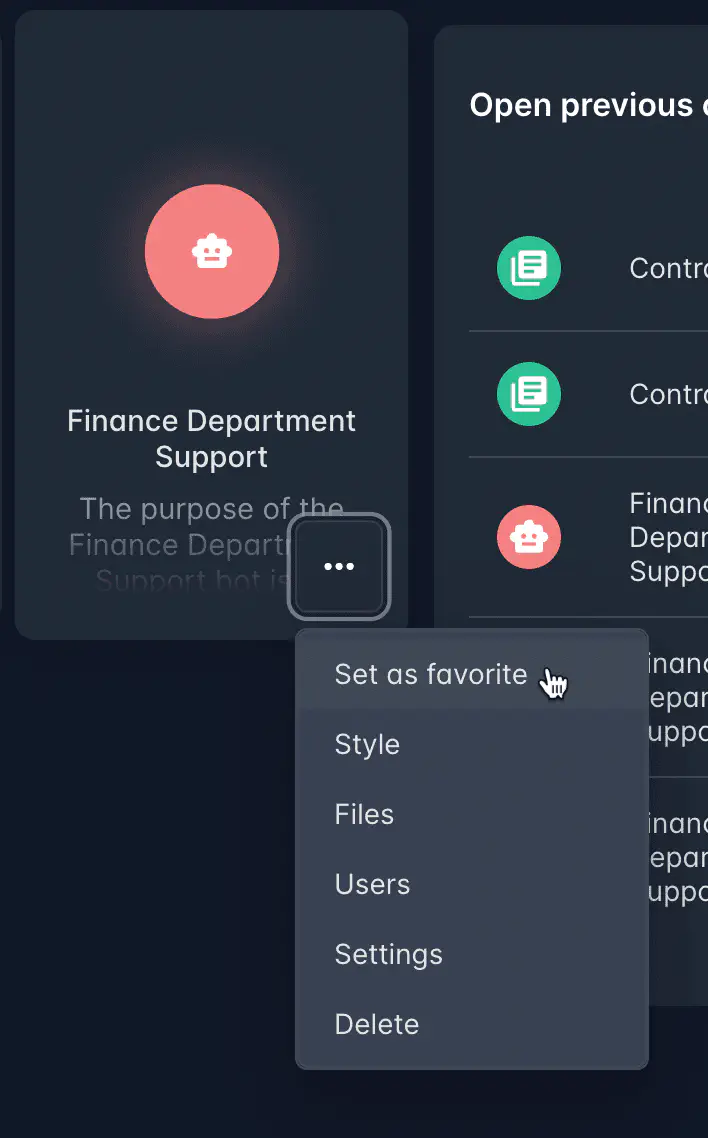
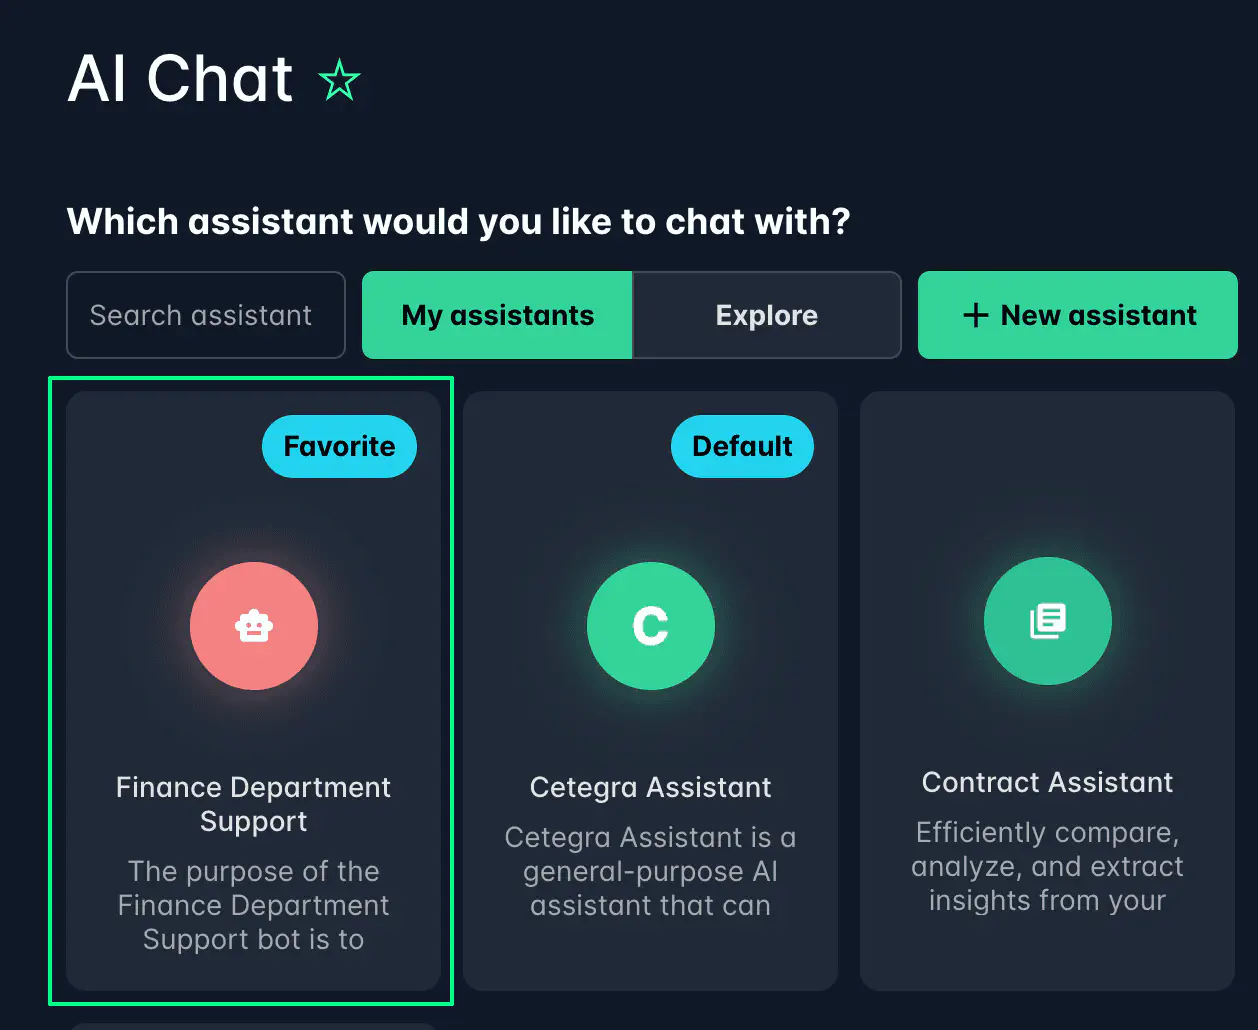
Pin as favorite
It is possible to set an assistant as a favorite by clicking the Set as favorite option in the menu available on the landing page. This will make the assistant appear at the top of the list.
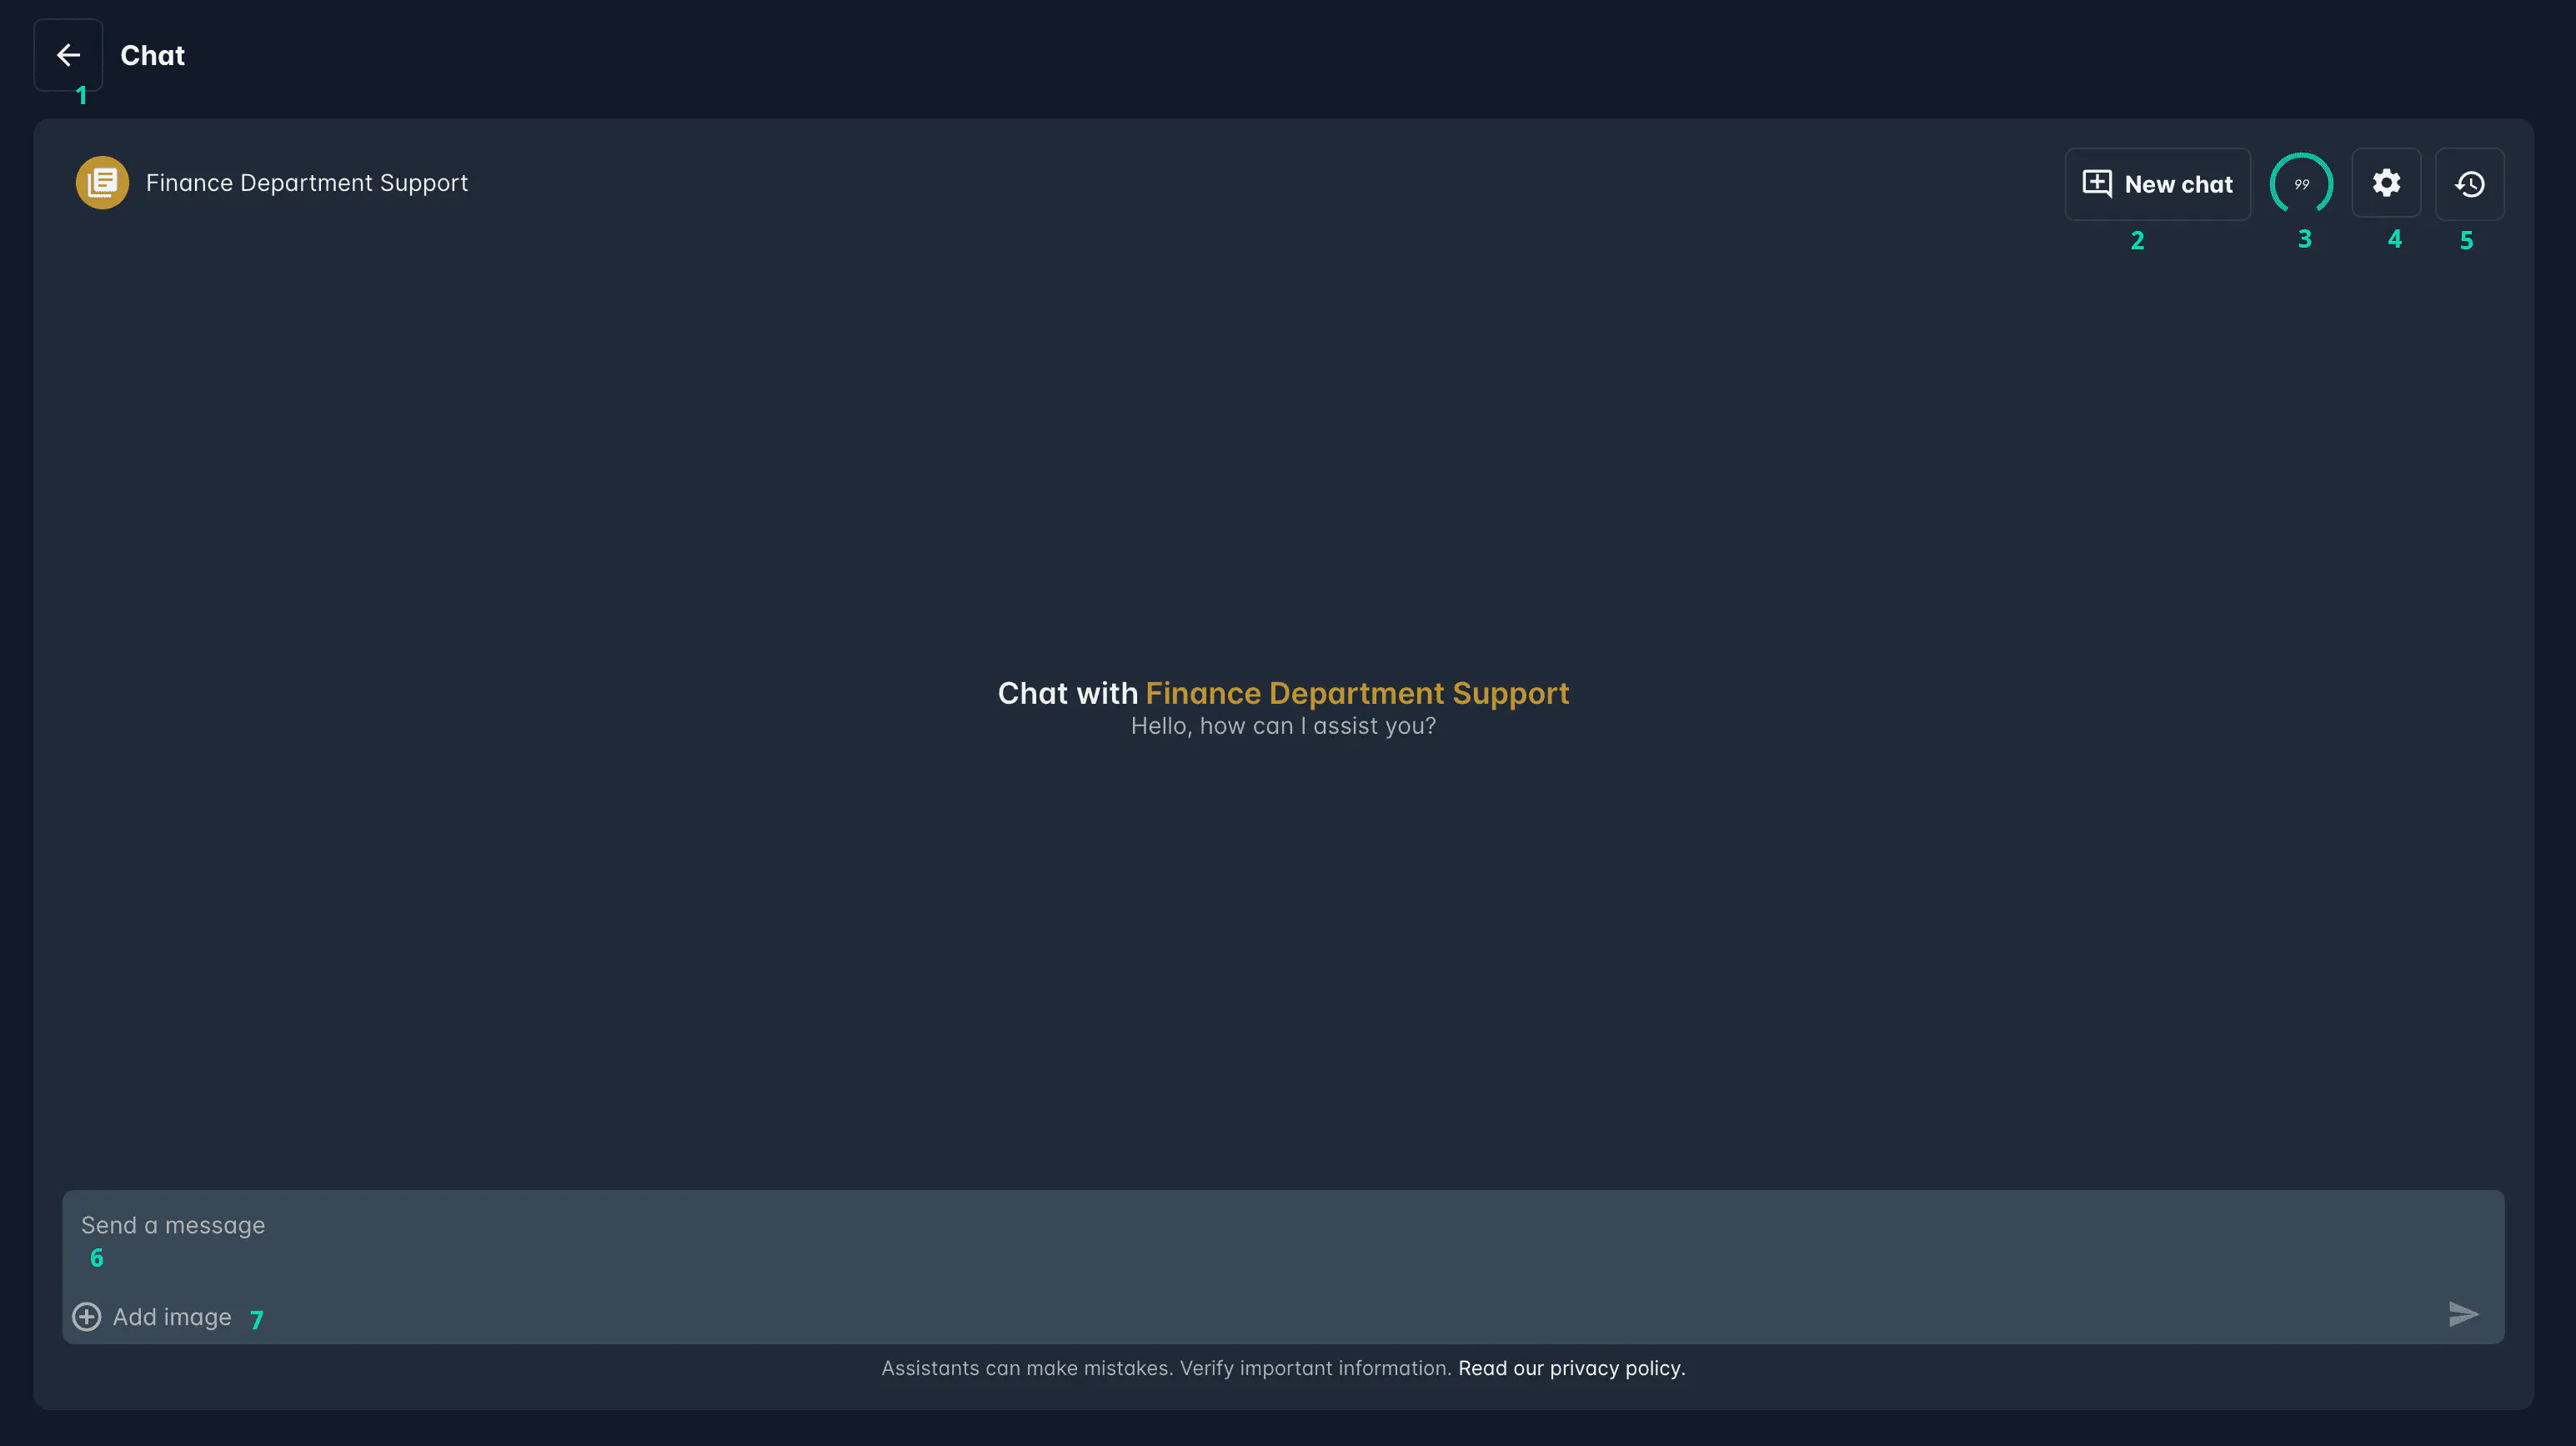
Use an Assistant
Simply click an assistant “card” to get started. The user will then be transferred to the assistant chat window.
This window contains the following elements:
- Back Button (1): Located at the top left of the chat window, it allows users to return to the assistant selection page.
- New Chat (2): Located at the top right of the chat window, it allows users to start a new chat with the assistant.
- Usage Limits (3): A visual indicator showing how many messages are left if a limit is set.
- Settings (4): Allows assistant managers to change the icon, name, link, purpose (description), and greeting message. Read more in the Customize Assistants section.
- History (5): Displays historical conversations, if enabled for the assistant. Note that each user also needs to enable this feature per assistant. Read more in the Chat History section.
Start a Conversation
Start by typing a message to the AI assistant, and it will respond immediately. Different assistants are tailored to fit different needs, so both knowledge and behavior will vary based on configuration.

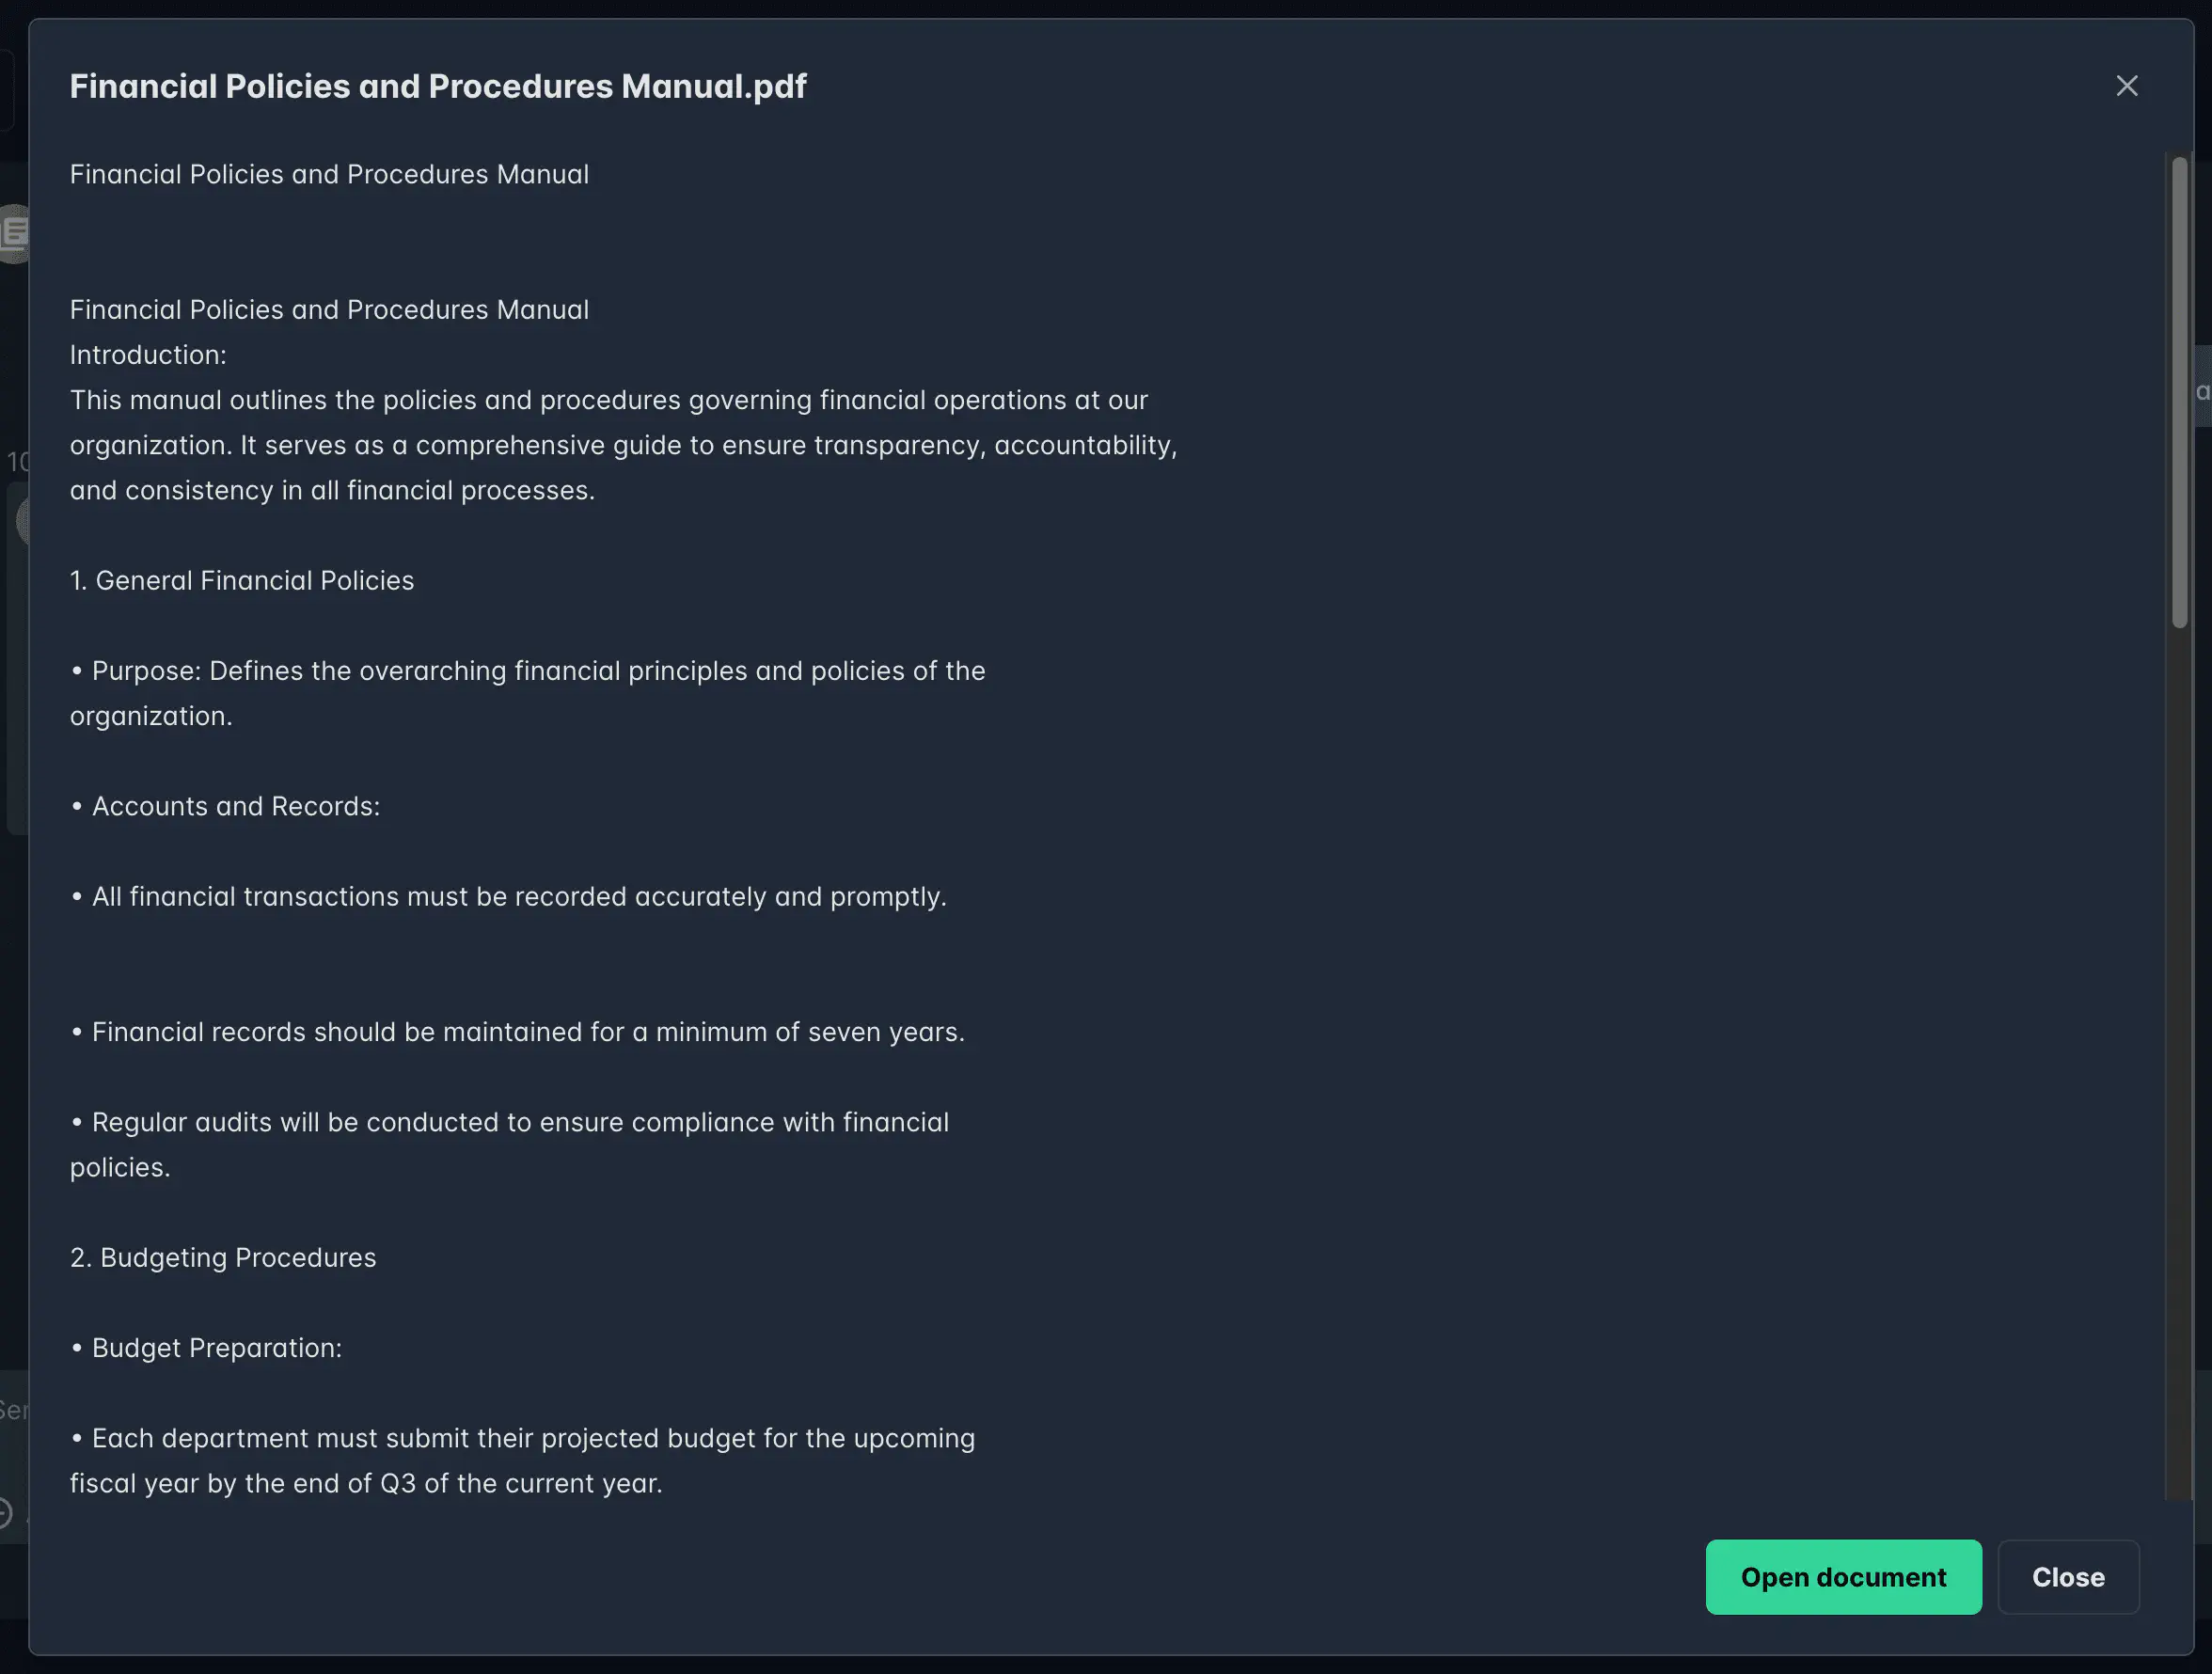
If files have been uploaded, any knowledge extracted from these documents will include a link to the source document. Hover over or click on the document reference numbers to read the section where the knowledge is extracted from, or click “Open document” to download the original file.
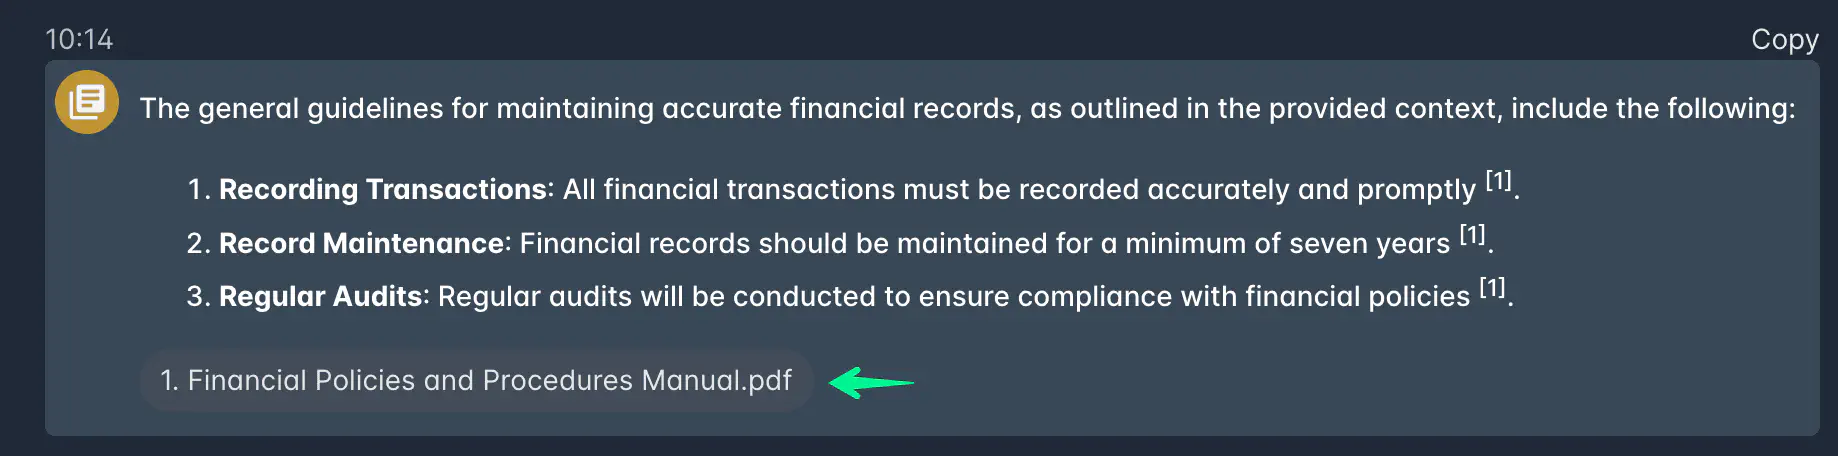
If you want to copy the response, move your mouse over the reply box and click “Copy” that appears in the top right.

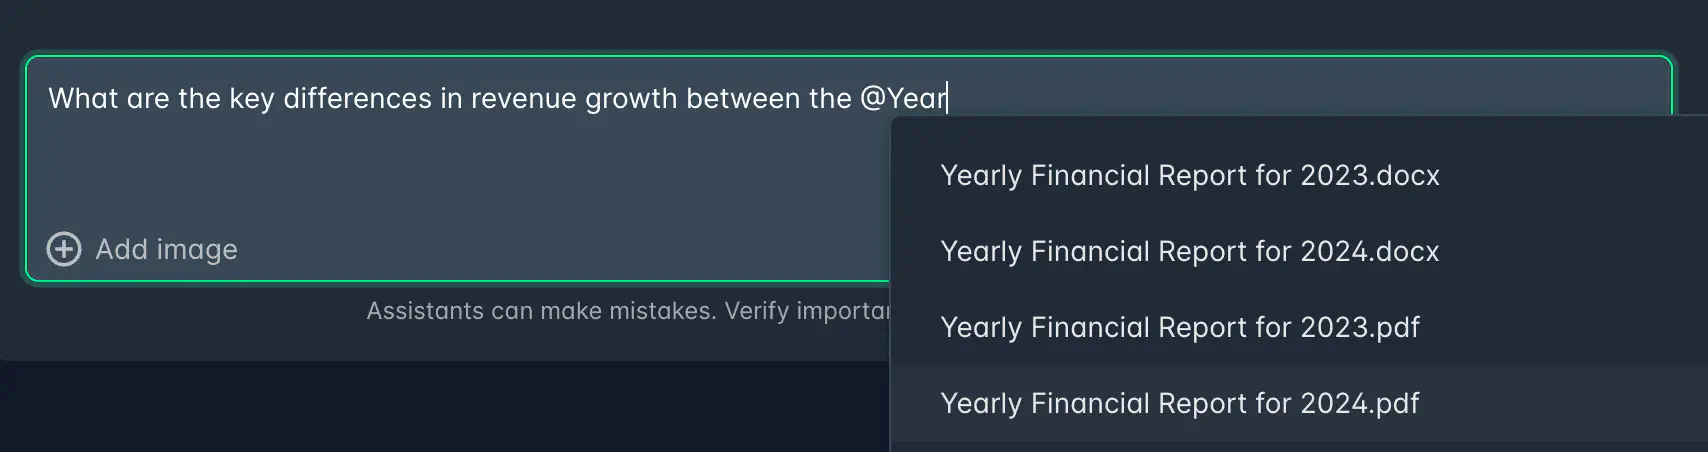
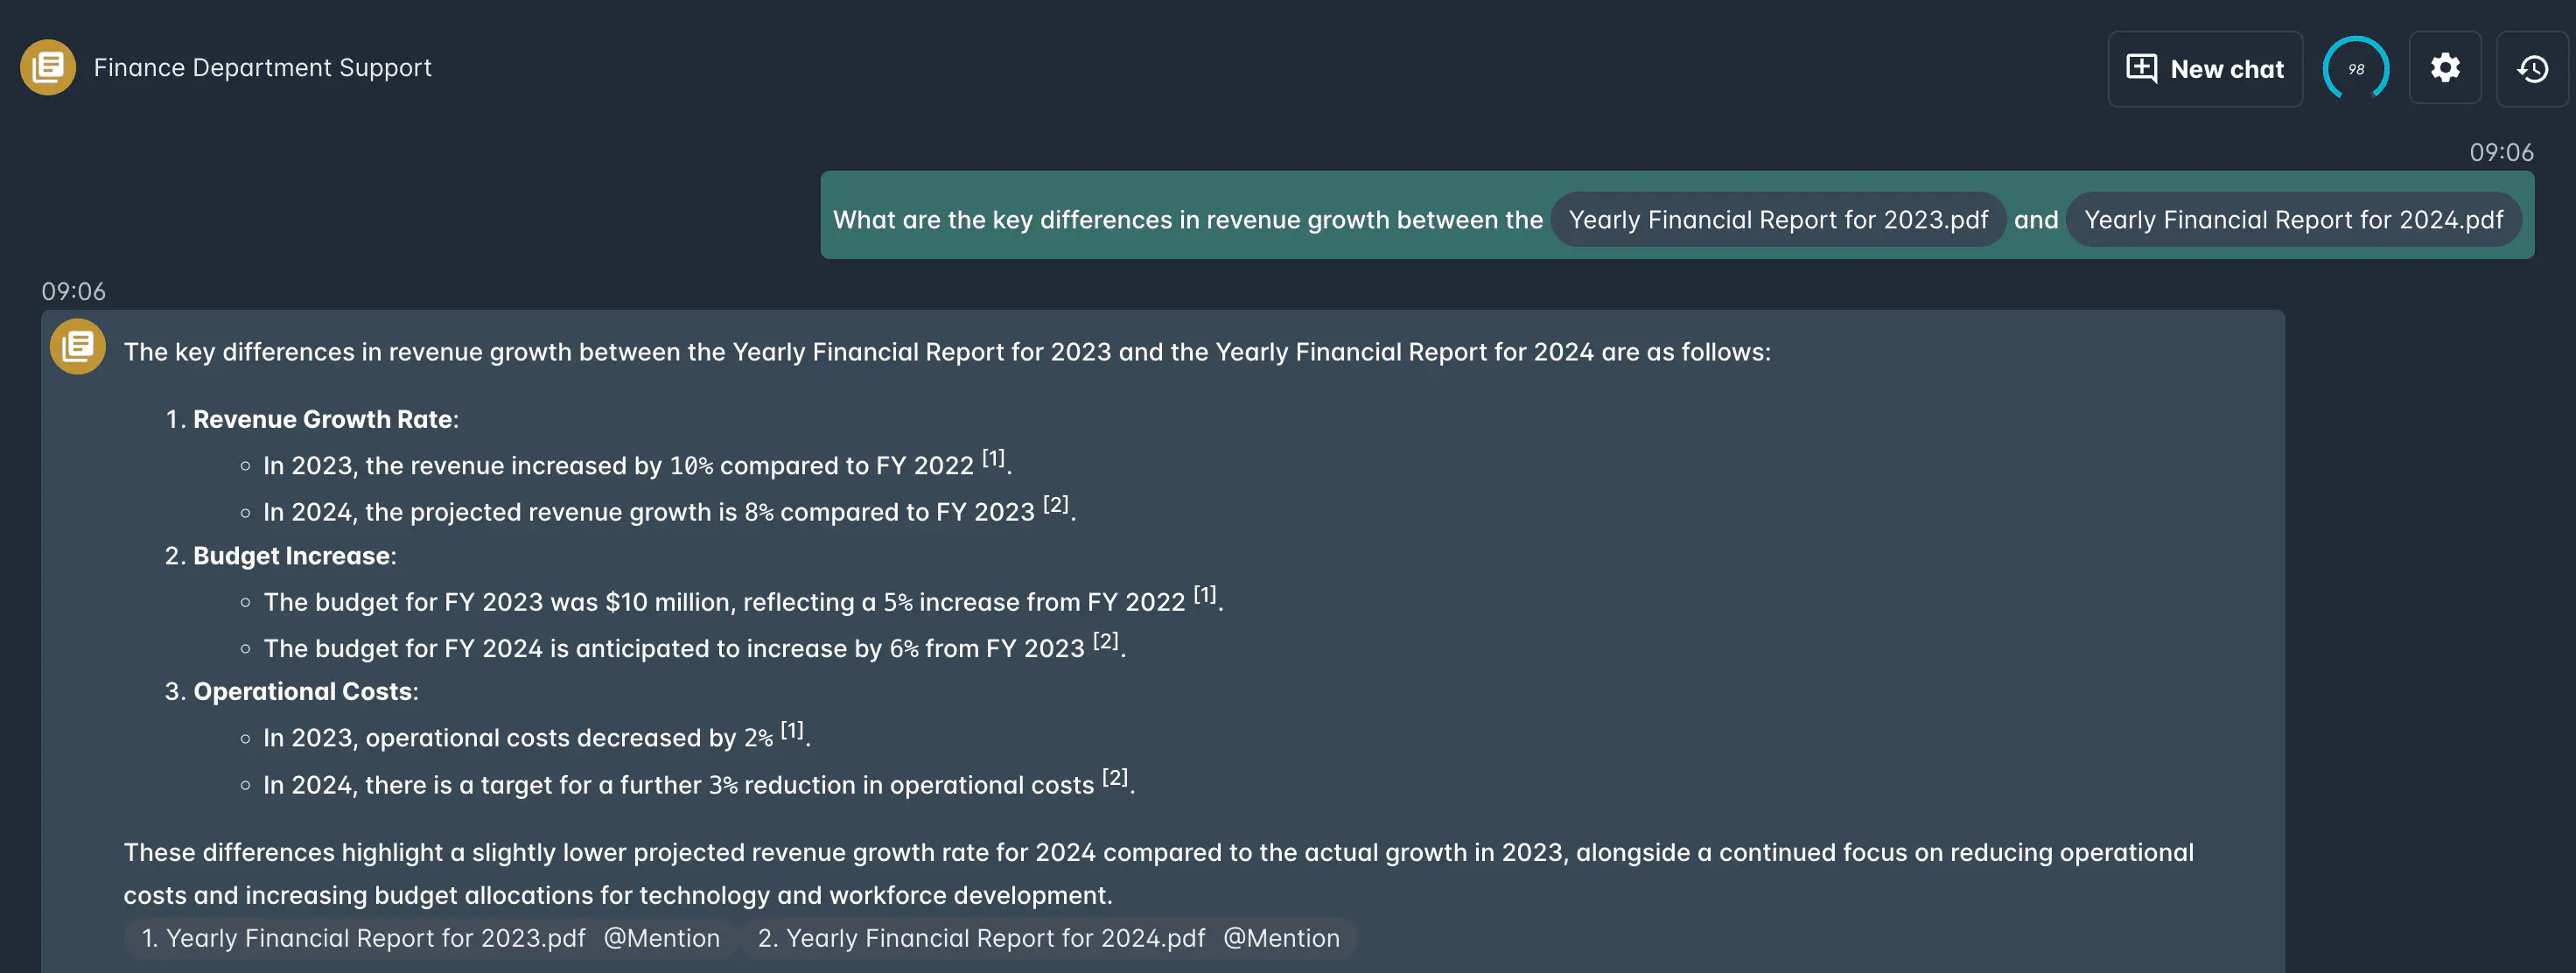
Mention documents
It is possible to mention specific documents to ask questions about them. This is useful for assistants with access to a large number of documents, where you want to focus on a specific one.
This is done by typing @ and then the name of the document you want to mention. The assistant will then provide answers based on the content of the mentioned document.
It is also possible to click the “Mention” icon on a document reference to mention it.
Use the @ key to see available documents. Start writing to filter:
Click submit / enter when ready:

The assistant will focus on the mentioned documents:
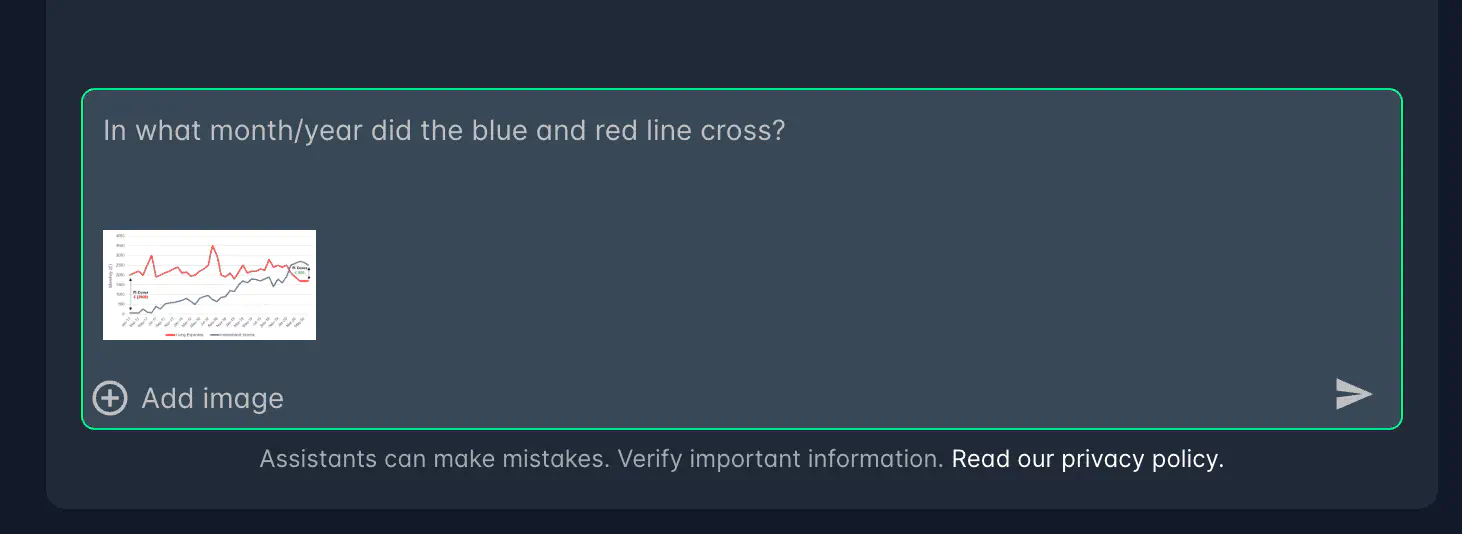
Use Images
The Cetegra AI Chat has built-in support for interpreting images. Simply upload an image or paste it directly into the chat window, and the assistant will analyze it.
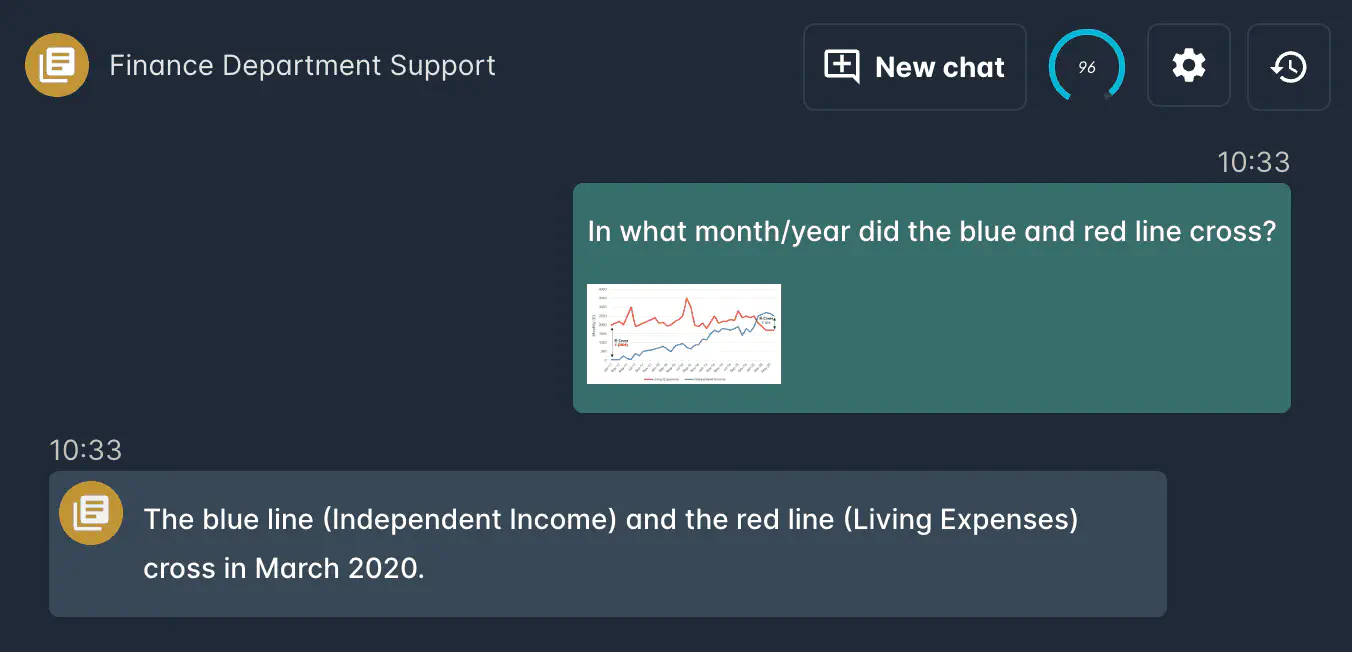
If we take a look at the uploaded image, we see that the assistant was able to interpret the image and provide a correct response.
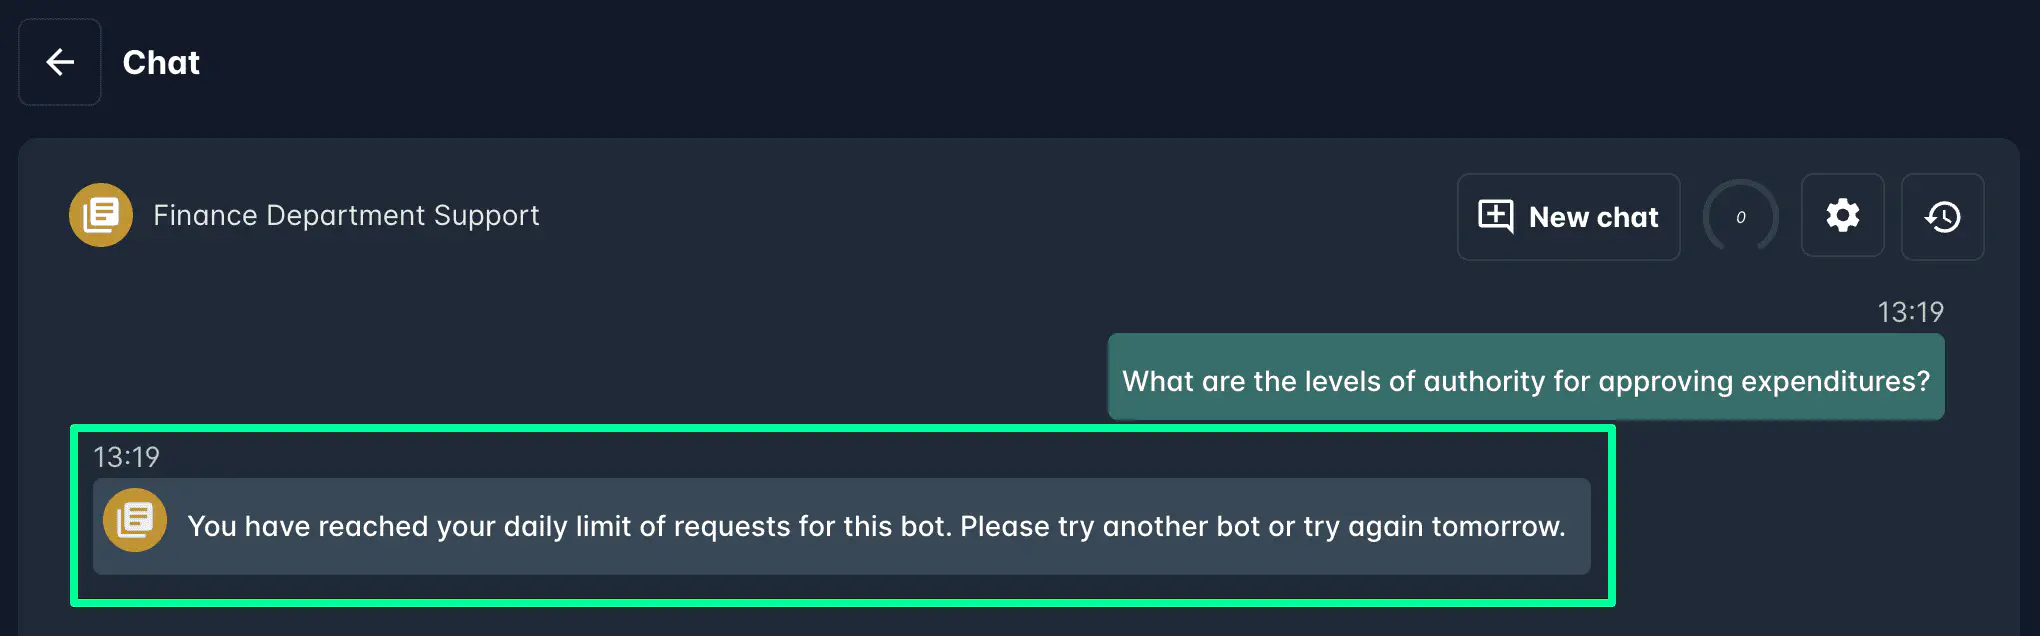
Usage Limits
Usage limits can be configured by the assistant manager. If a limit is set, a visual indicator will show how many messages are left. When the limit is reached, the user will be notified.
Chat History
The chat history feature allows users to review previous conversations with the assistant. This feature must be enabled by both the assistant manager and each individual user per assistant.
Enable Chat History
The assistant manager can enable the chat history feature in the assistant settings. Each user must also enable this feature individually for their assistant.
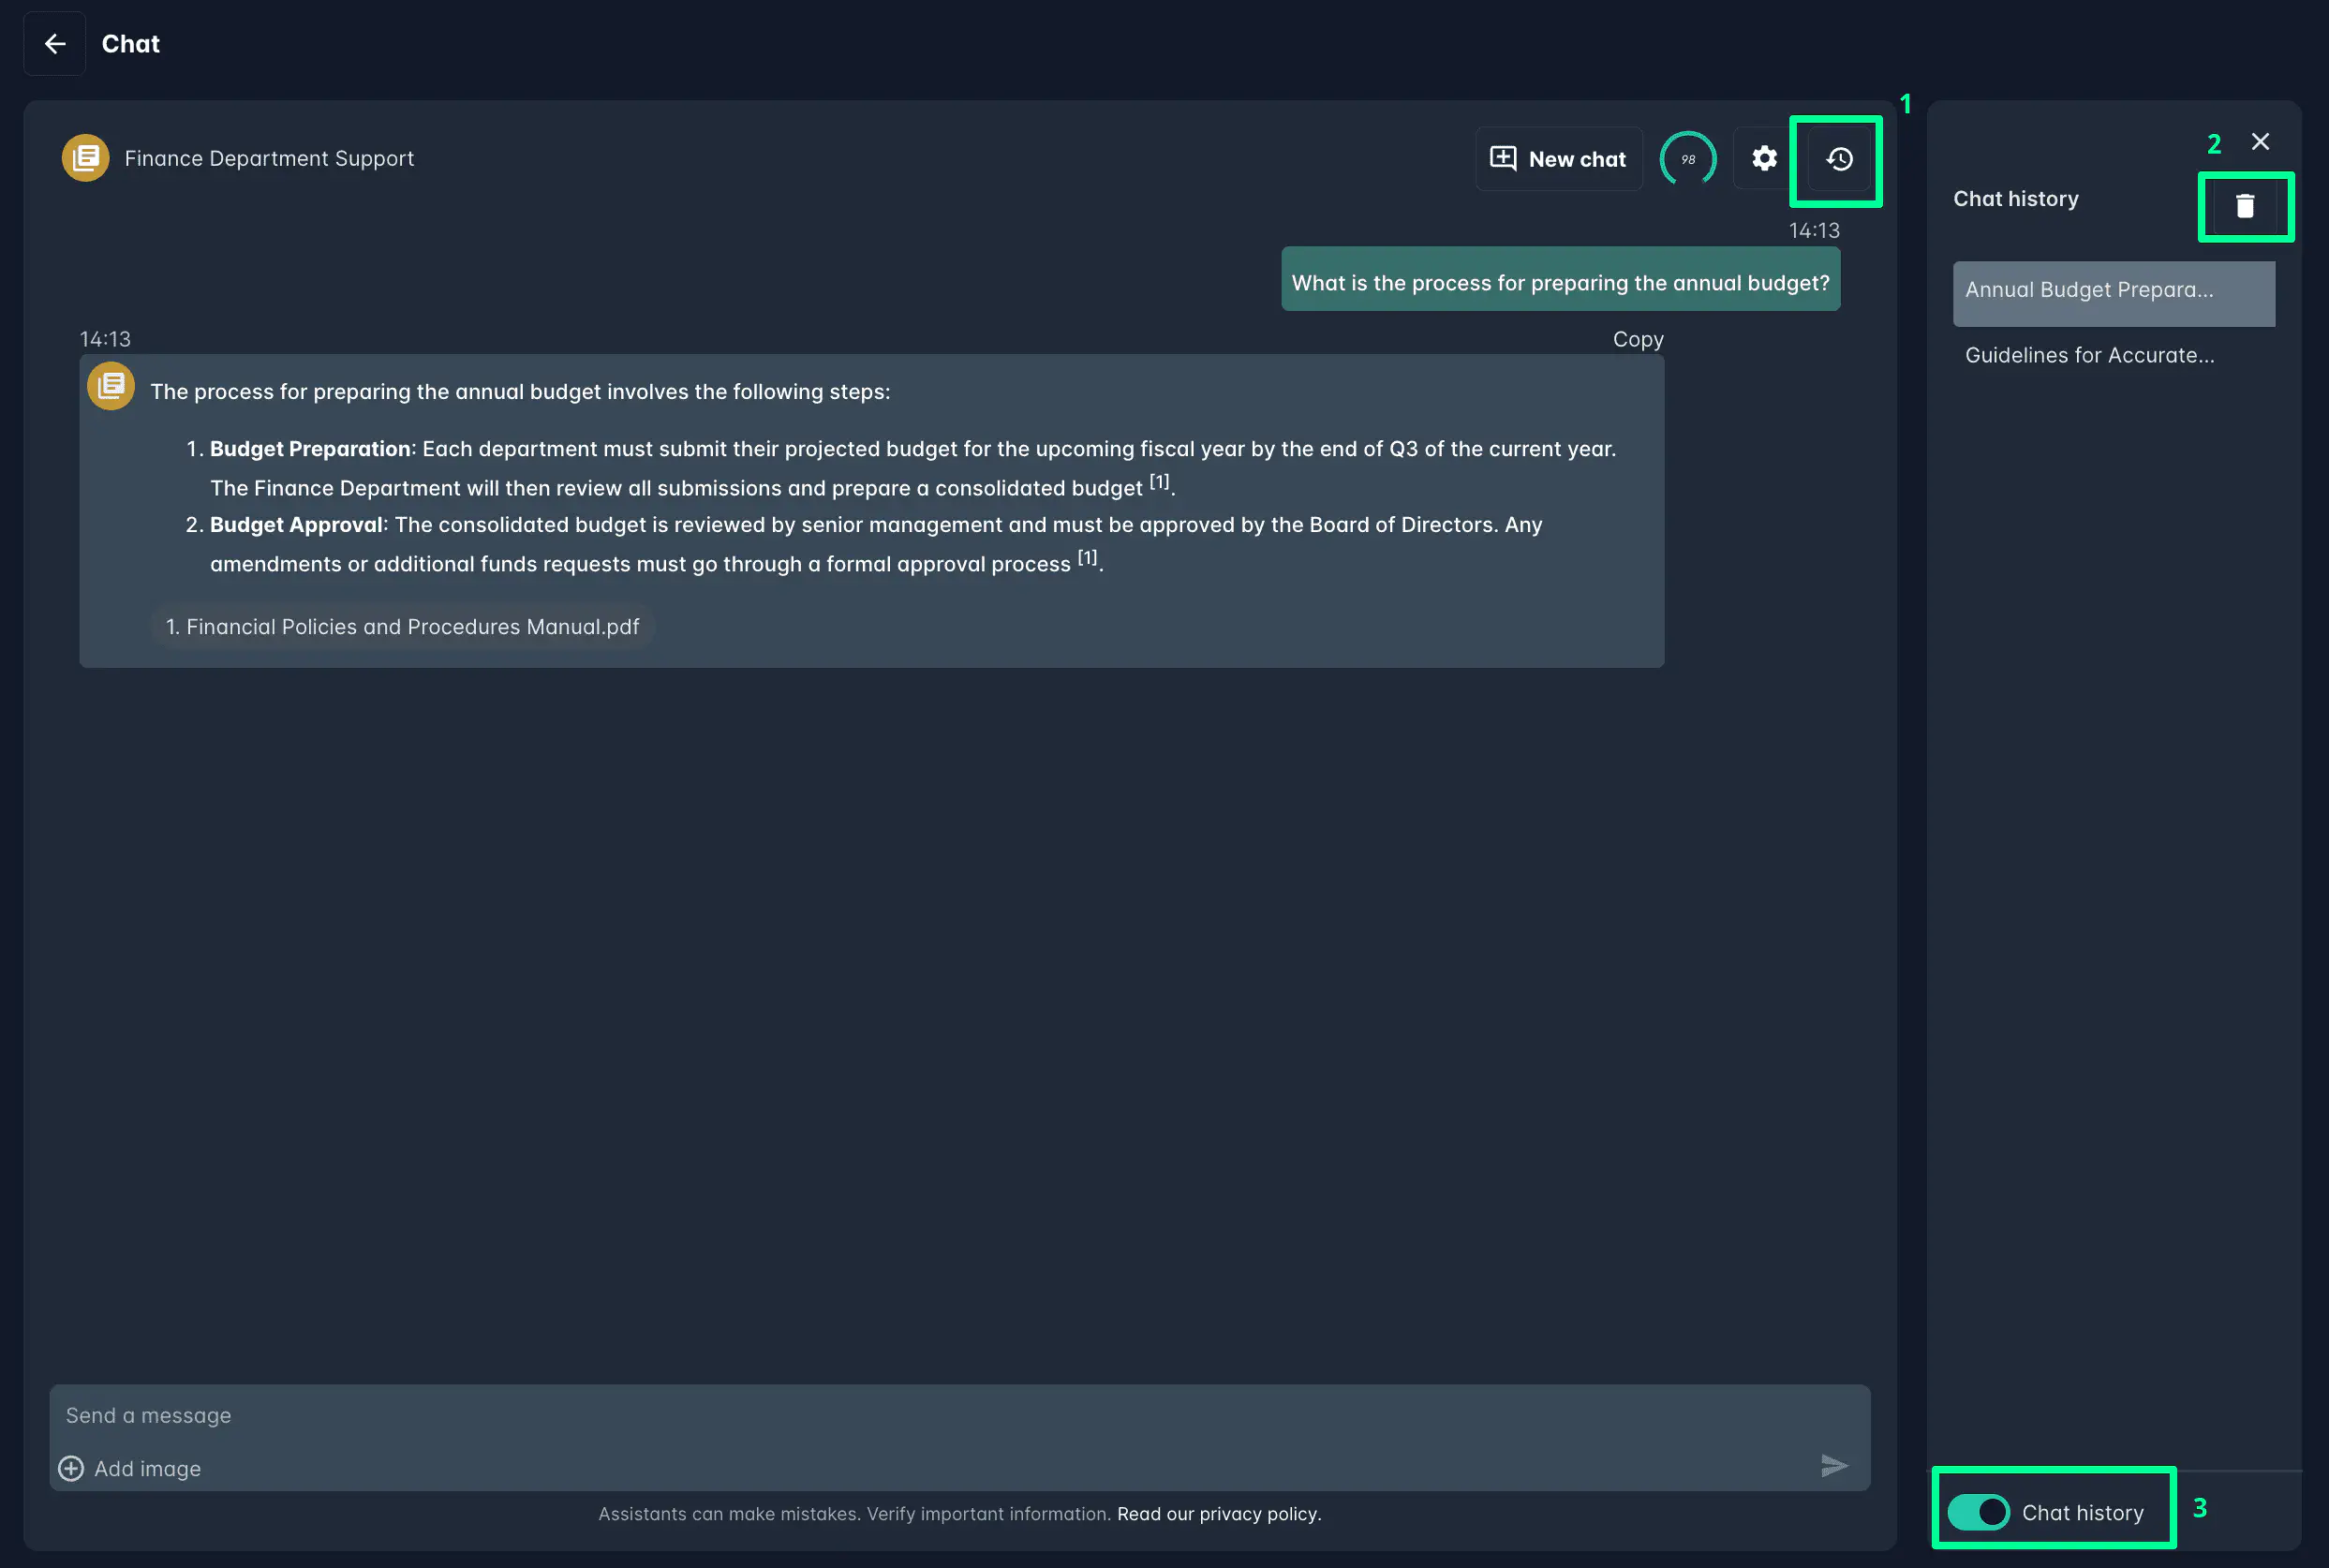
Open Chat History
To view past conversations, click the Chat History icon (1) in the top left toolbar of the chat window.
Delete Chat History
To remove all chat history, click the “Delete” icon (2) in the top right corner of the chat history window.
Disable Chat History
To turn off chat history, toggle the “Disable” switch (3) at the bottom of the chat history window. This action will erase all stored conversations for the assistant.