Budget
The Budget page gives you an overview of all budgets in the system (depending on your role/access level). You can add, edit, delete, manage access and change the threshold for budgets.
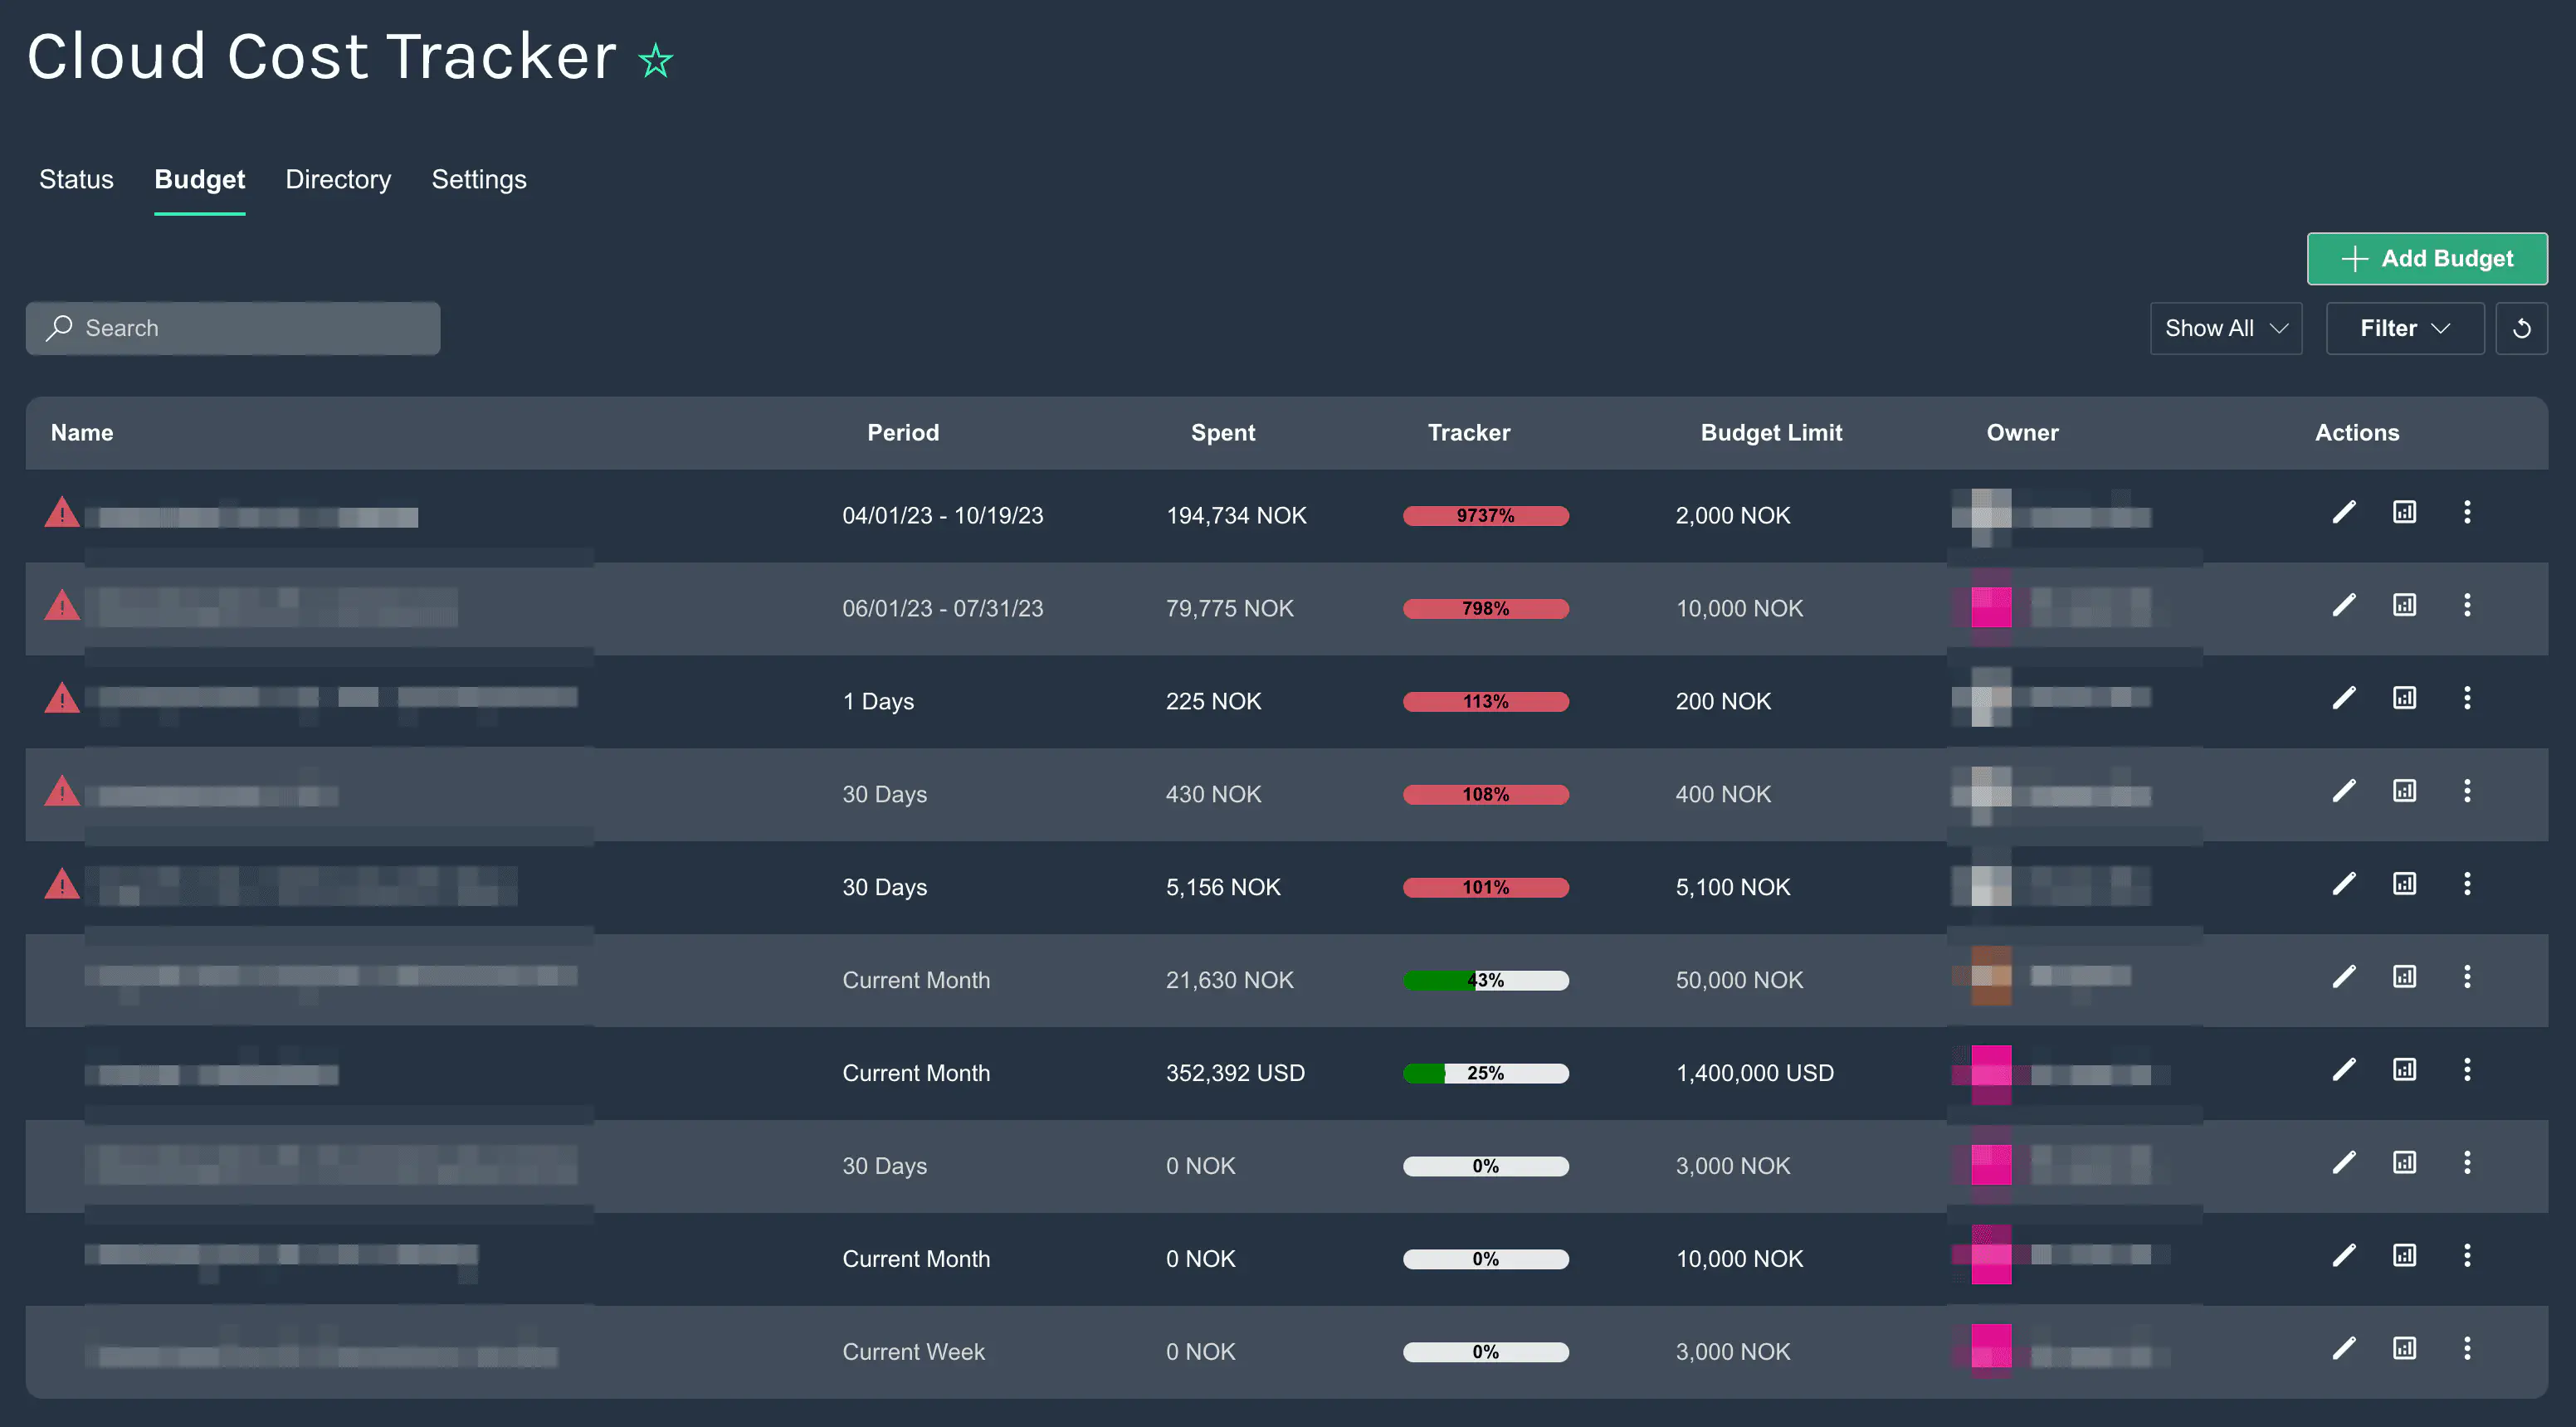
The table shows the following information:
- Name - The name of the budget
- Period - The period the budget is valid for
- Spent - The current cost
- Tracker - Progress bar showing percents of the threshold
- Cost threshold - The cost threshold that has been set
- Owner - The owner of the budget
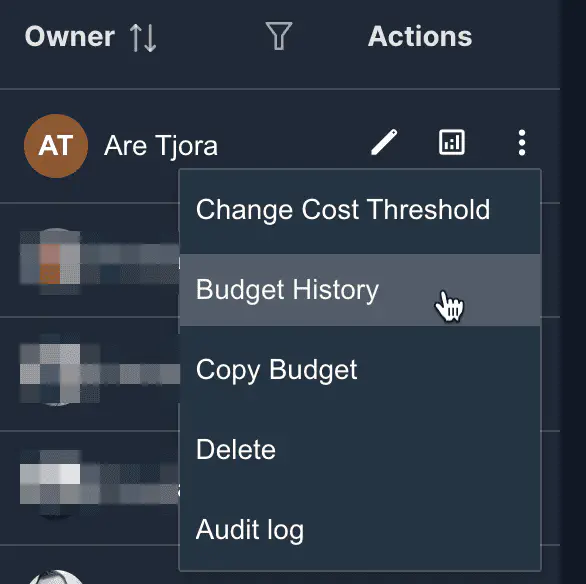
- Actions - Available actions for the budget
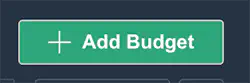
Add budget
To add a new budget, click the Add Budget button.
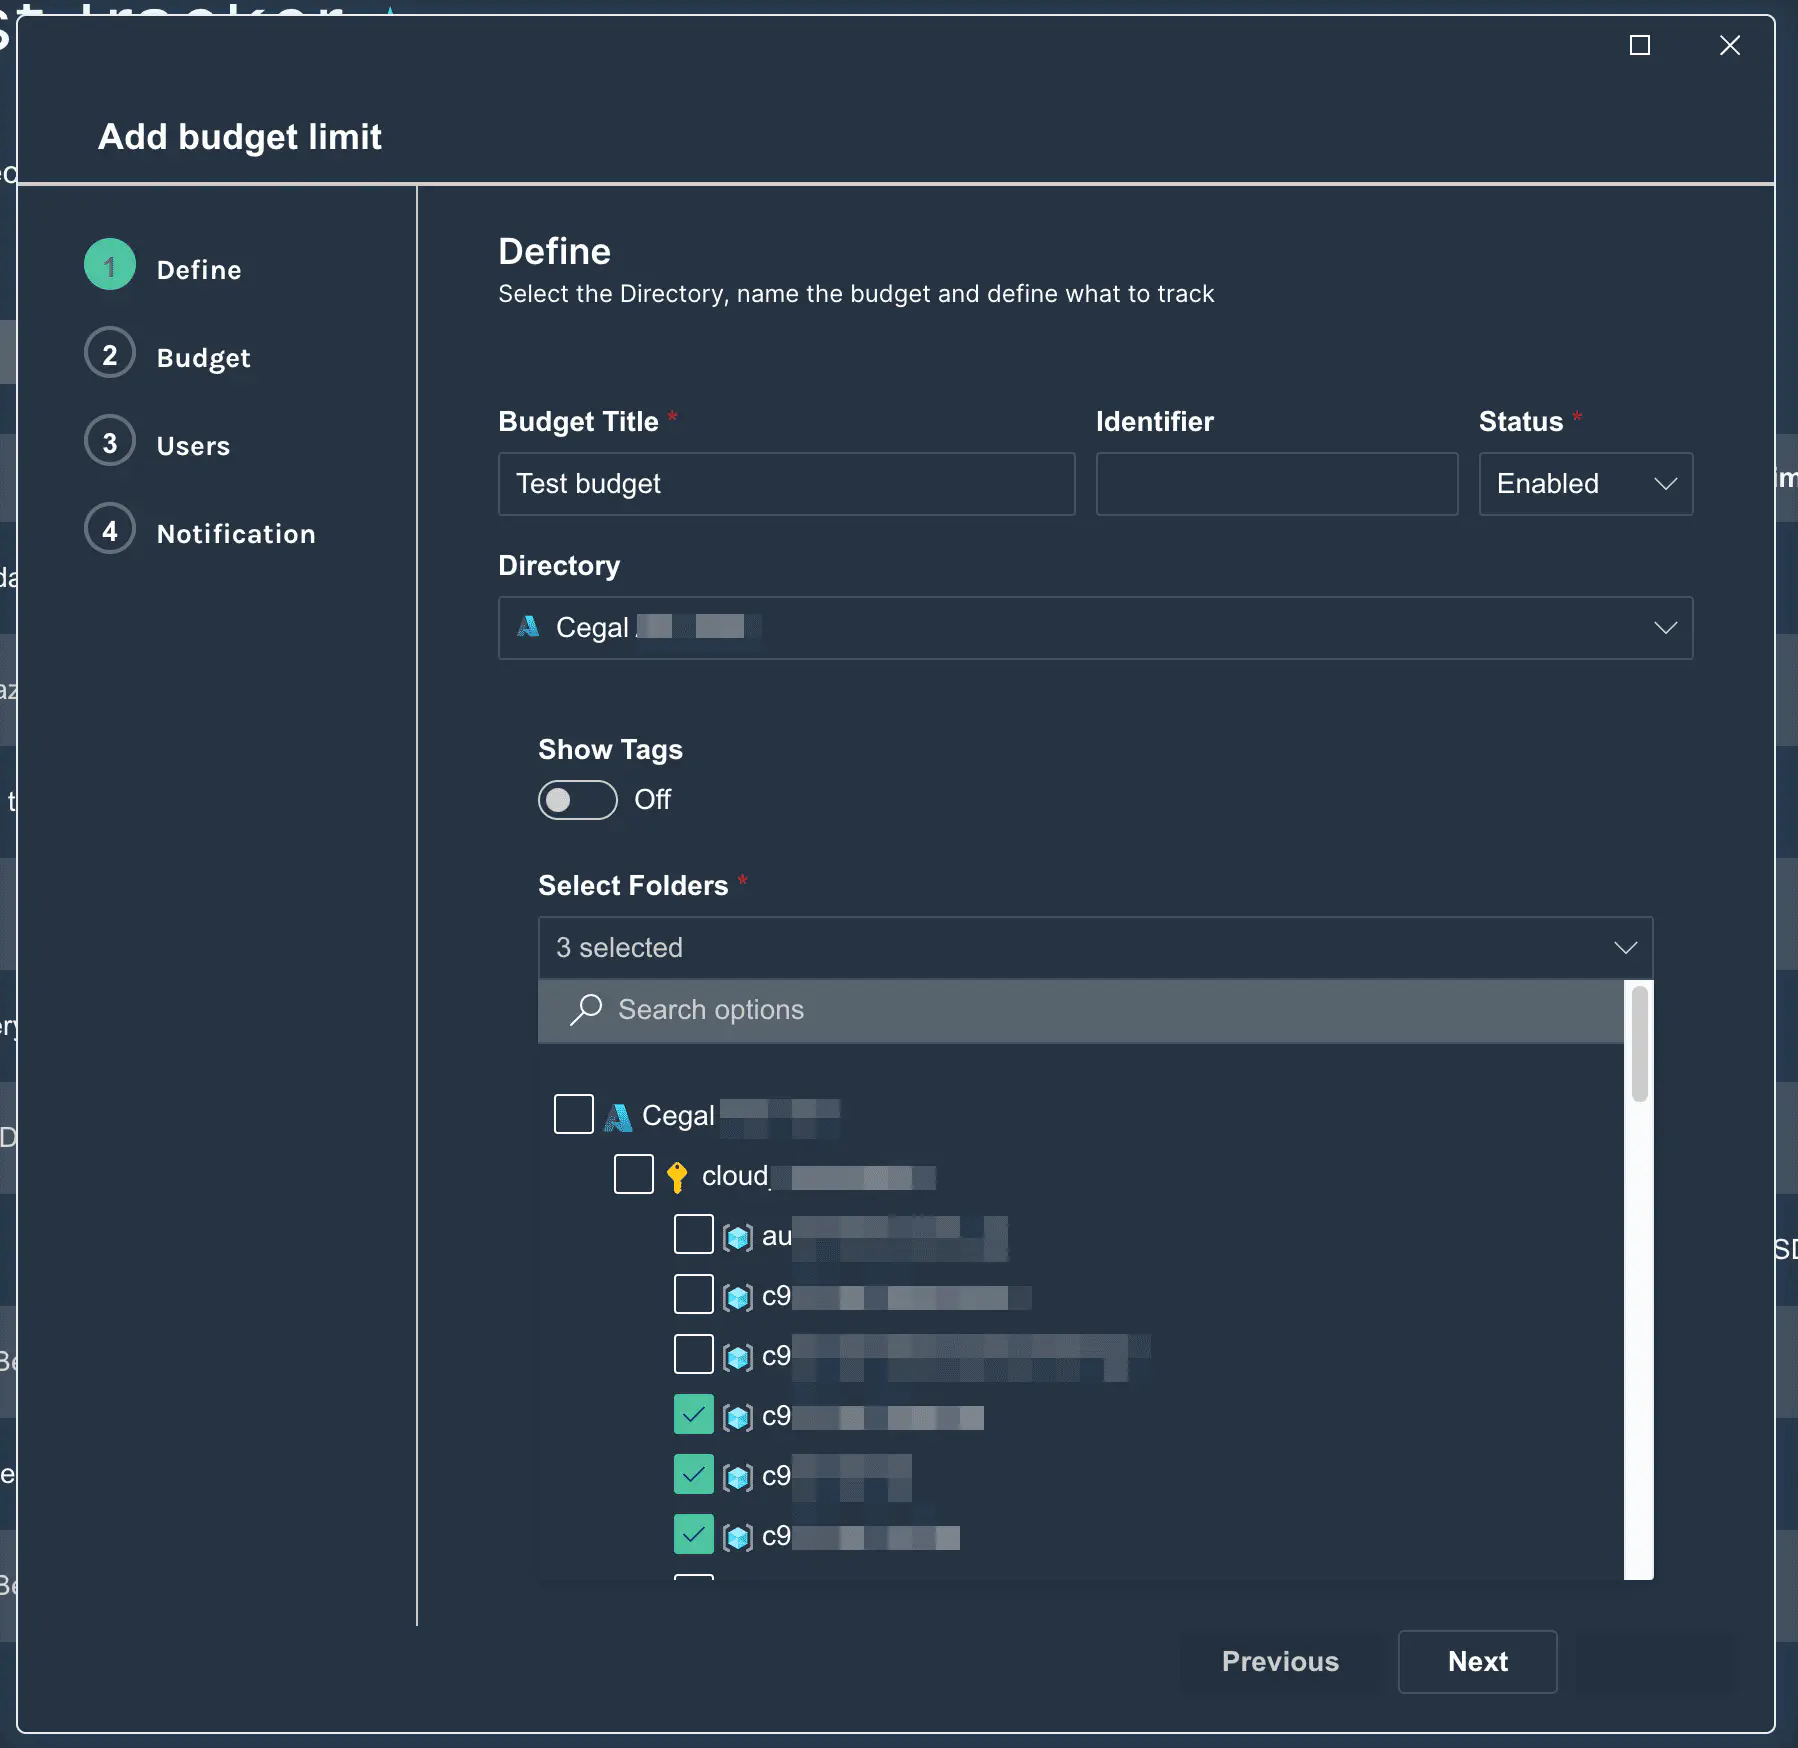
Define
Start by defining a budget title, select a directory and define what to track.
The status can be set to Disabled to prevent the budget from being visible.
Select a Directory by clicking the directory select list. The directory list will show all available directories in the system that you have access to.
After selecting a directory, use the Select Folders select list to select folders or resources that should be tracked. The list will show all available folders and resources in the selected directory.
For Azure, it will show all available subscriptions and resource groups for the selected directory.
For OCI, it will show all available folders for the selected directory.
Click Next to continue.
Budget
In the Budget step, define the period and threshold for the budget.
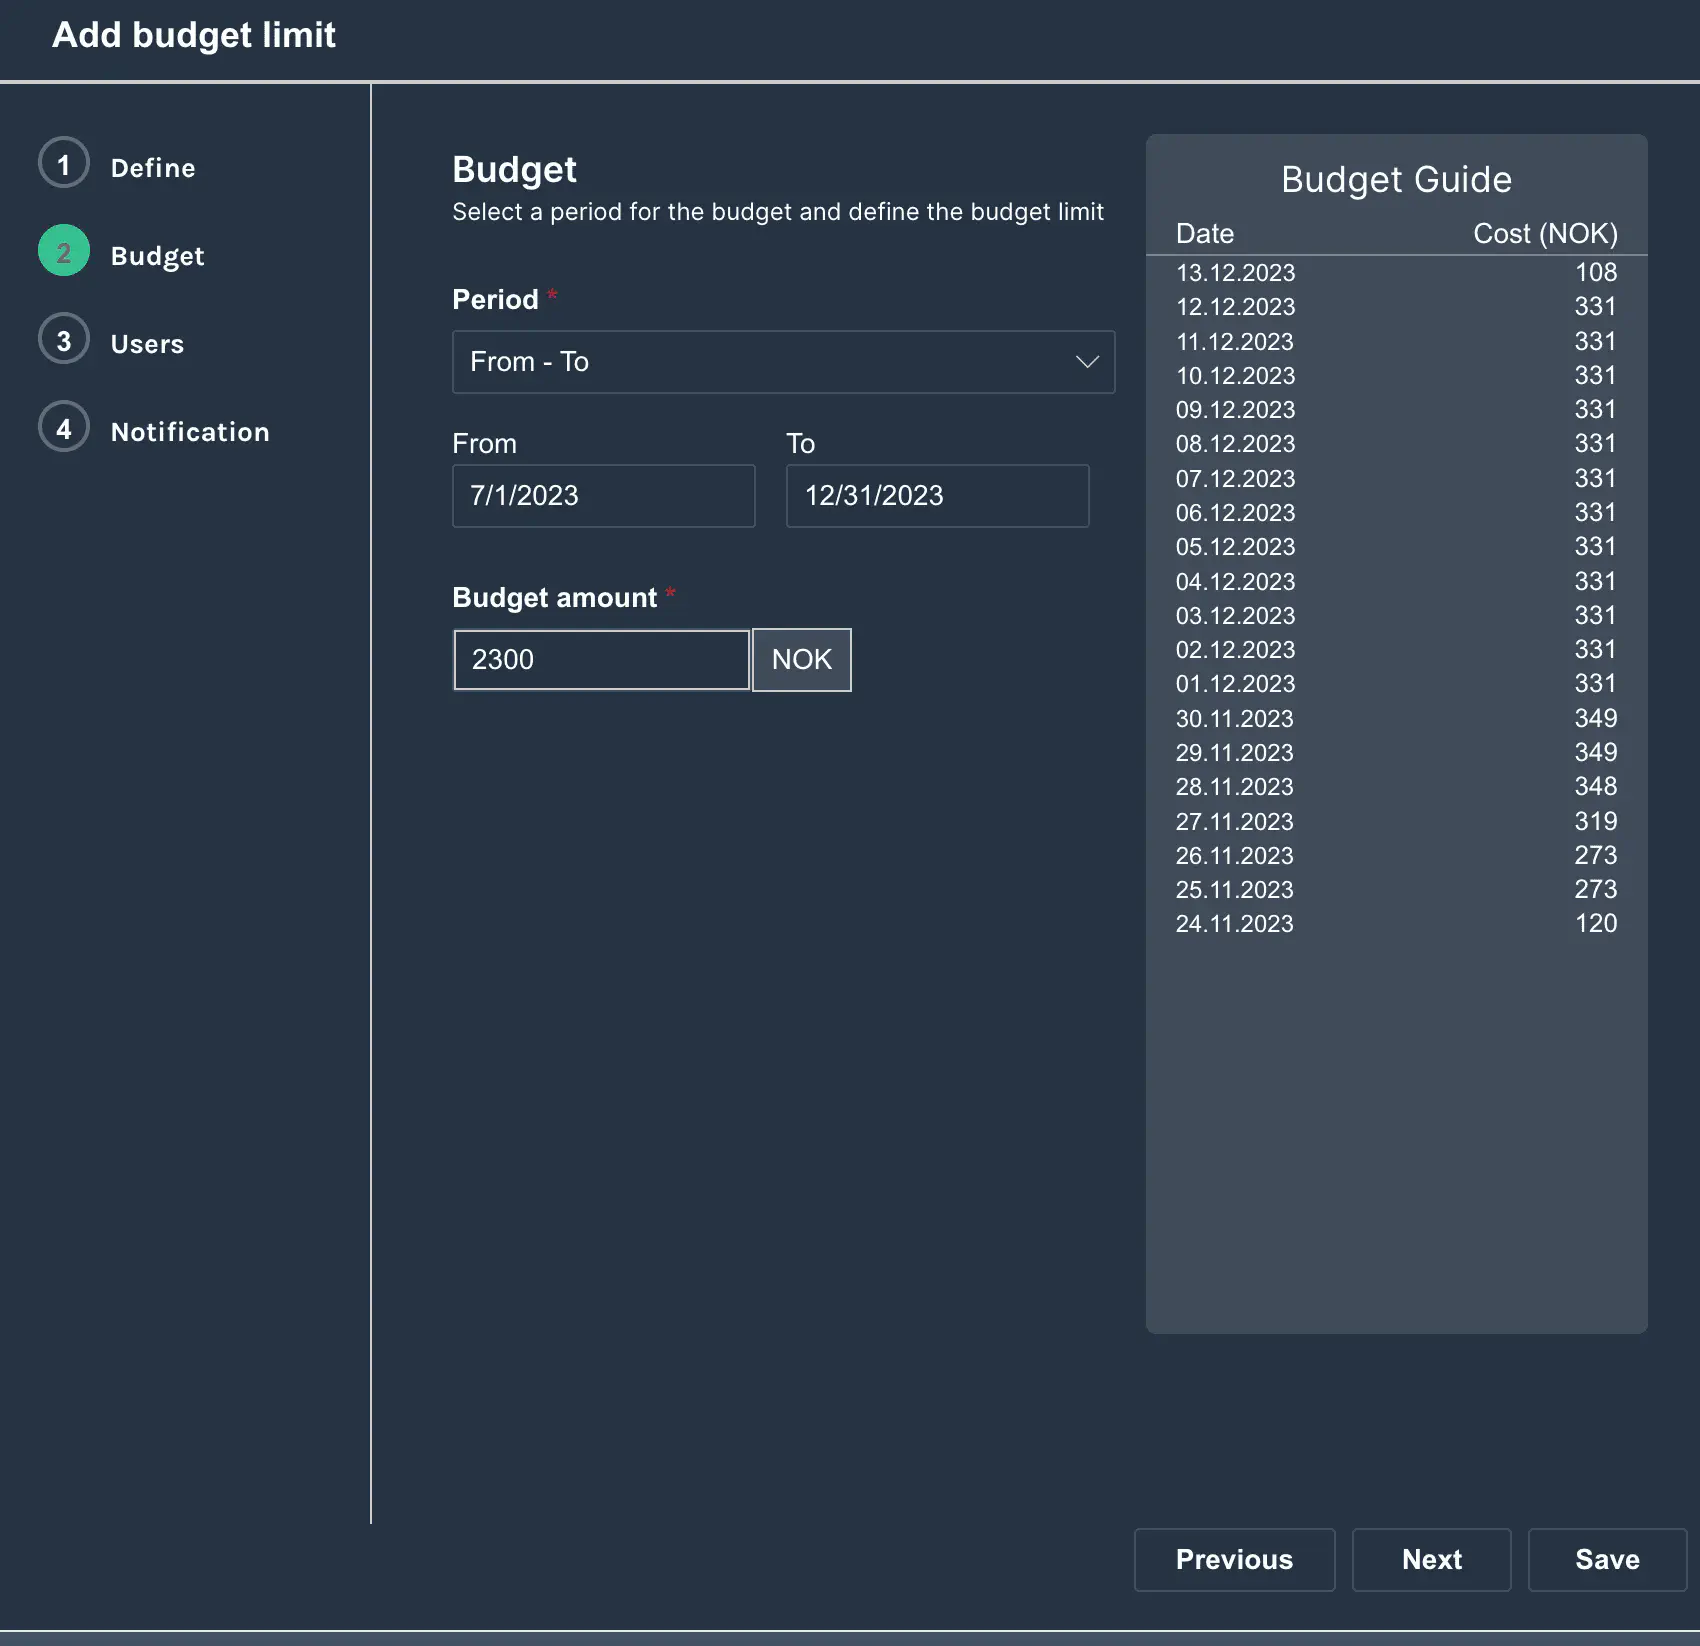
The period defines the time the budget is valid for. The period can be defined in one of the following ways:
- Days: Number of days
- From - To: Start and end date
- Current Week
- Current Month
- Current Year
Set the cost threshold, that will be the limit for the budget. When the threshold is breached, the budget will be marked with red in the overview, and notifications will be sent according to the configuration.
A budget guide will be visible to the right. This guide will show historical data for the selected resources.
Users
Assign users that should have access to the budget. The users will be able to see the budget in the overview and get notifications when the threshold is breached.

Click Add User to select a user from the list. The list will show all available users in the system.
A user can also be set as an Owner. The owner will be able to edit the budget and manage access.
Notifications
In the notifications step, define how notifications should be sent when the threshold is breached.
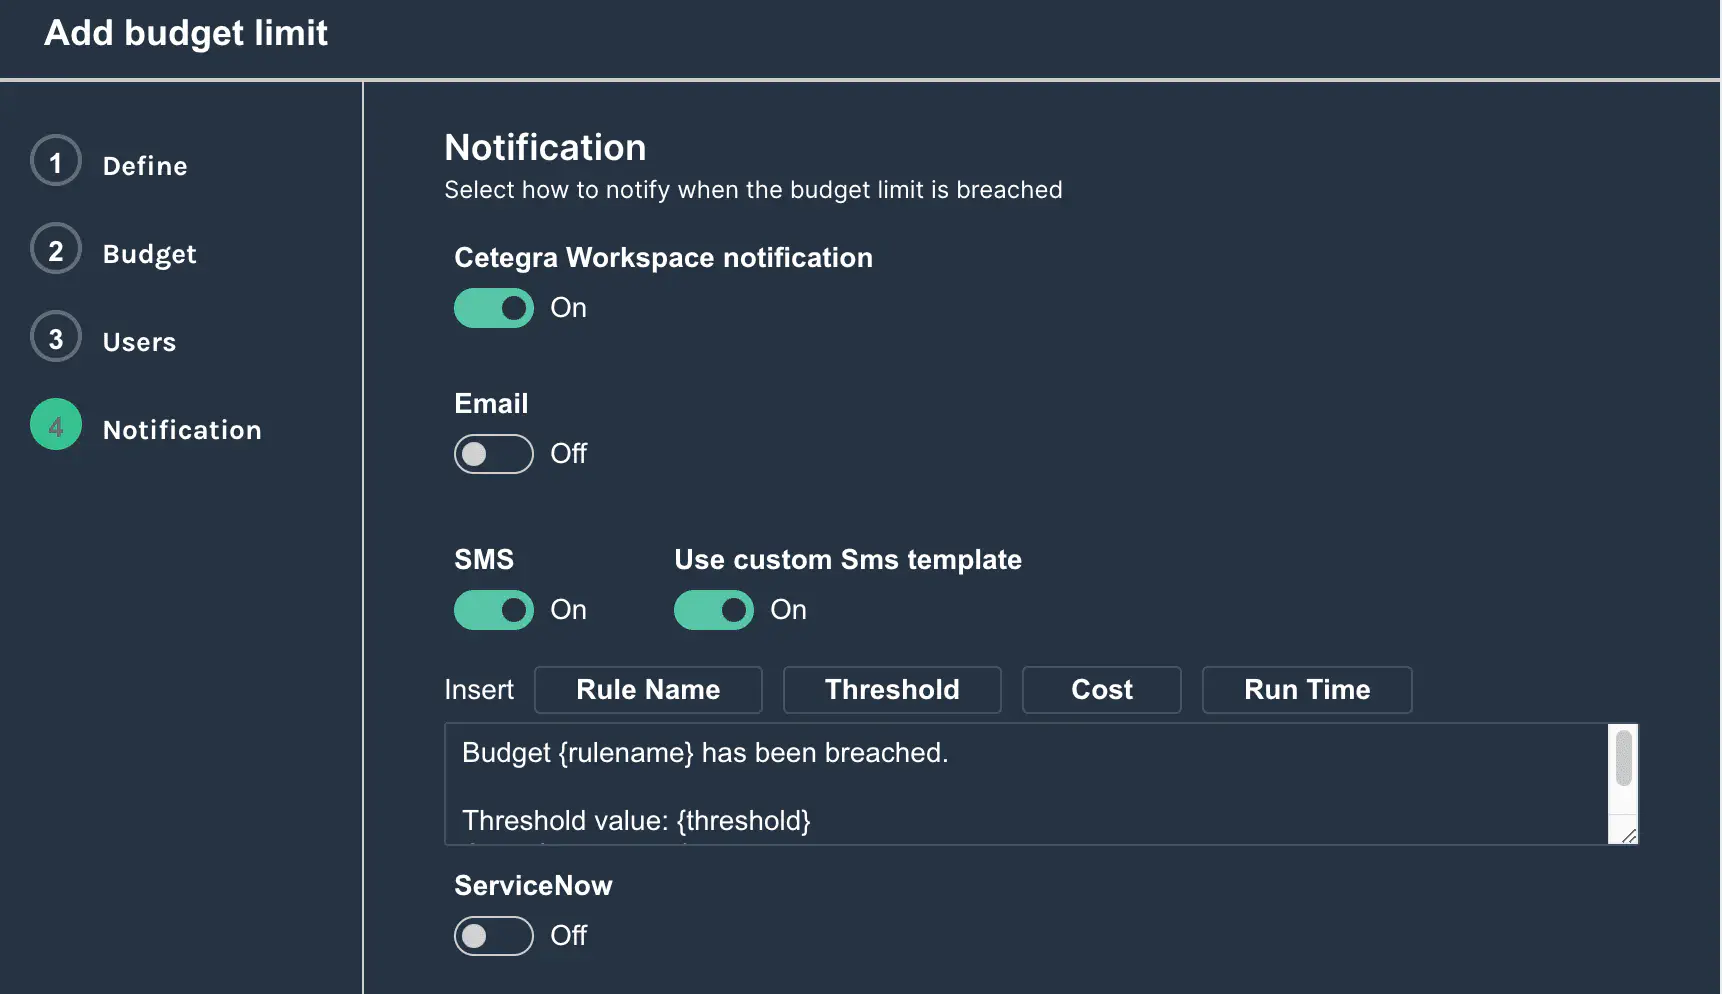
The following notification types are available:
- Cetegra Workspace notification: Send a notification to the Cetegra Workspace notification center
- Email: Send an email to the users
- SMS: Send an SMS to the users
- ServiceNow: Create an incident in ServiceNow
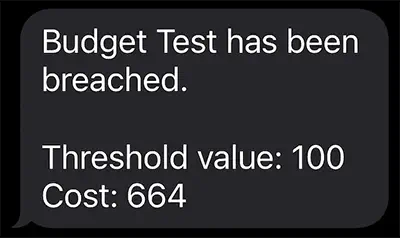
For email and SMS, it is possible to define a custom message that will be sent to the users.
Example:
Edit budget
Click the Edit button to edit the budget.

The edit mode is the same as the add mode but with the current settings pre-filled.
To change the threshold, see below.
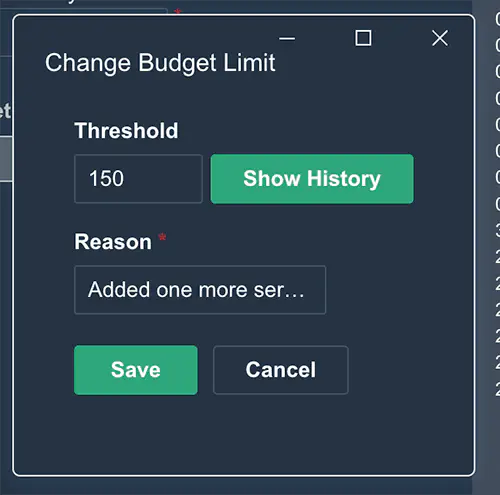
Change threshold
To change the cost threshold, navigate to page 2 (Budget) in Edit mode, or click the Change threshold button.
For auditing reasons, you need to enter a reason for the cost threshold change.
Graphs and insight
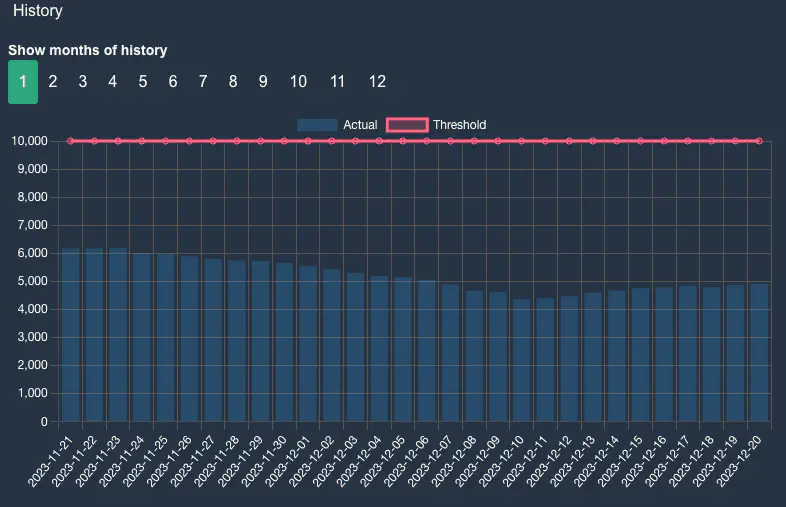
History
Click the History option from the Actions menu to see the history of a budget.
Select for how many months you want to see the history.
Usage graph
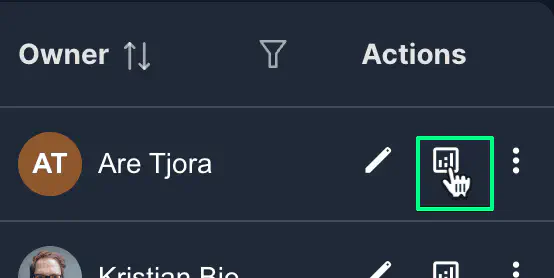
Open the Usage Graph by clicking the graph icon in the Actions column.
The usage graph shows the cost for the selected budget, divided into resource types.
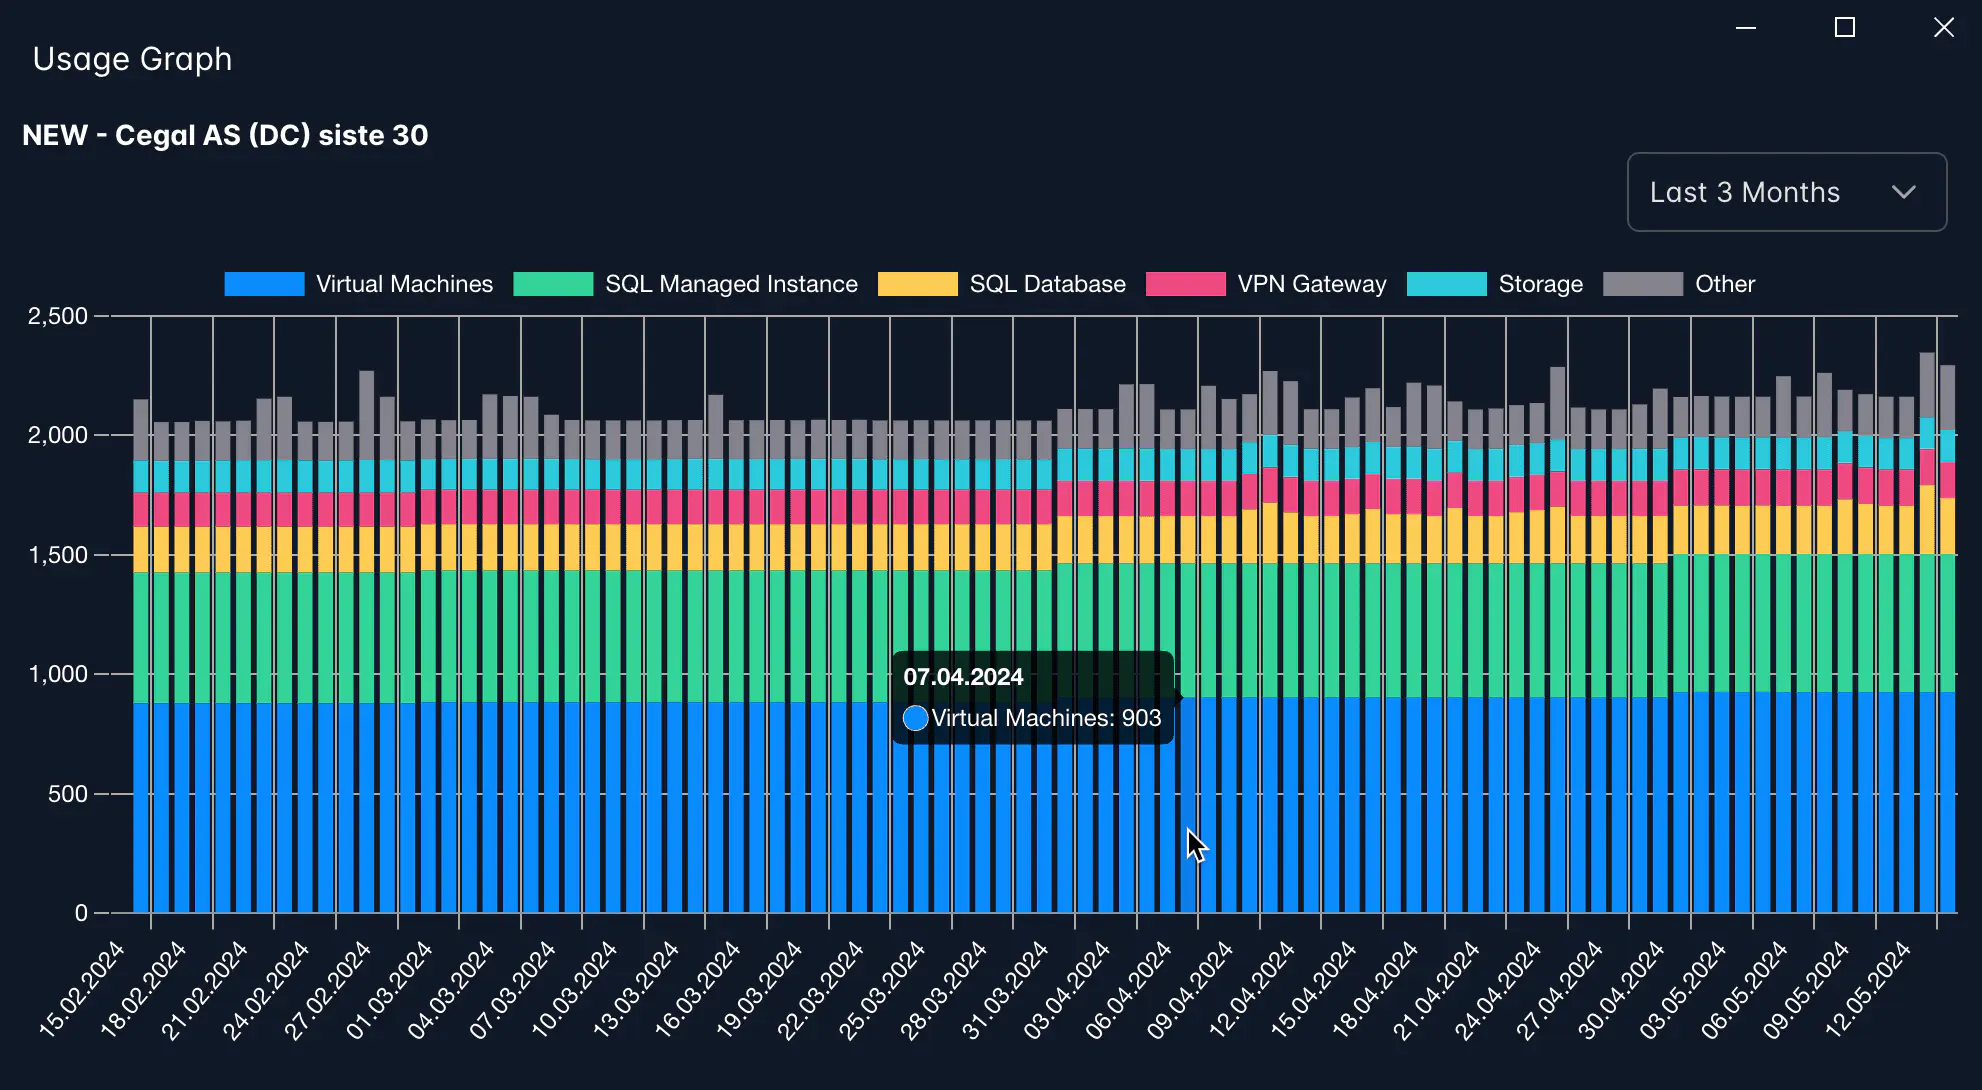
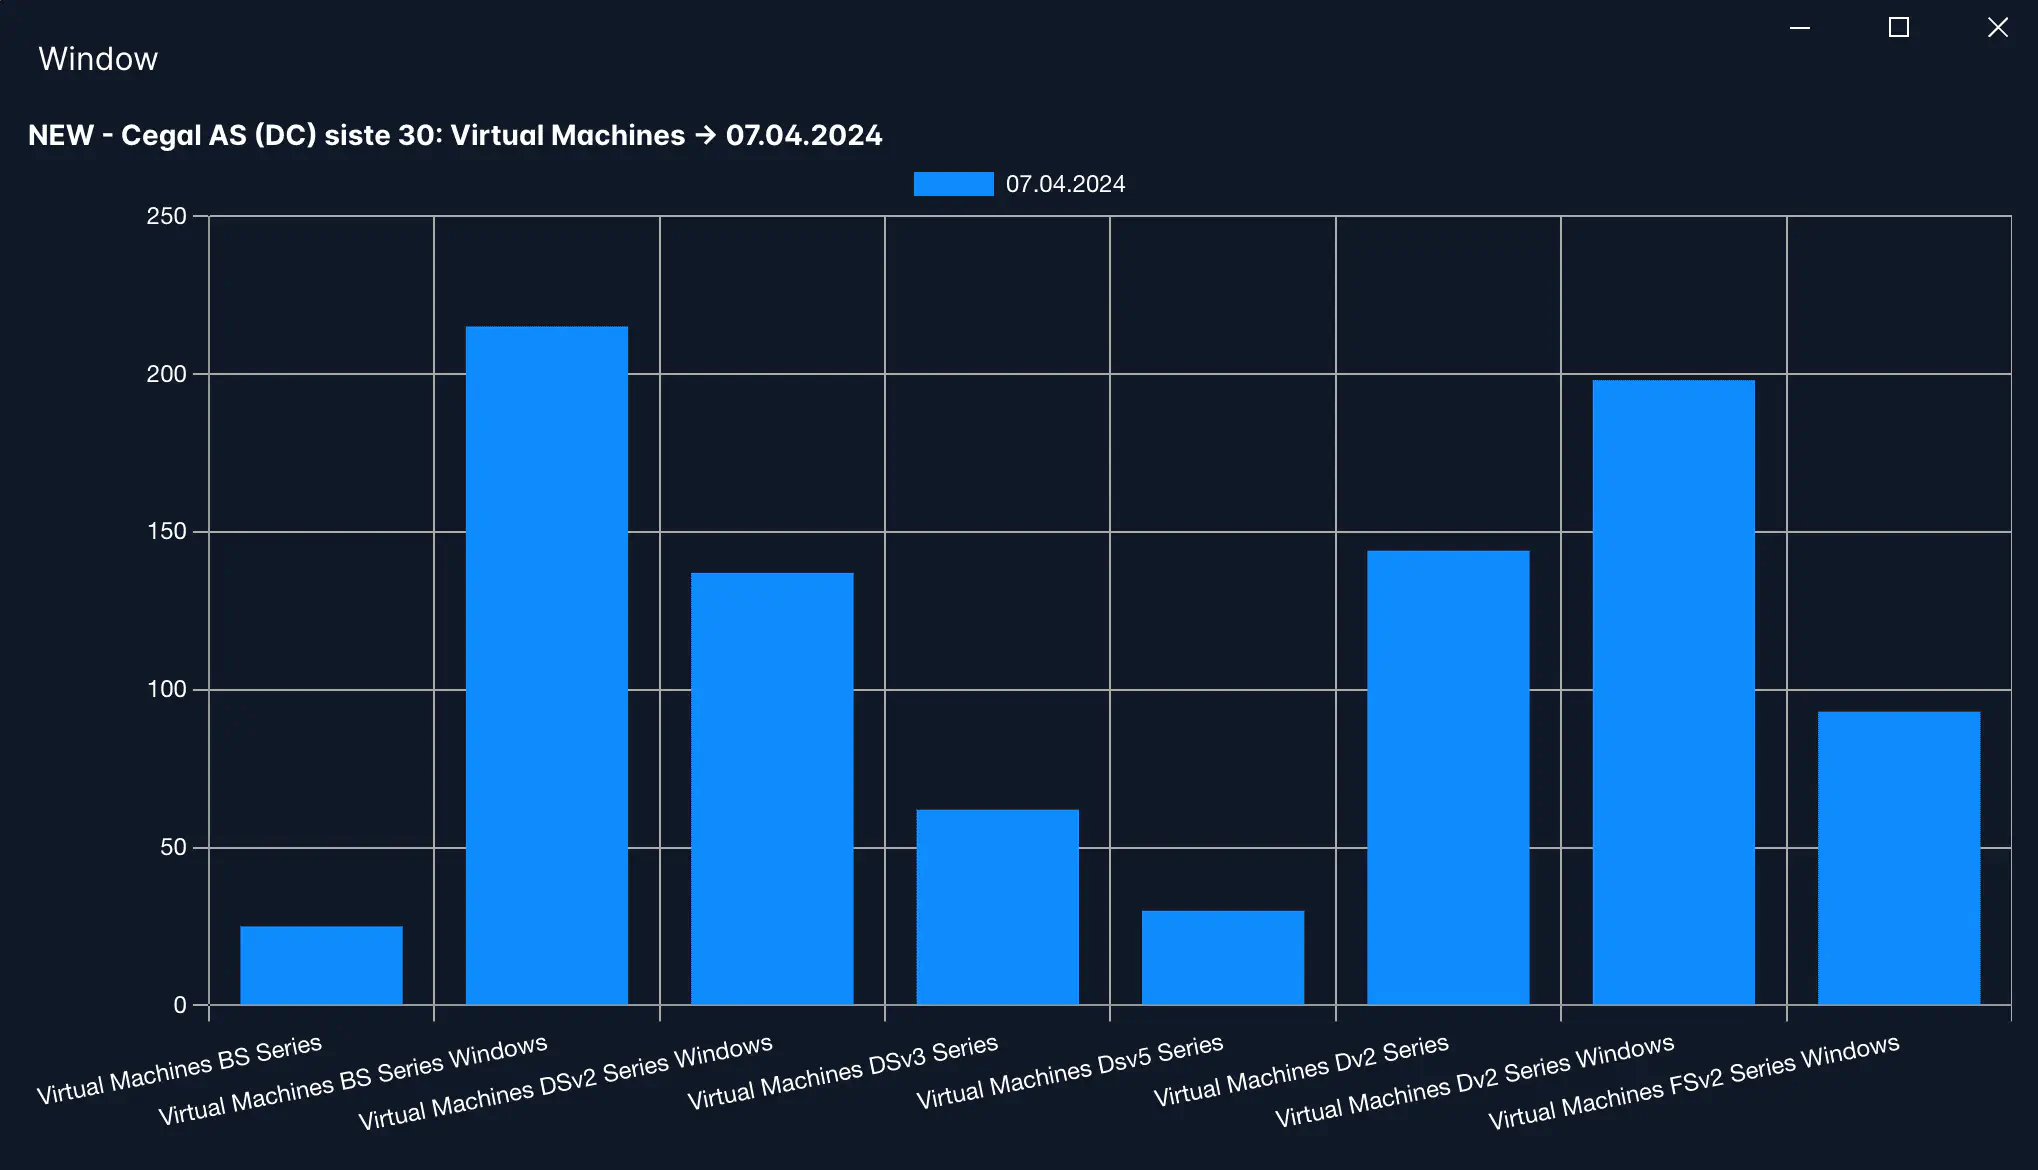
Click a resource type to see more details.
Disable or delete
To disable or delete a budget, click the Actions menu and select the Disable or Delete option.