Catalog
The Cetegra Catalog is a self-service store where you can order products, access applications, and fill out forms. This guide shows you how to use the Catalog.
Note: The Catalog’s look and content might change based on your organization’s setup.
Watch the video below for a quick overview:
Exploring the Catalog Front Page
The front page is your starting point. It shows:
- Top categories.
- Highlighted categories or banners (slides).
- Featured products and categories.
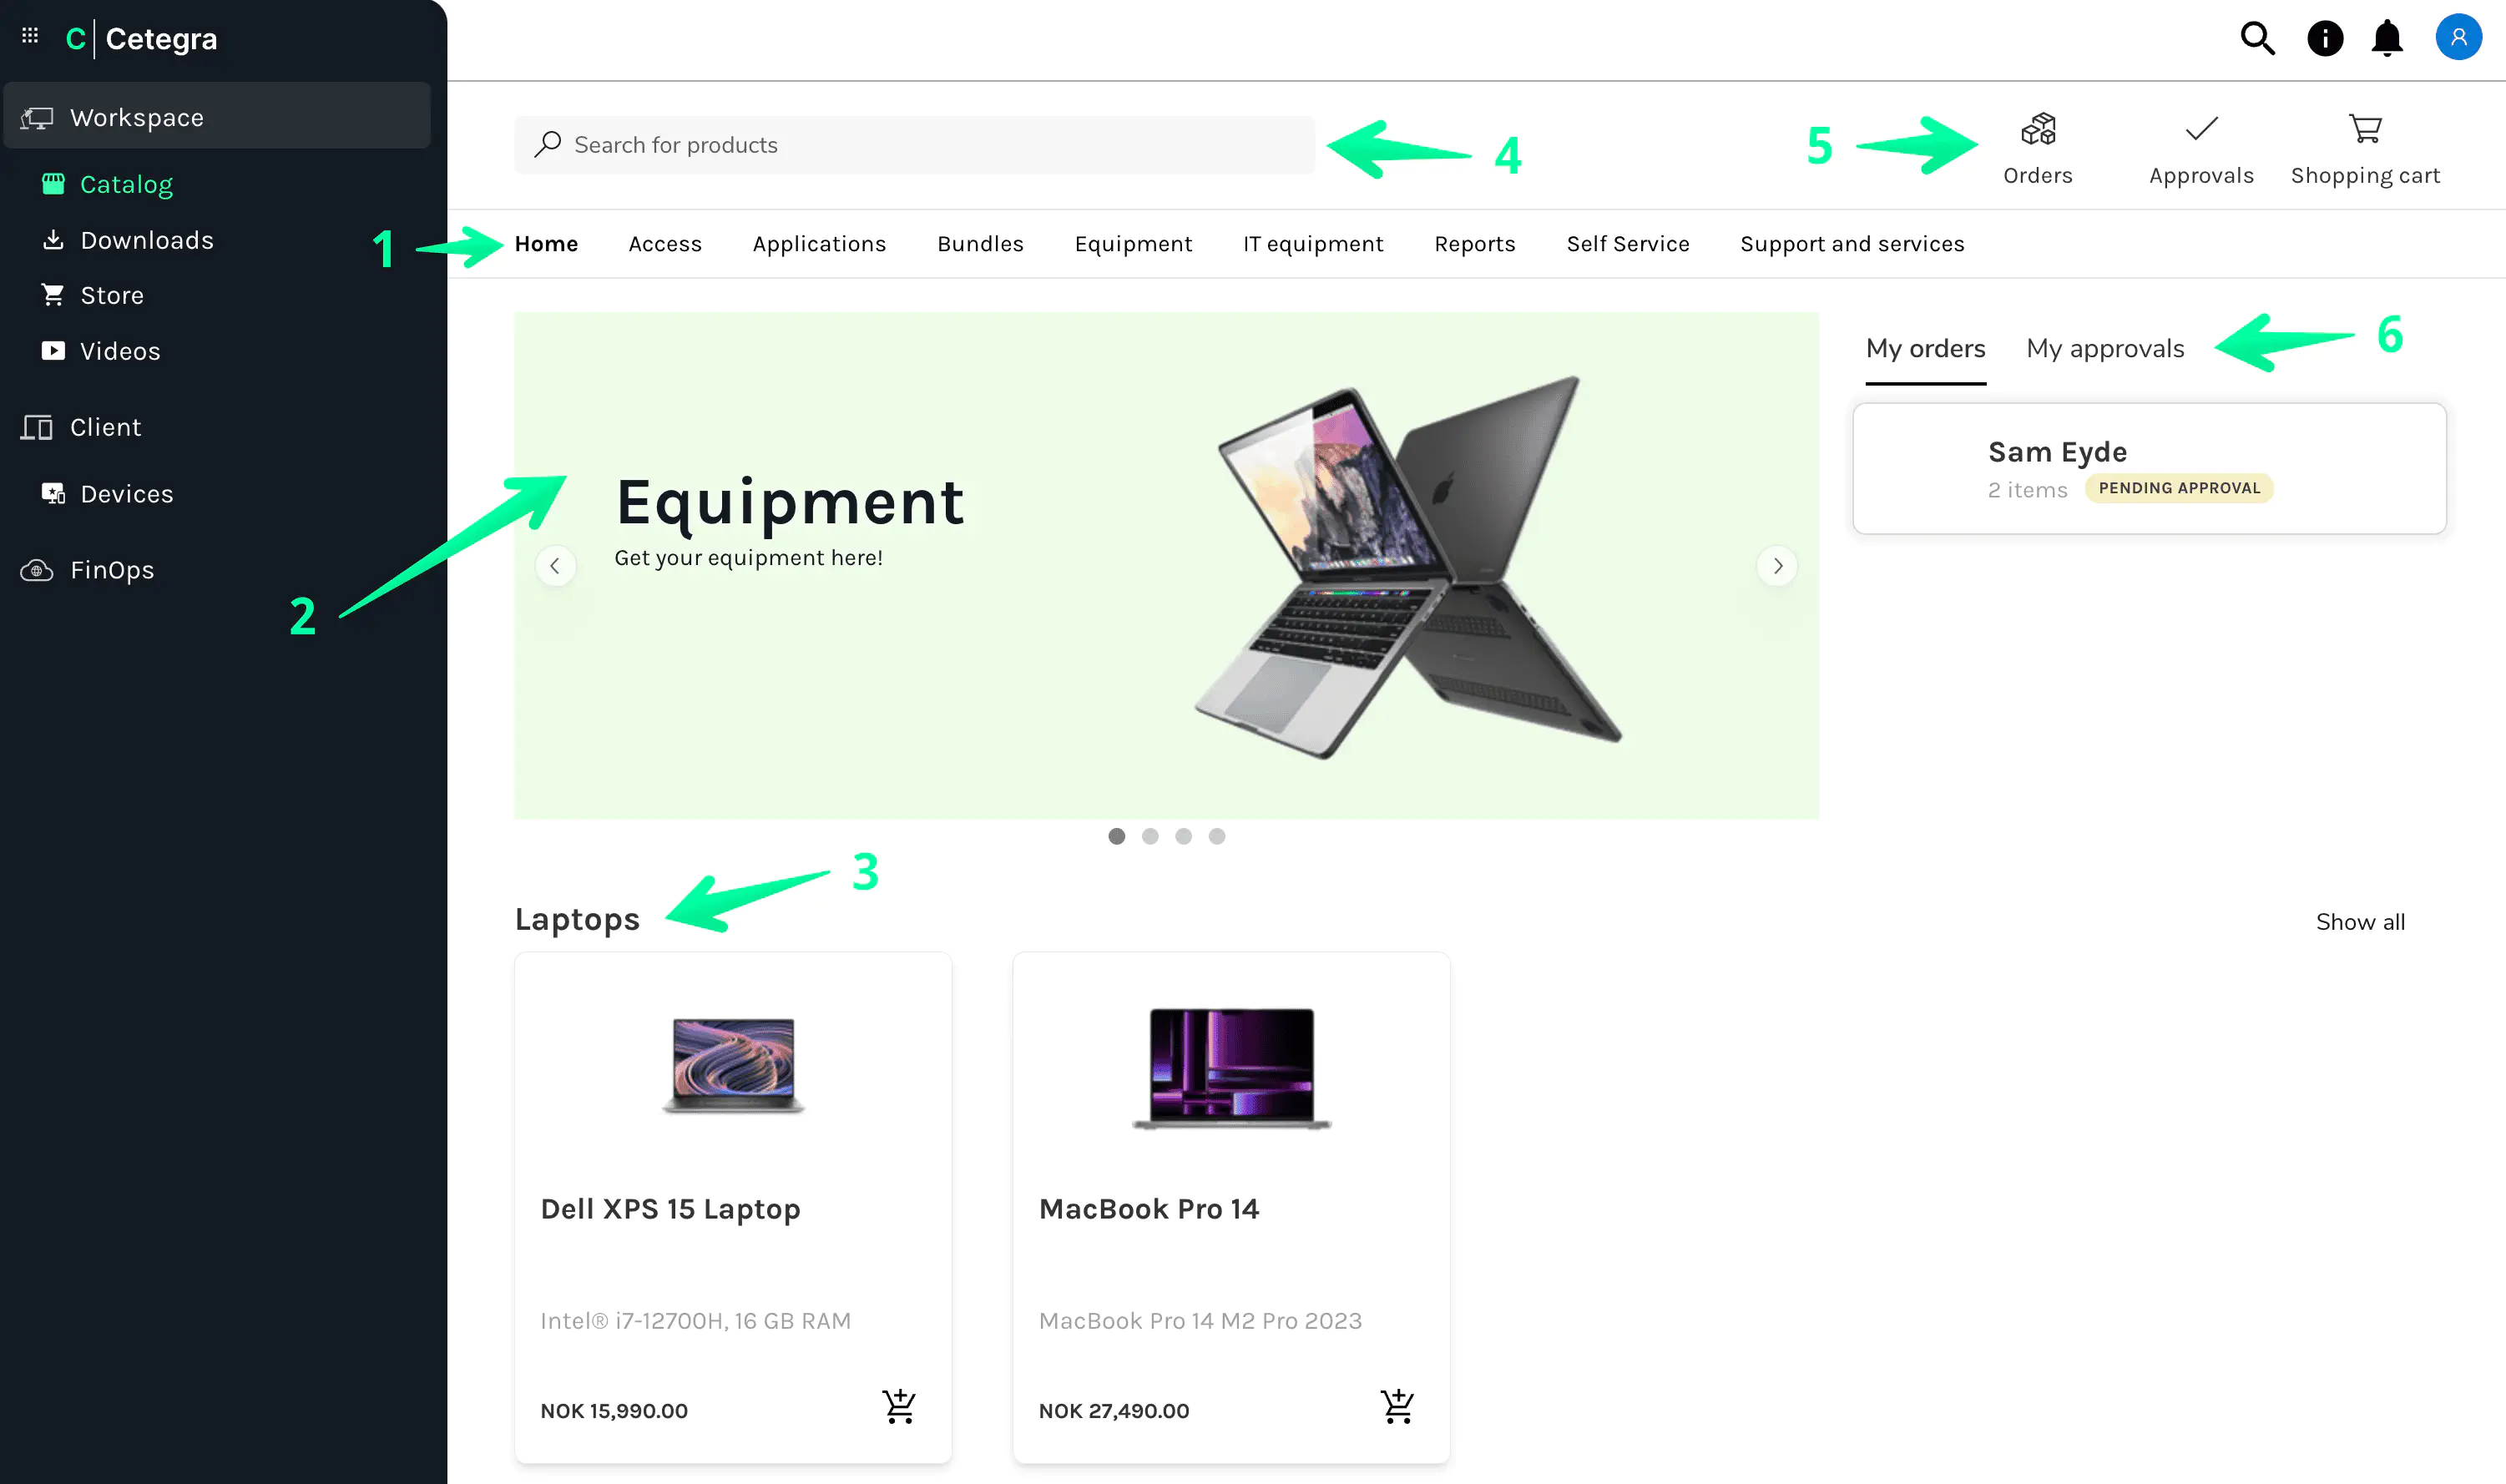
- All available categories.
- Highlighted slides with custom banners or categories.
- Selected products and categories.
- A search bar to find products or items.
- Access your orders, see approval tasks (if needed), and view your cart.
- Quick view of pending orders and approval tasks.
Product Navigation and Discovery
Click on a category to see its contents.
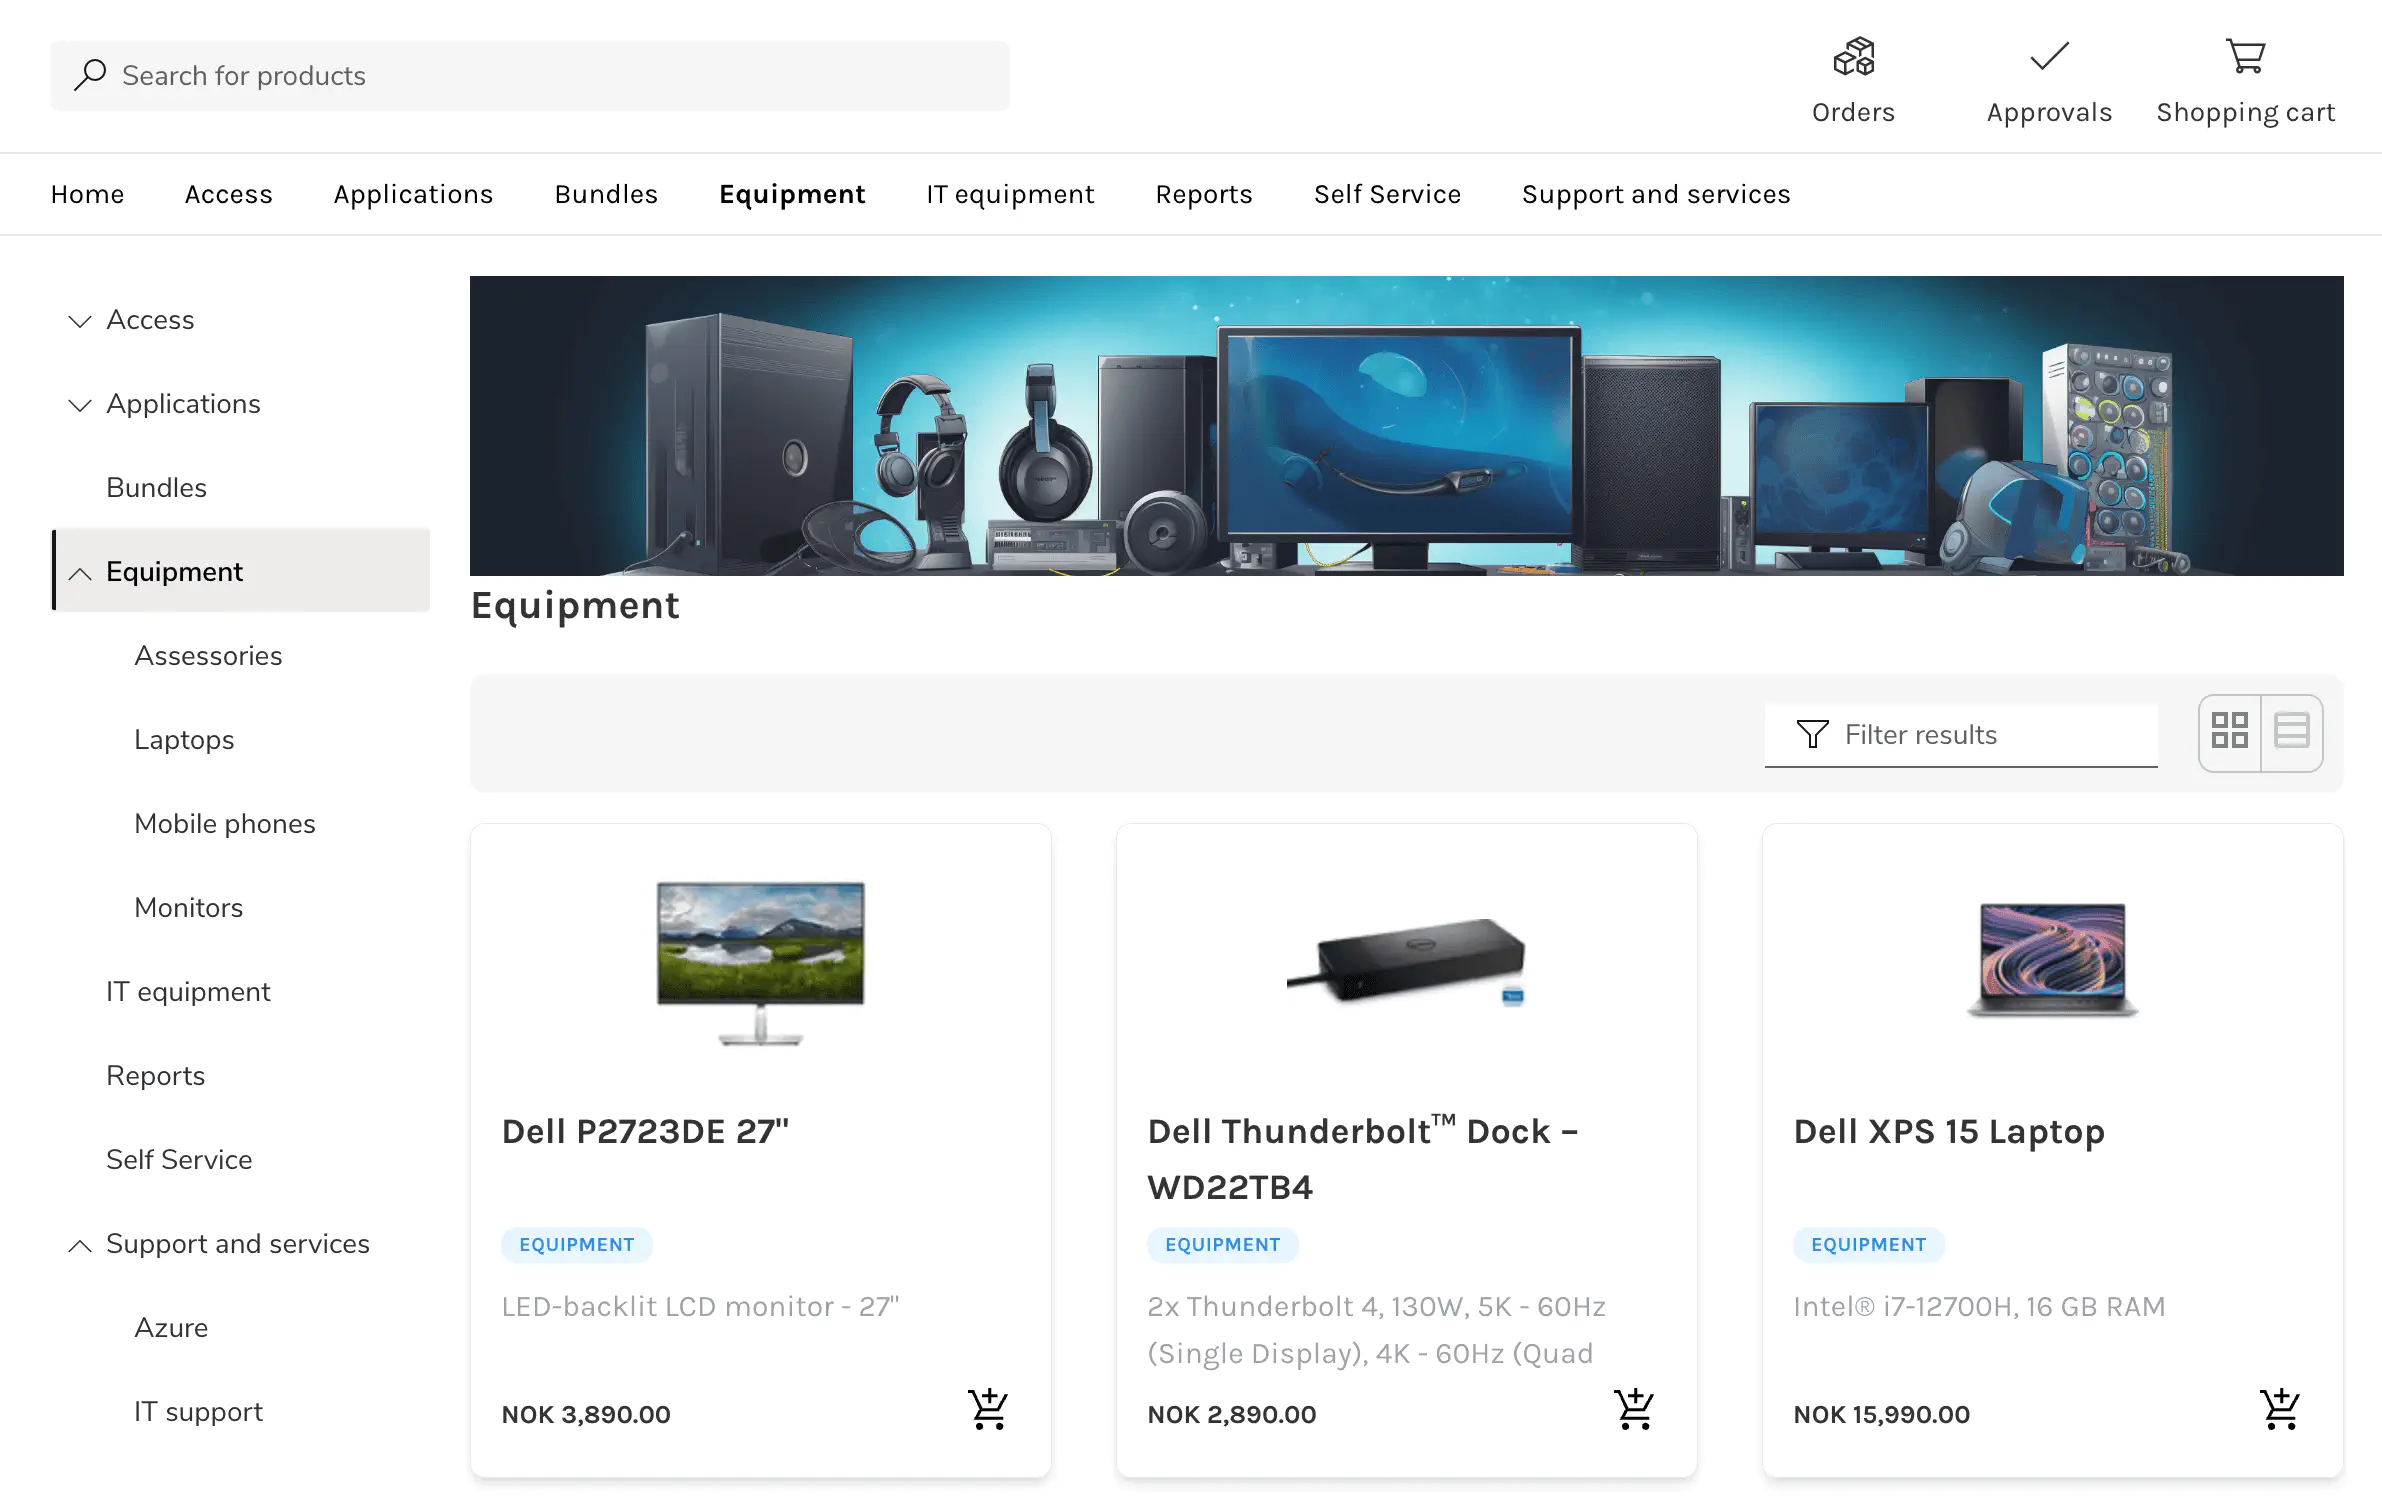
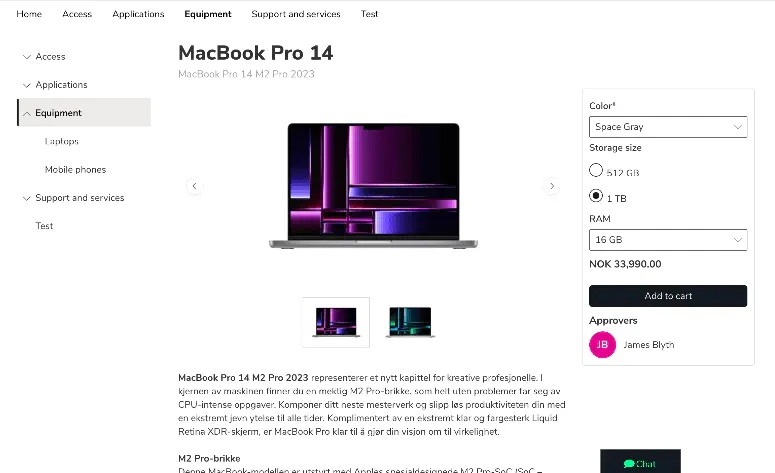
Click on a product to see its details.
The Catalog has many items, based on your organization’s setup:
- Equipment: Items like laptops, headsets, or other IT equipment. These usually have product details and options.
- Access/Applications: Items that give access to resources like disk areas, apps, or reports. Users are usually added to an AD group or managed by the service desk.
- Forms: Used for different purposes, like self-service operations, support tickets, and order forms, with specific actions.
Products marked as Free display a “Free” badge on the product page, so you can immediately tell that placing the order incurs no cost.
Click add to cart or order now to send your order to the right recipient, whether it’s a person, a group, a task, or a support ticket.
Incompatible group membership If your account and some groups in the product are from different directory types (for example, an on-premises account ordering a cloud-only group), you may see this notice before confirming: “You may not be added to some of the groups included in this product. Your order can still be placed, but some groups may not be assigned.”
You can still place the order — compatible groups will be assigned. If you are unsure whether you will get the access you need, check with your Workspace administrator before ordering.
Monitoring Order Progress
After submitting, you can track your order on the orders page. The timeline shows the order’s status from submission to completion.
If your order triggered an automated process (such as a Runbook) and that process fails, you will receive a notification so you can follow up with the appropriate team.
Note: The order status doesn’t reflect the status of any tasks or tickets that come after. Check ServiceNow for ticket updates.
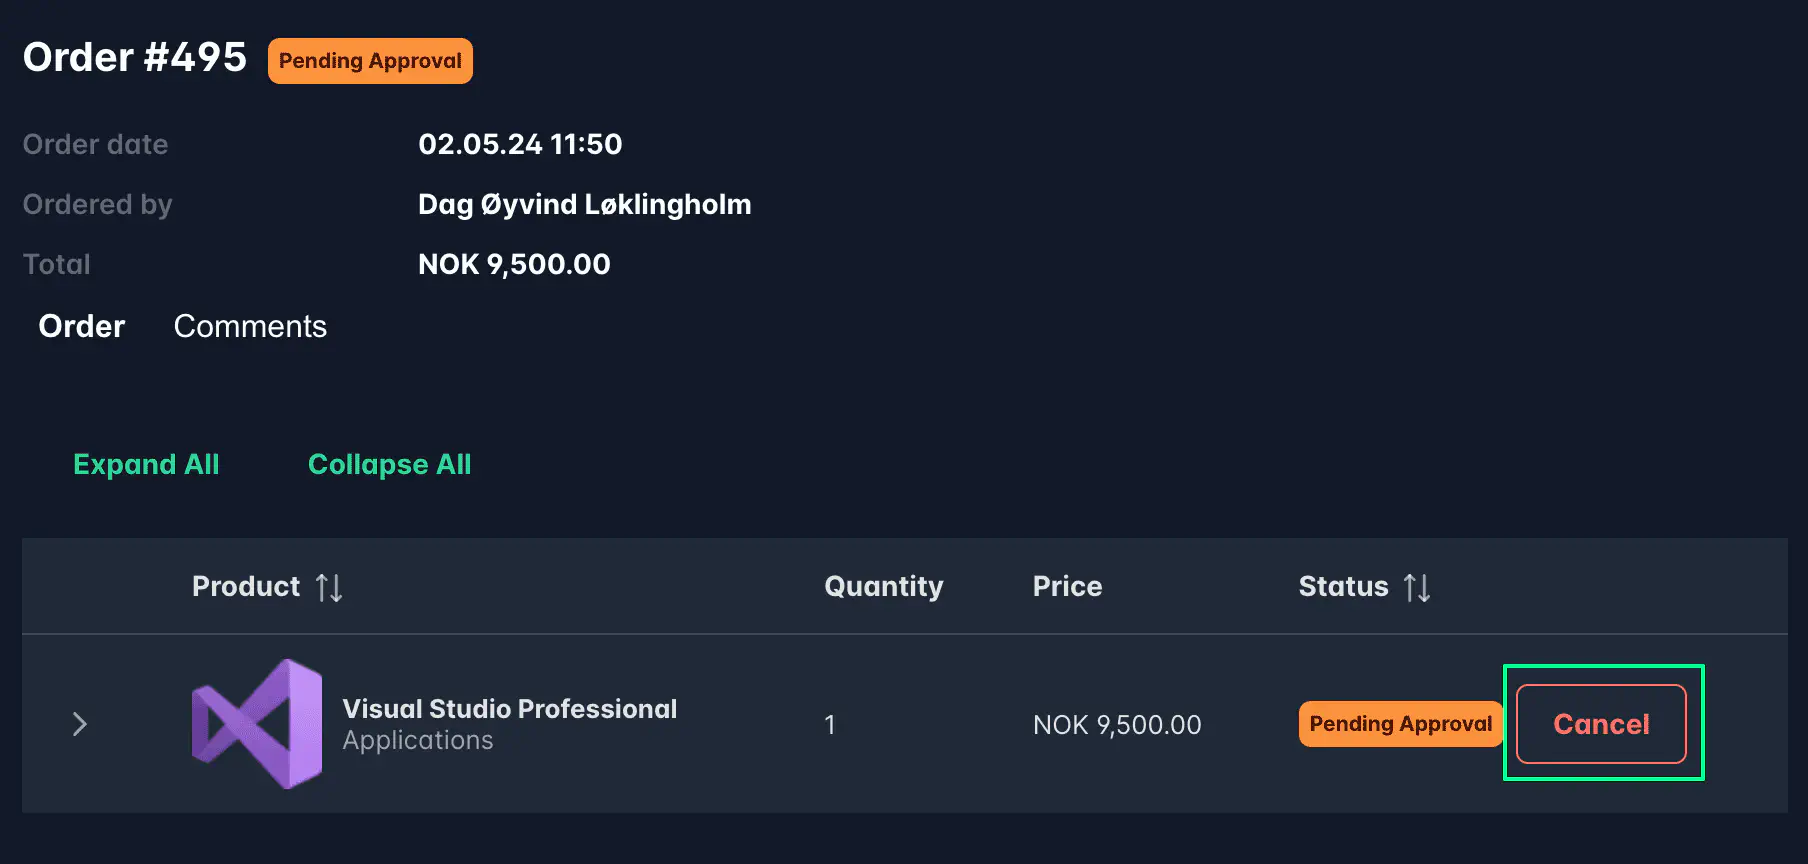
Cancel Order
To cancel an order, click on the order and select Cancel order. This action cannot be undone.
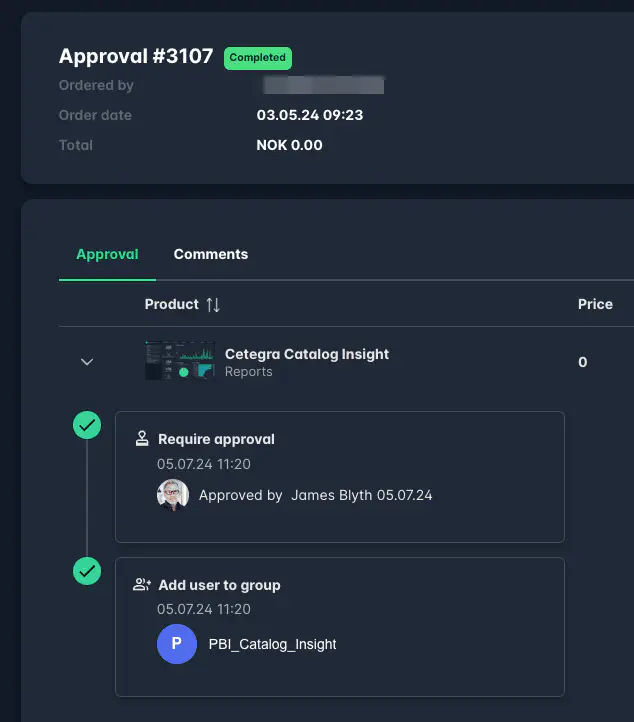
Managing Approvals
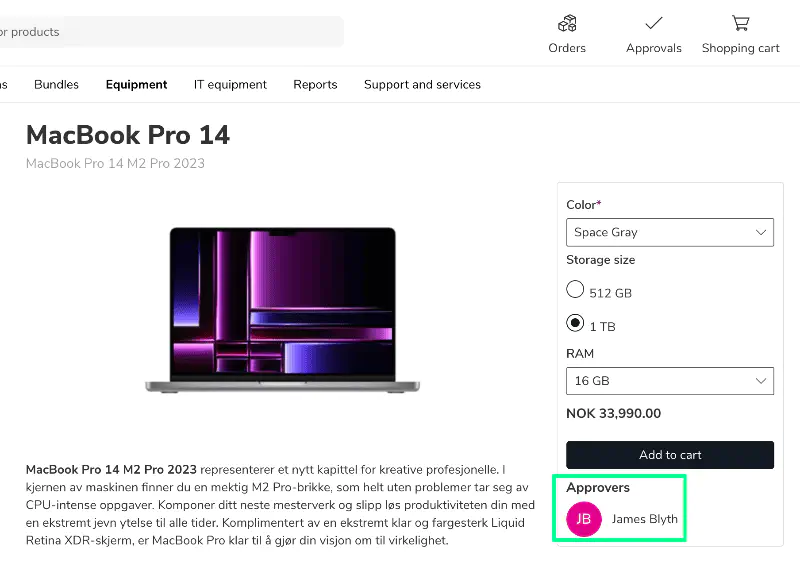
If you need to approve requests, you can do it easily in the Catalog. Approvers are shown in the product details.
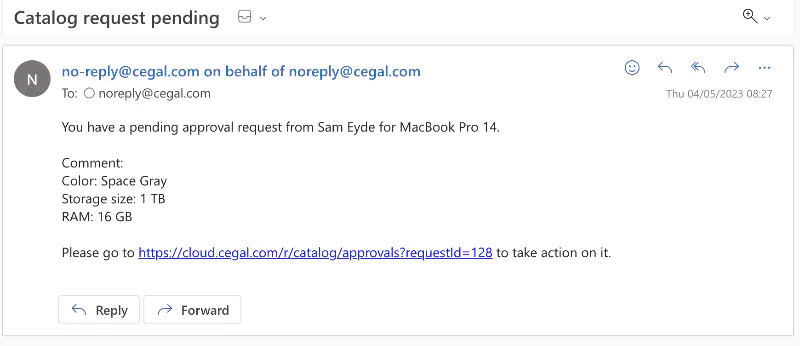
Approvers will get an email notification.
To see more details, click on the pending status order. This will show the order details, configurations, or user inputs. You can also see what happens after approval.
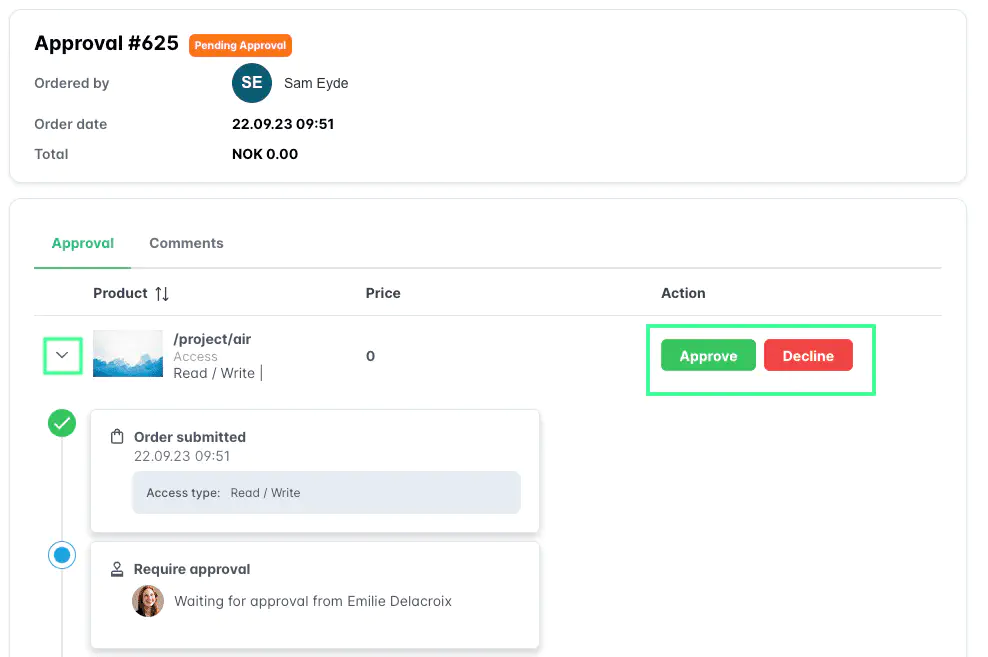
Click Approve or Decline to finalize. Sometimes, you may need to add comments or extra information when approving. This information can be useful for later actions, like automation tasks or email notifications.
For example: In a two-step approval process, the first approver (James Blyth) provides an IP address and WLAN ID for a new server. After this, the finance department gets an email with the server details. Then, Emilie approves and the server setup starts, including the provided user and network info.
