Approval
The approval system in Cetegra Catalog is a robust and flexible solution for handling a wide range of approval workflows. Approvals can be configured at both the category and product levels, and you can define multiple approval steps in sequence.
This article explains how to configure and use the approval system effectively — including the new Send Reminder feature available from the Statistics module.
Configuring Approval Steps
Adding an Approver
To add an approval step to a product or category:
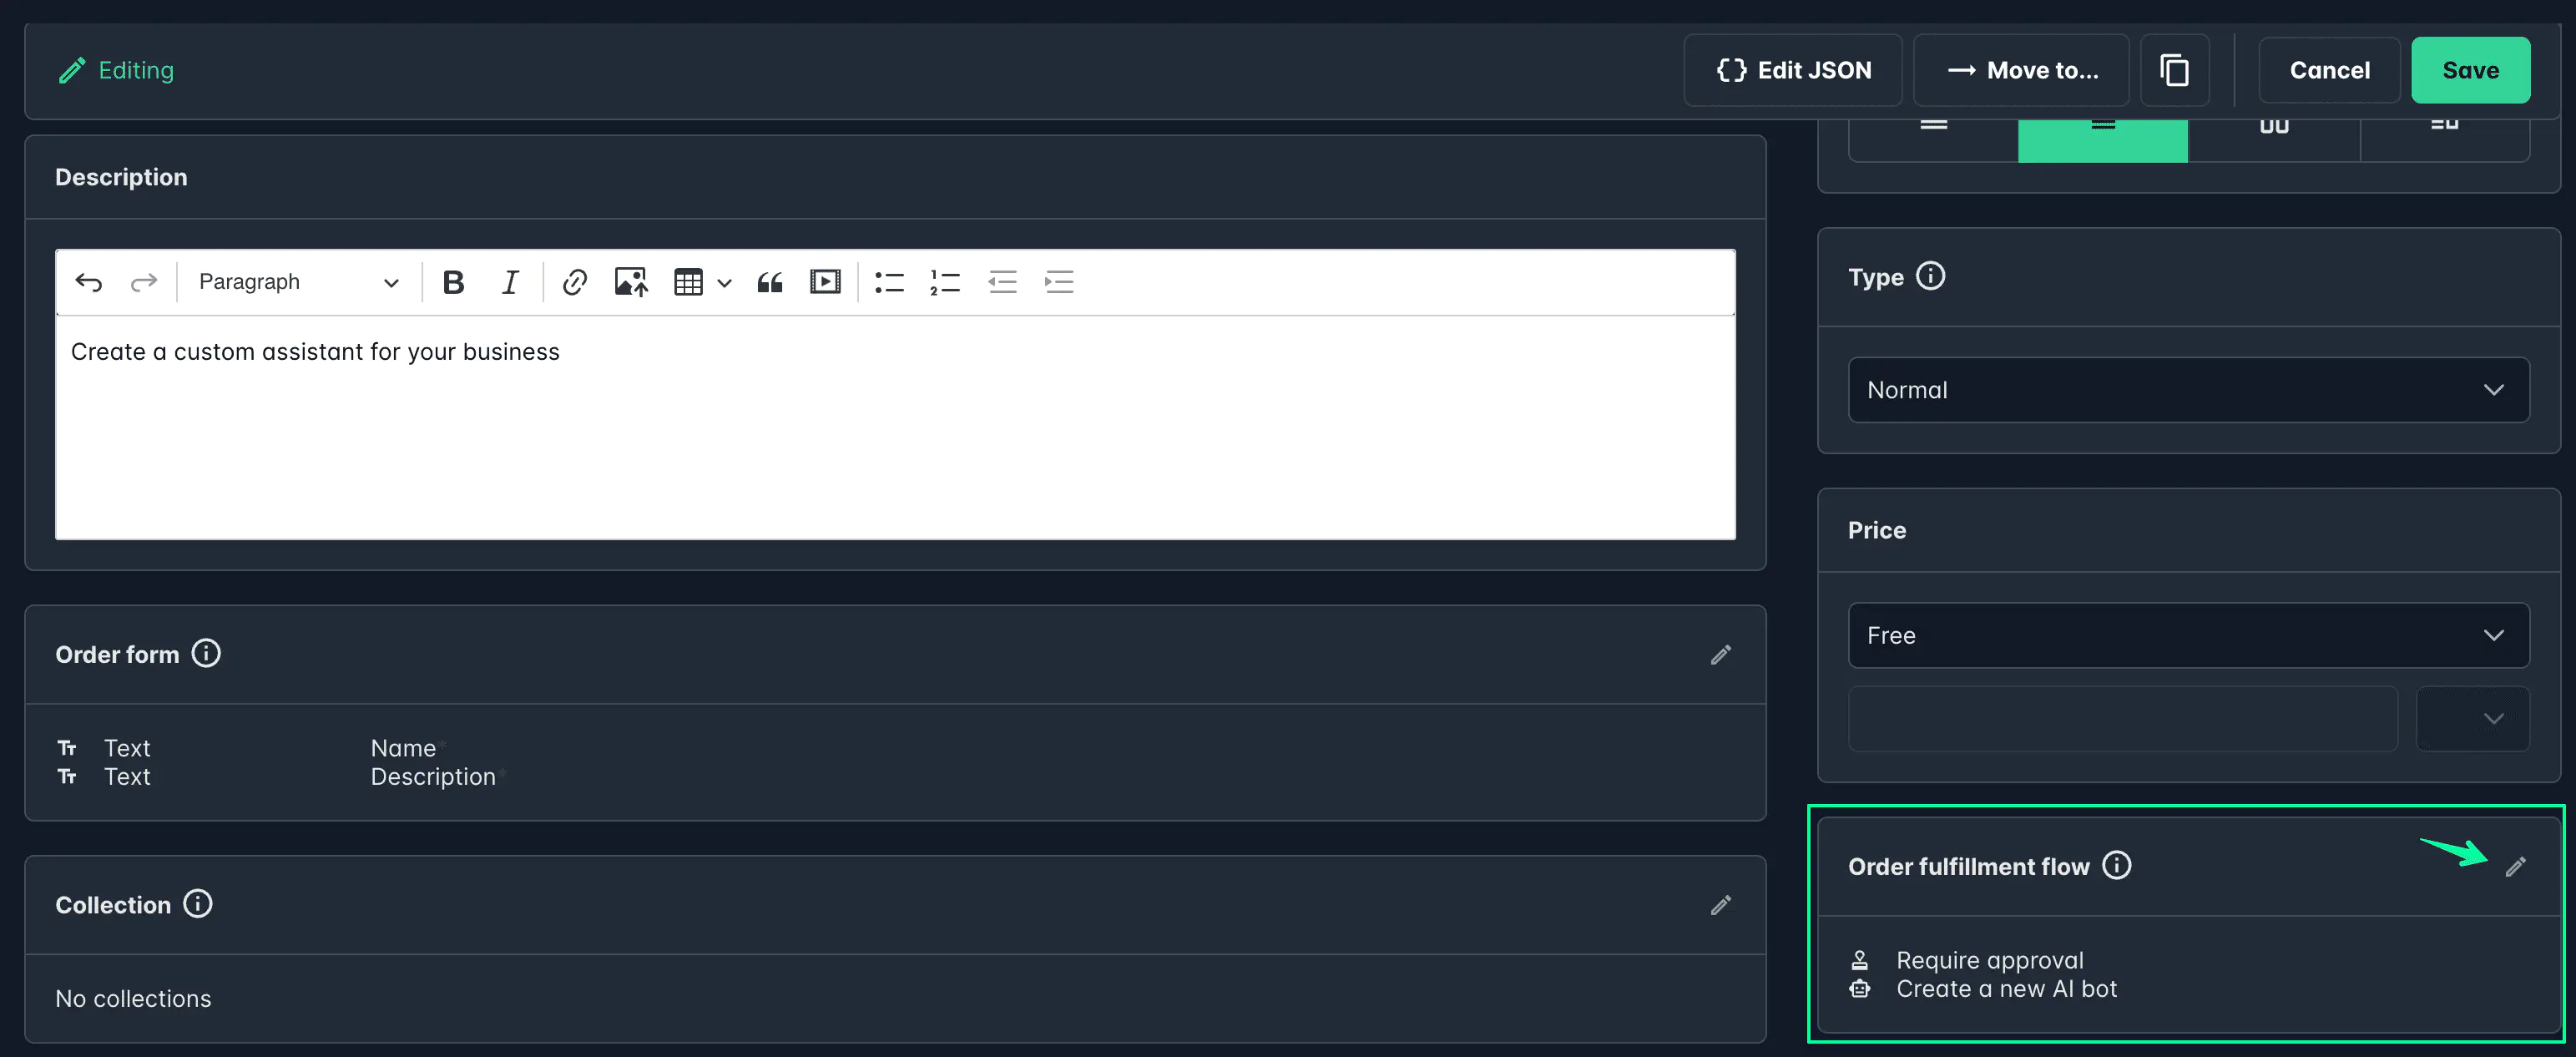
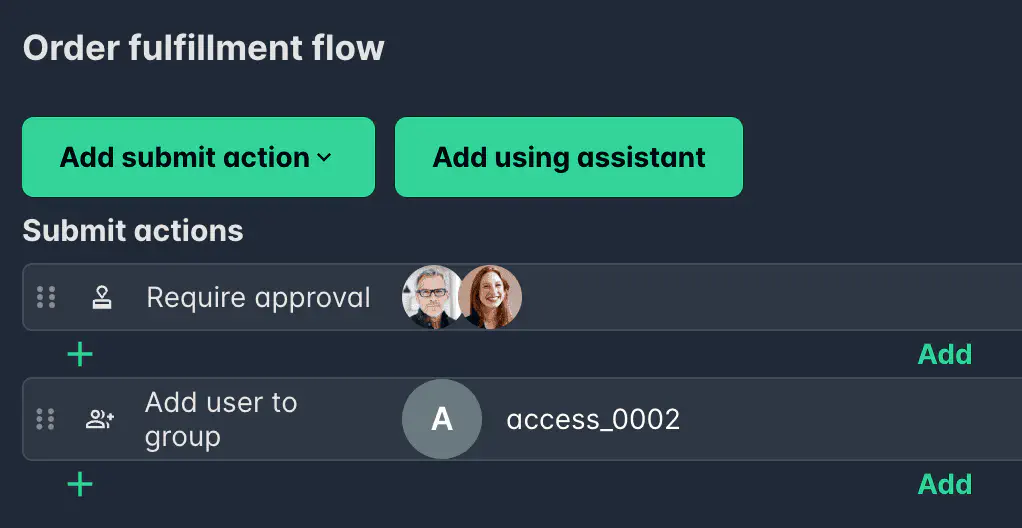
- Navigate to the Order fulfillment flow module.
- Click the Edit icon.
- Choose Add submit action, and select Require approval.
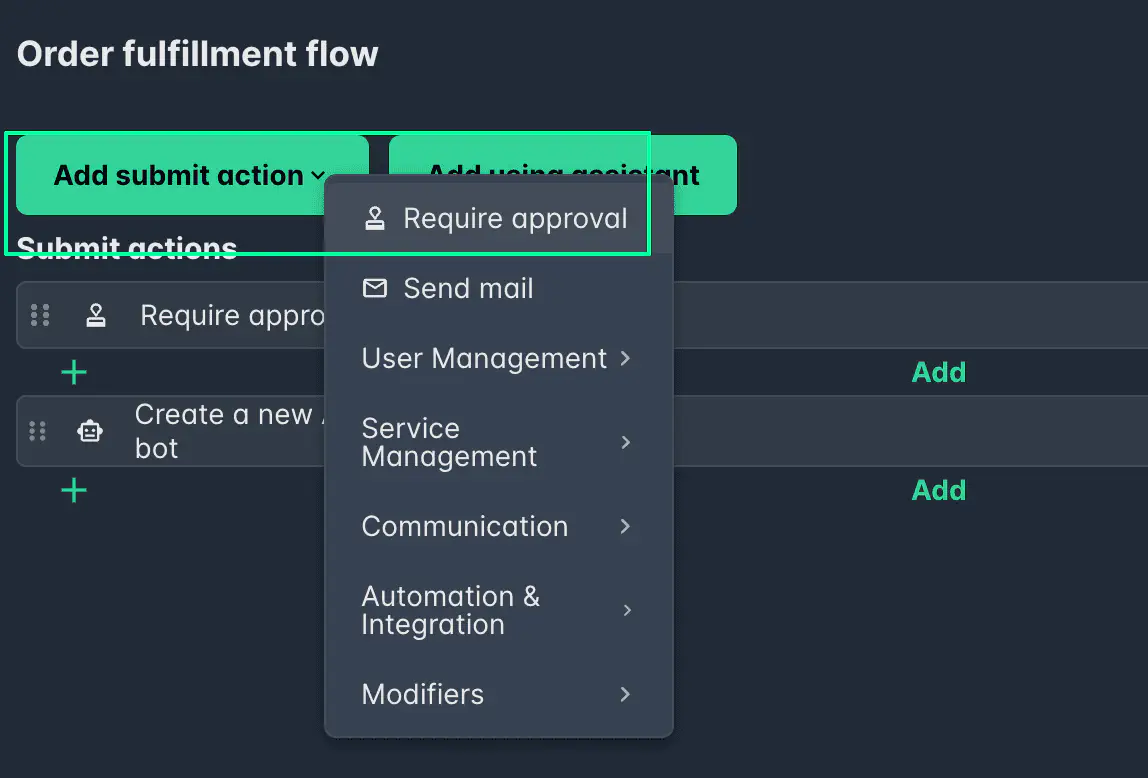
Approval steps can be based on users, groups, roles, the requester’s manager, or dynamically assigned from form input. You can add multiple steps, and each step can include several users or groups.
The step is approved as soon as one of the assigned approvers completes the approval.
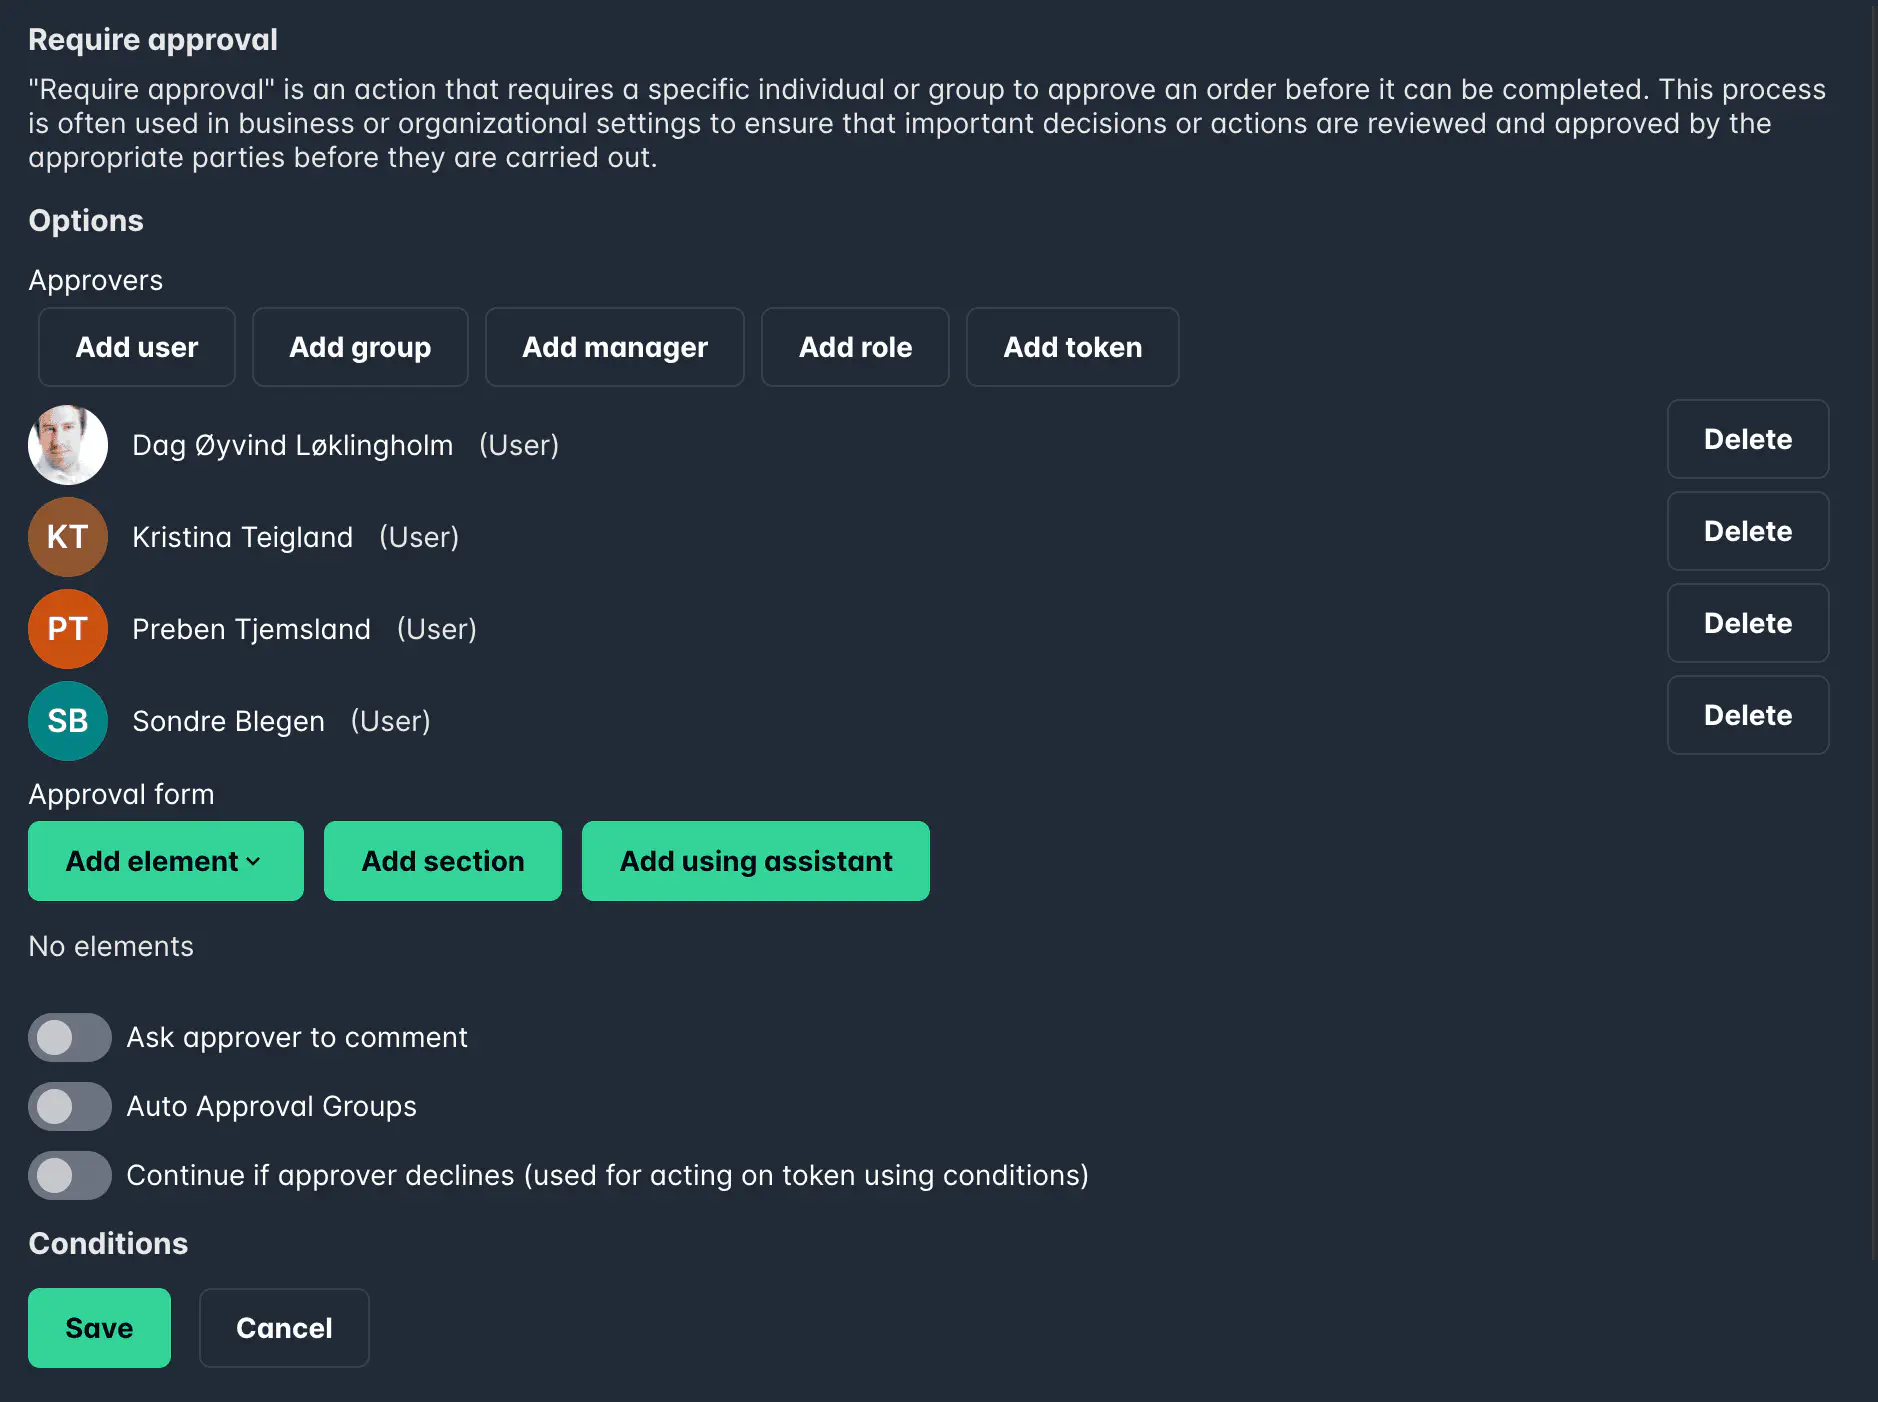
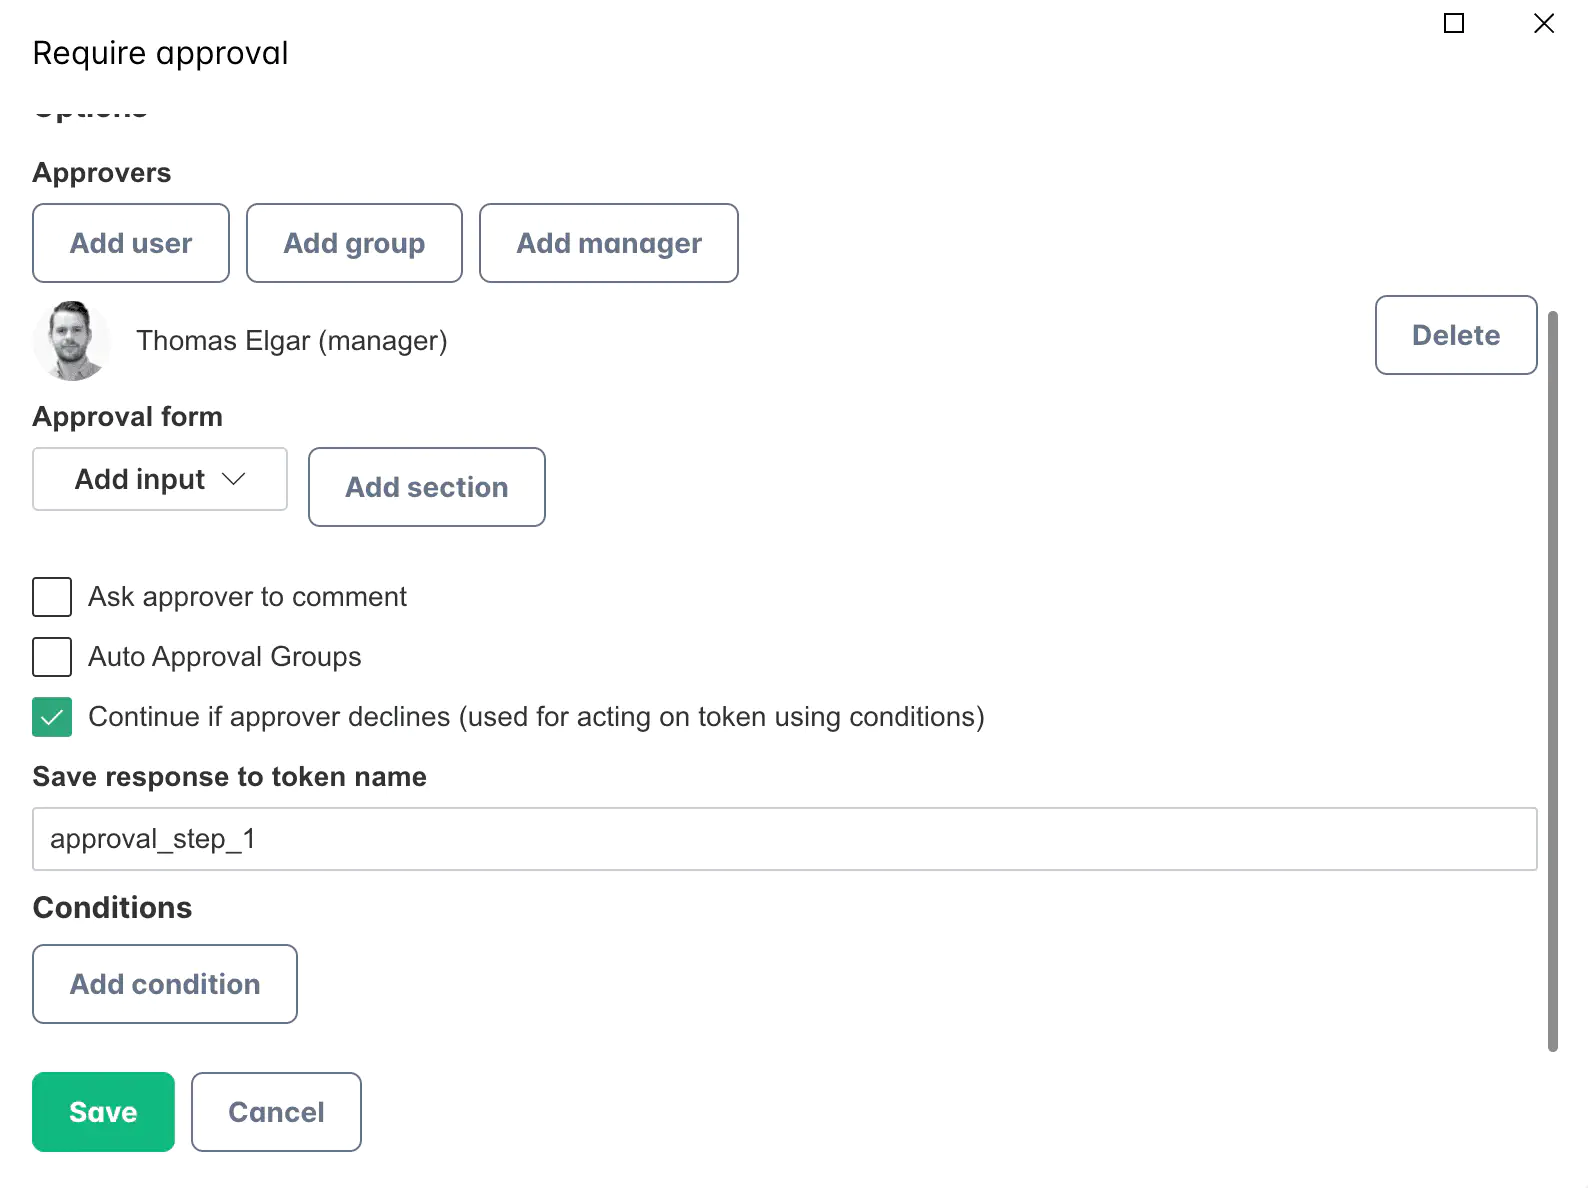
Require Approval Options
- Add Users: Select and filter users to assign as approvers.
- Add Group: Choose groups to include as approvers.
- Add Manager: Assigns the requester’s closest manager (based on AD attributes).
- Add Role: Select defined roles such as Desktop Manager or Catalog Admin.
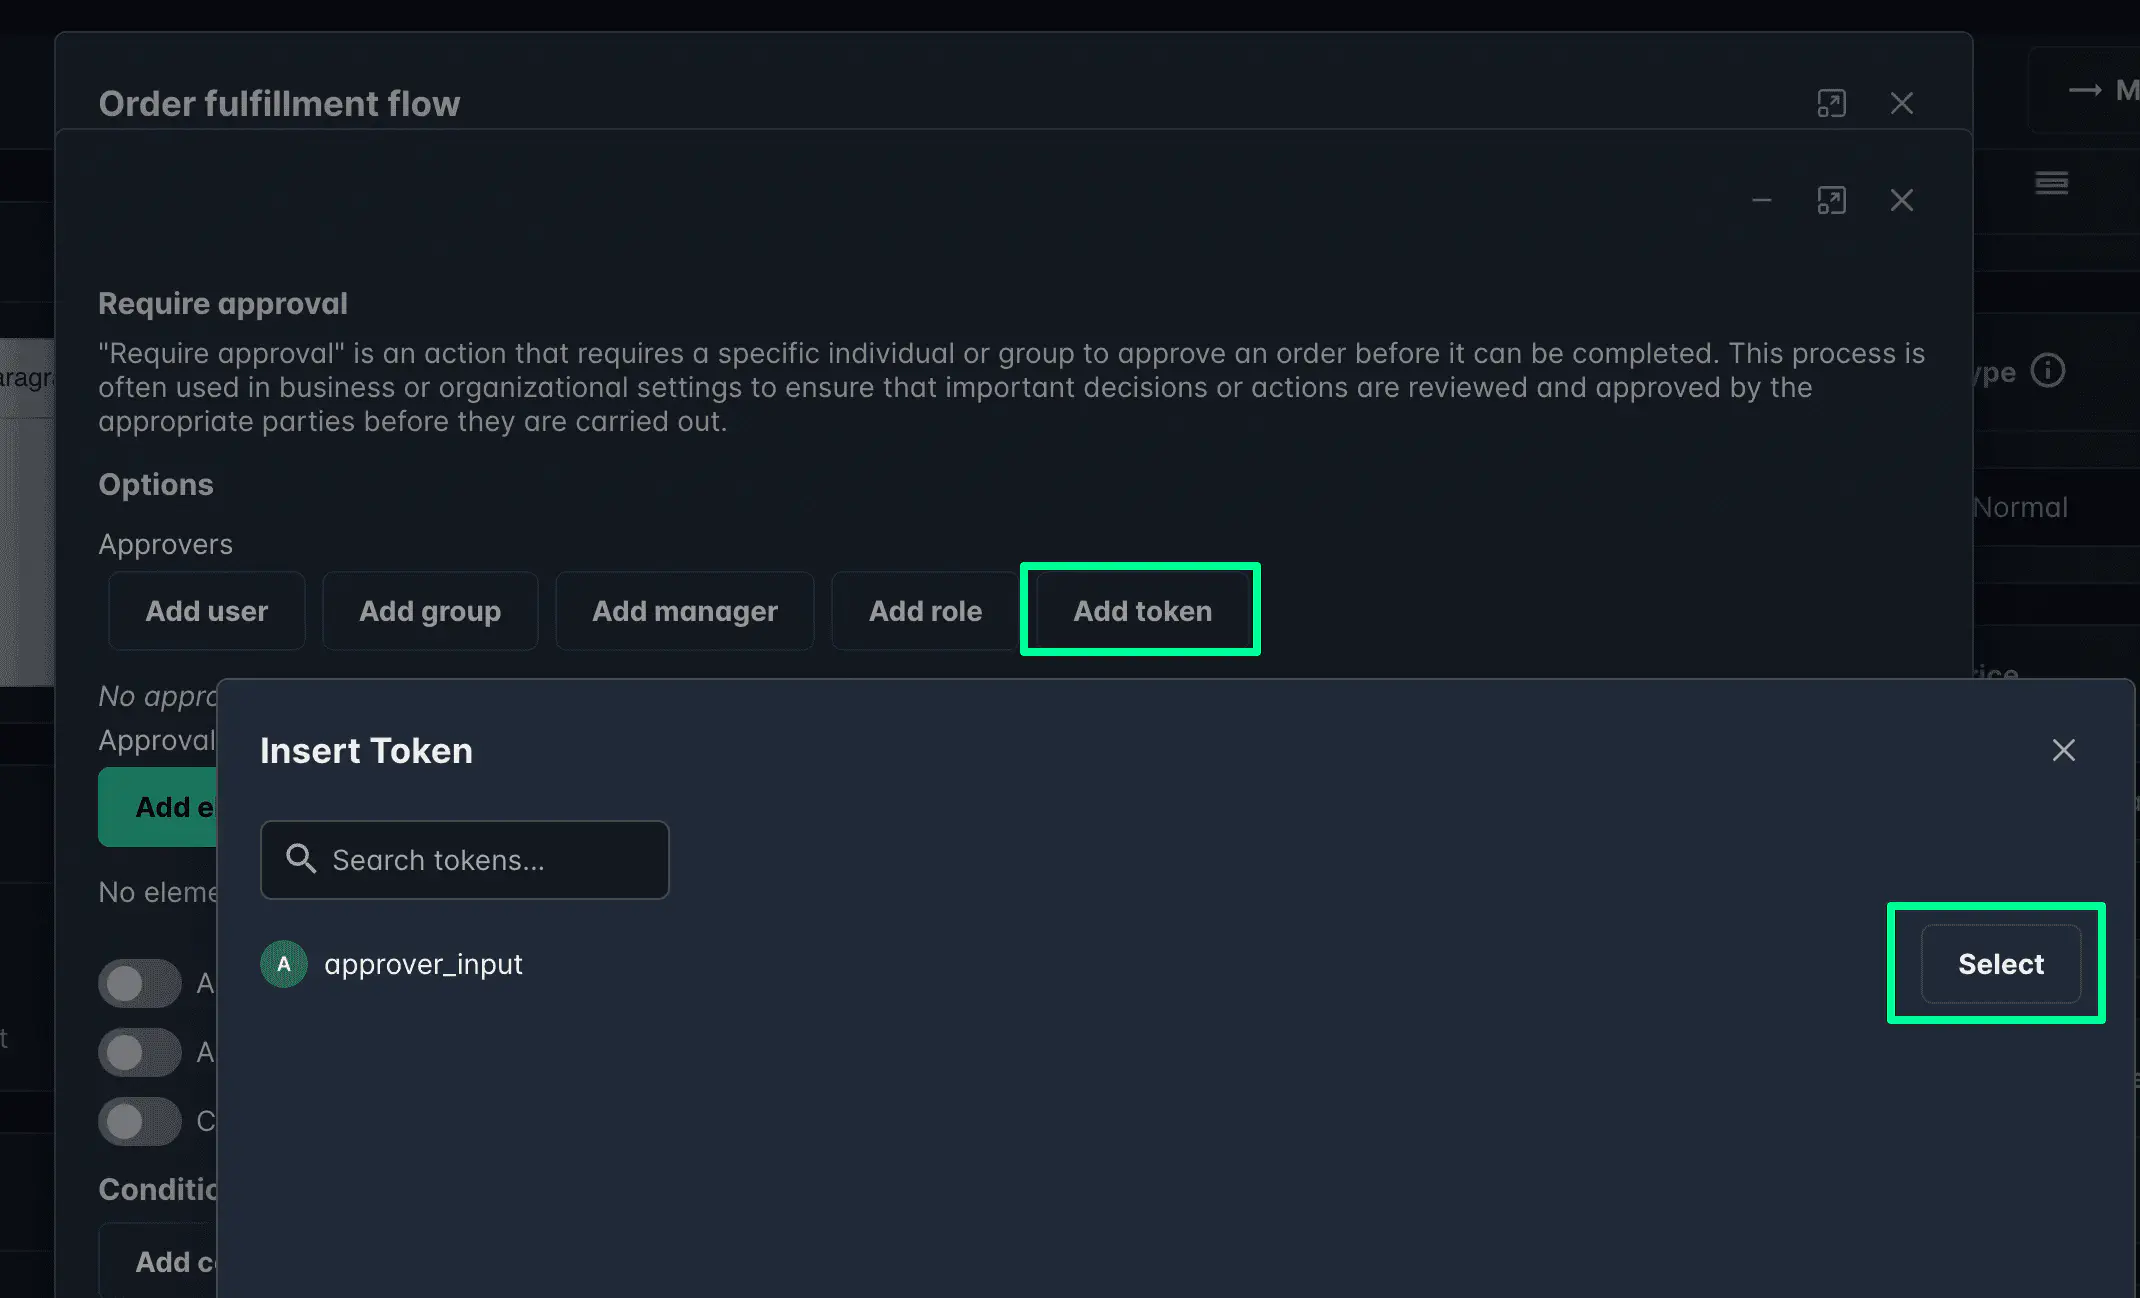
- Add Token: Use a form input value (e.g., selected user) to dynamically assign approver.
- Add Element: Include fields that the approver must fill during the approval step.
- Add Section: Group several inputs for the approver in a logical section.
- Ask Approver to Comment: Adds a mandatory comment field for feedback or justification.
- Auto Approval Groups: Automatically approves when the requester belongs to specific groups.
- Continue if Approver Declines: Allows the workflow to continue to the next step even after a decline.
Practical Examples
Single Approval Step
One of the two designated approvers must approve the request to add a user to the access_0001 AD group.
After approval, the user is automatically added.
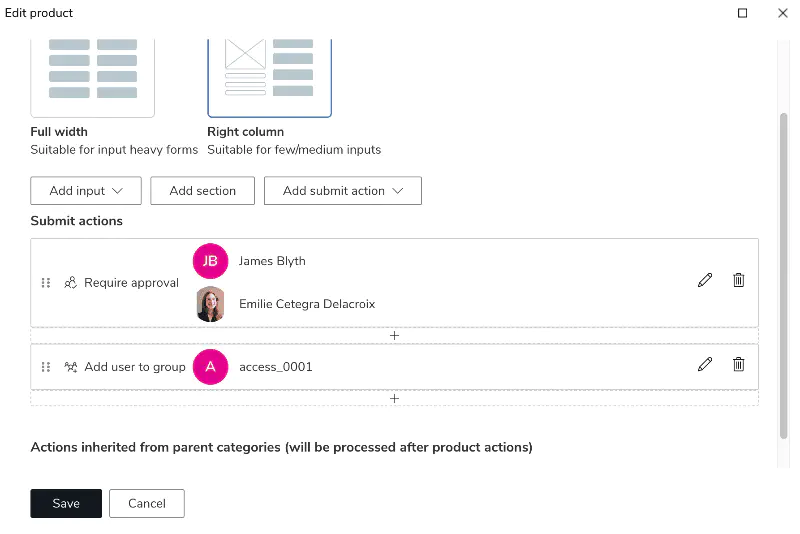
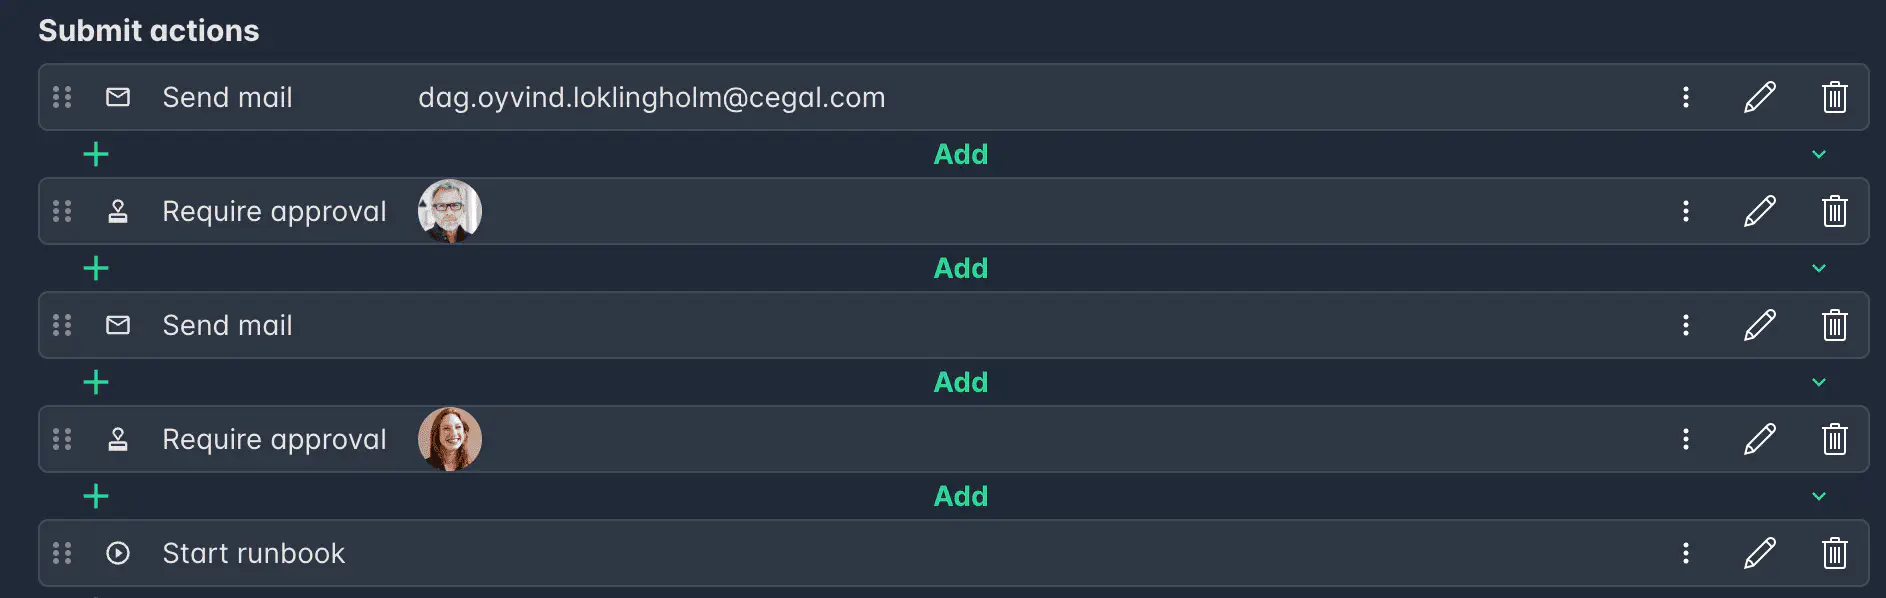
Sequential Approval Steps
In this example, James must approve first. Once approved, Emilie receives a notification to review the same request.
Input-Based Approval
An approval step can include required input fields for the approver. Here, the approver enters the IP address and VLAN ID before the system proceeds with server setup.
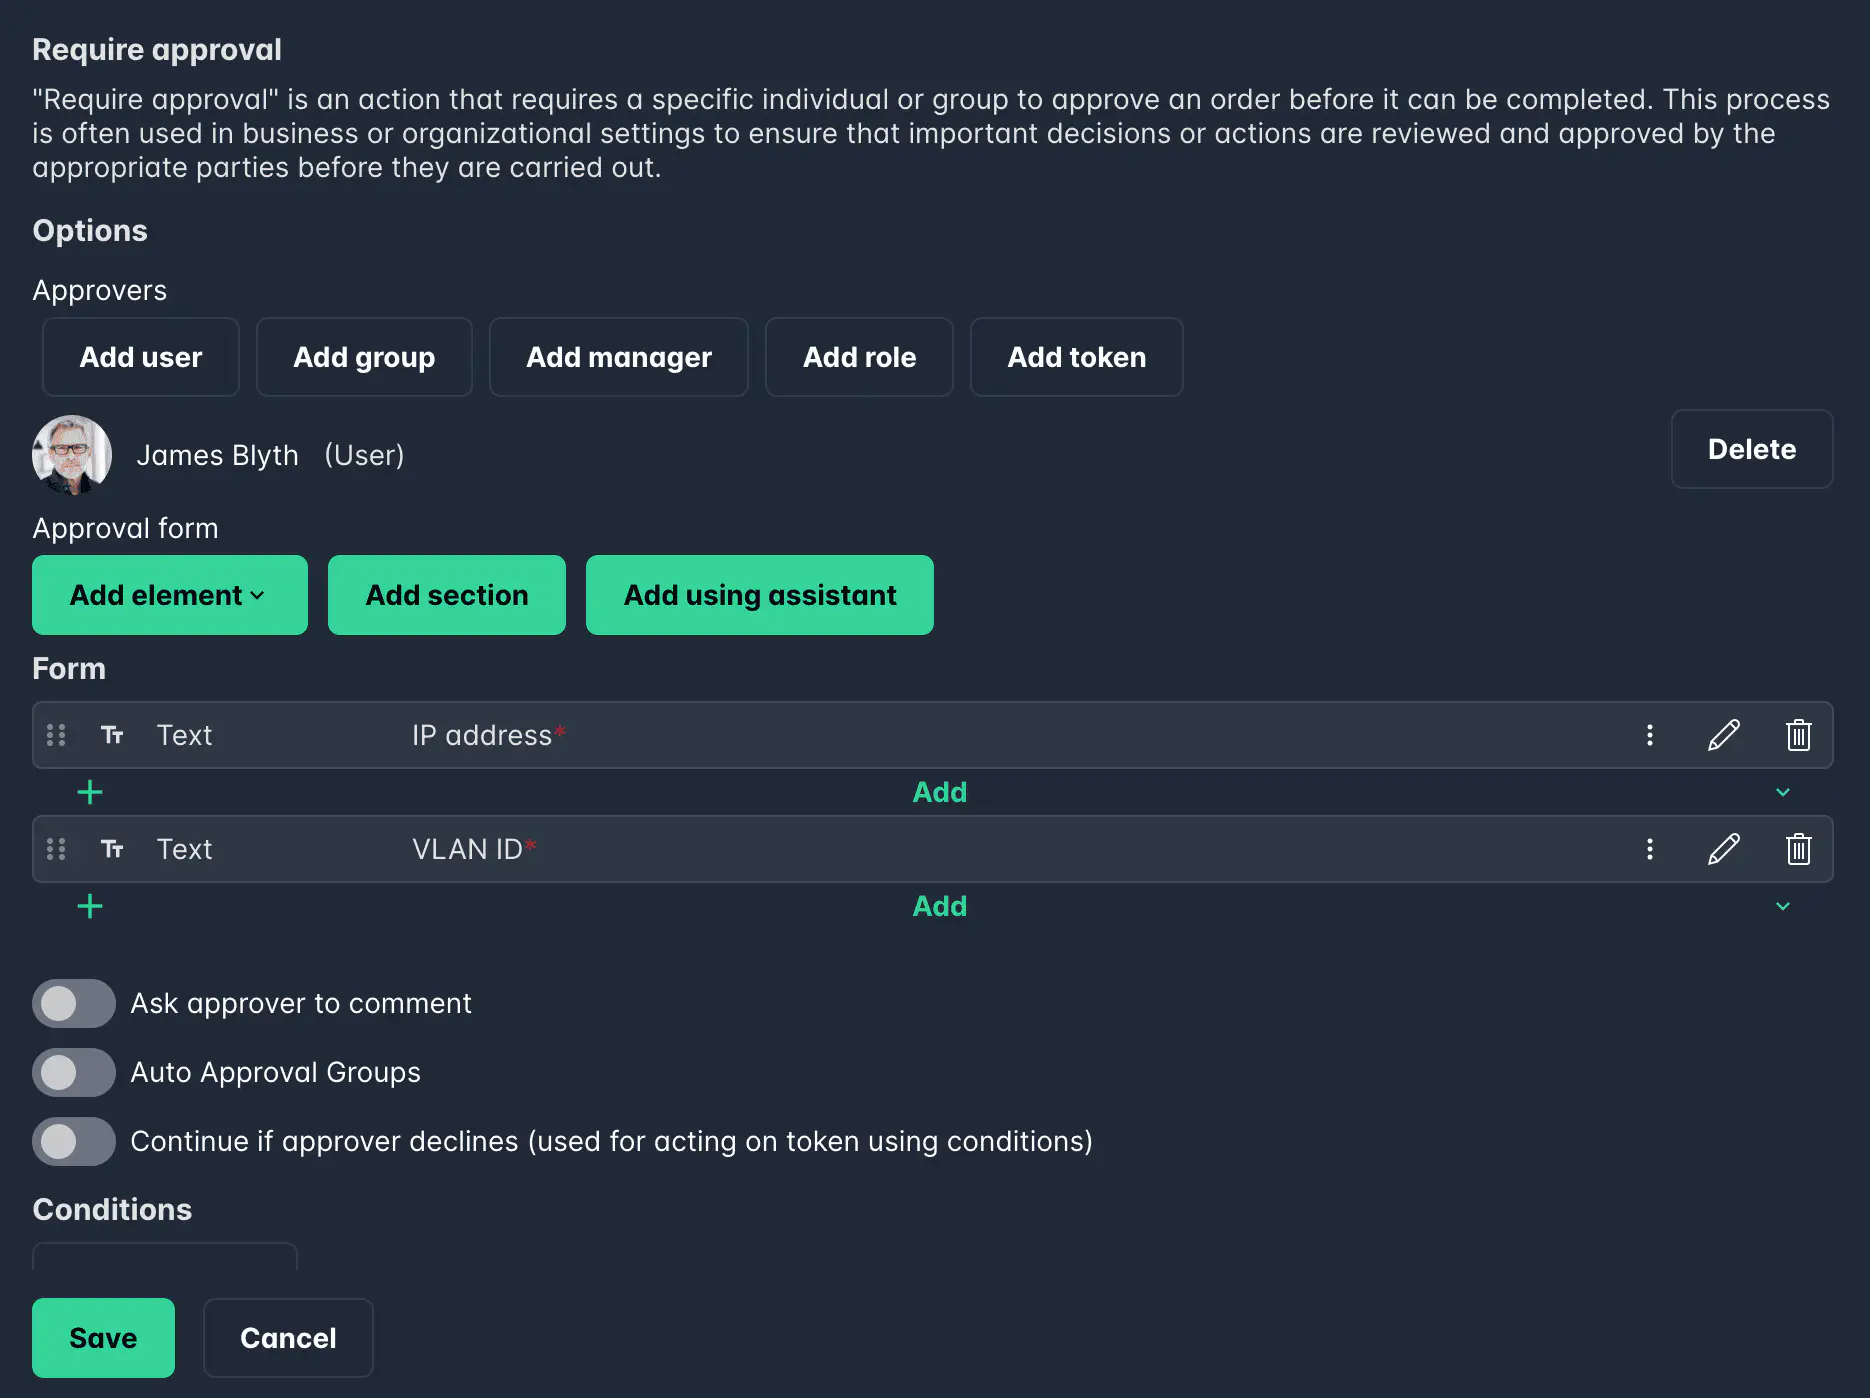
Once approved, the automation uses form data (server name, OS, etc.) and approval data (network info) to complete setup.
Learn more about advanced action systems here.
Automatic Approval
Approvals can be automated for specific groups.
In this example, any user in the _DL_Cegal_Development AD group is automatically approved.
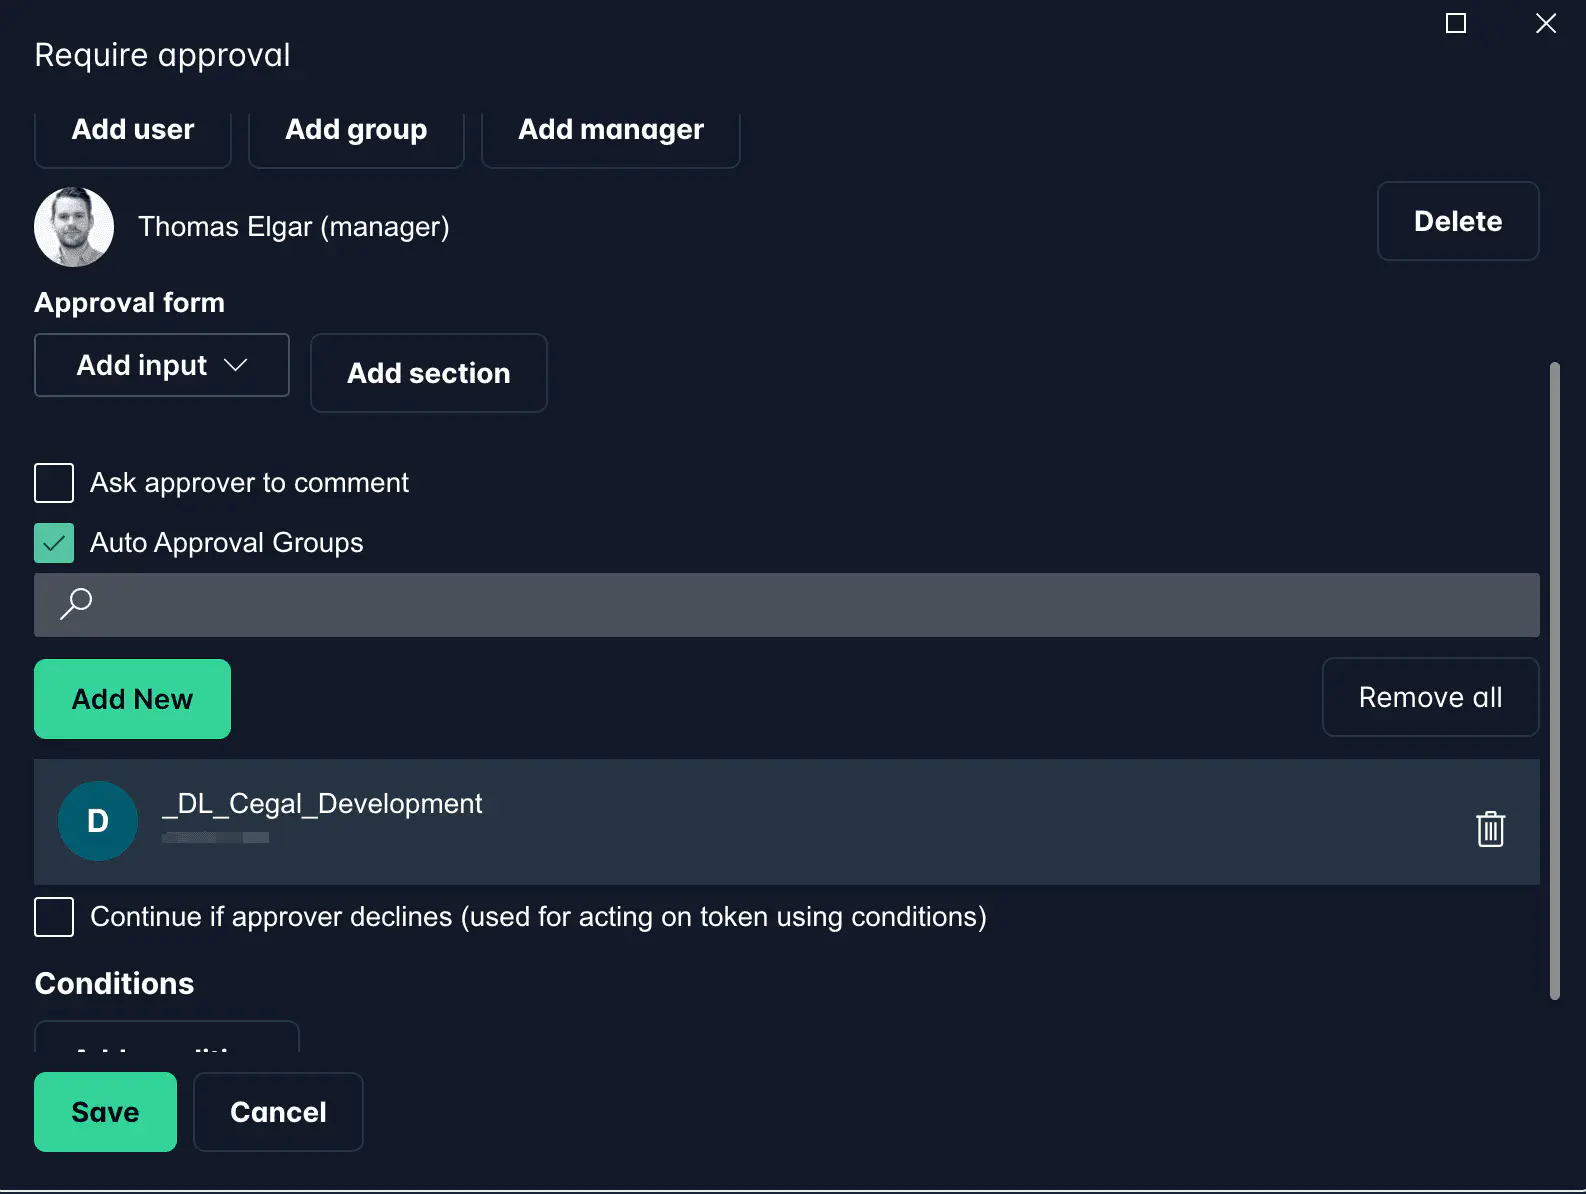
When an order is auto-approved this way, the order details page shows “Auto-approved due to membership of <group name>” — giving catalog managers full transparency into why the order was approved without manual intervention.
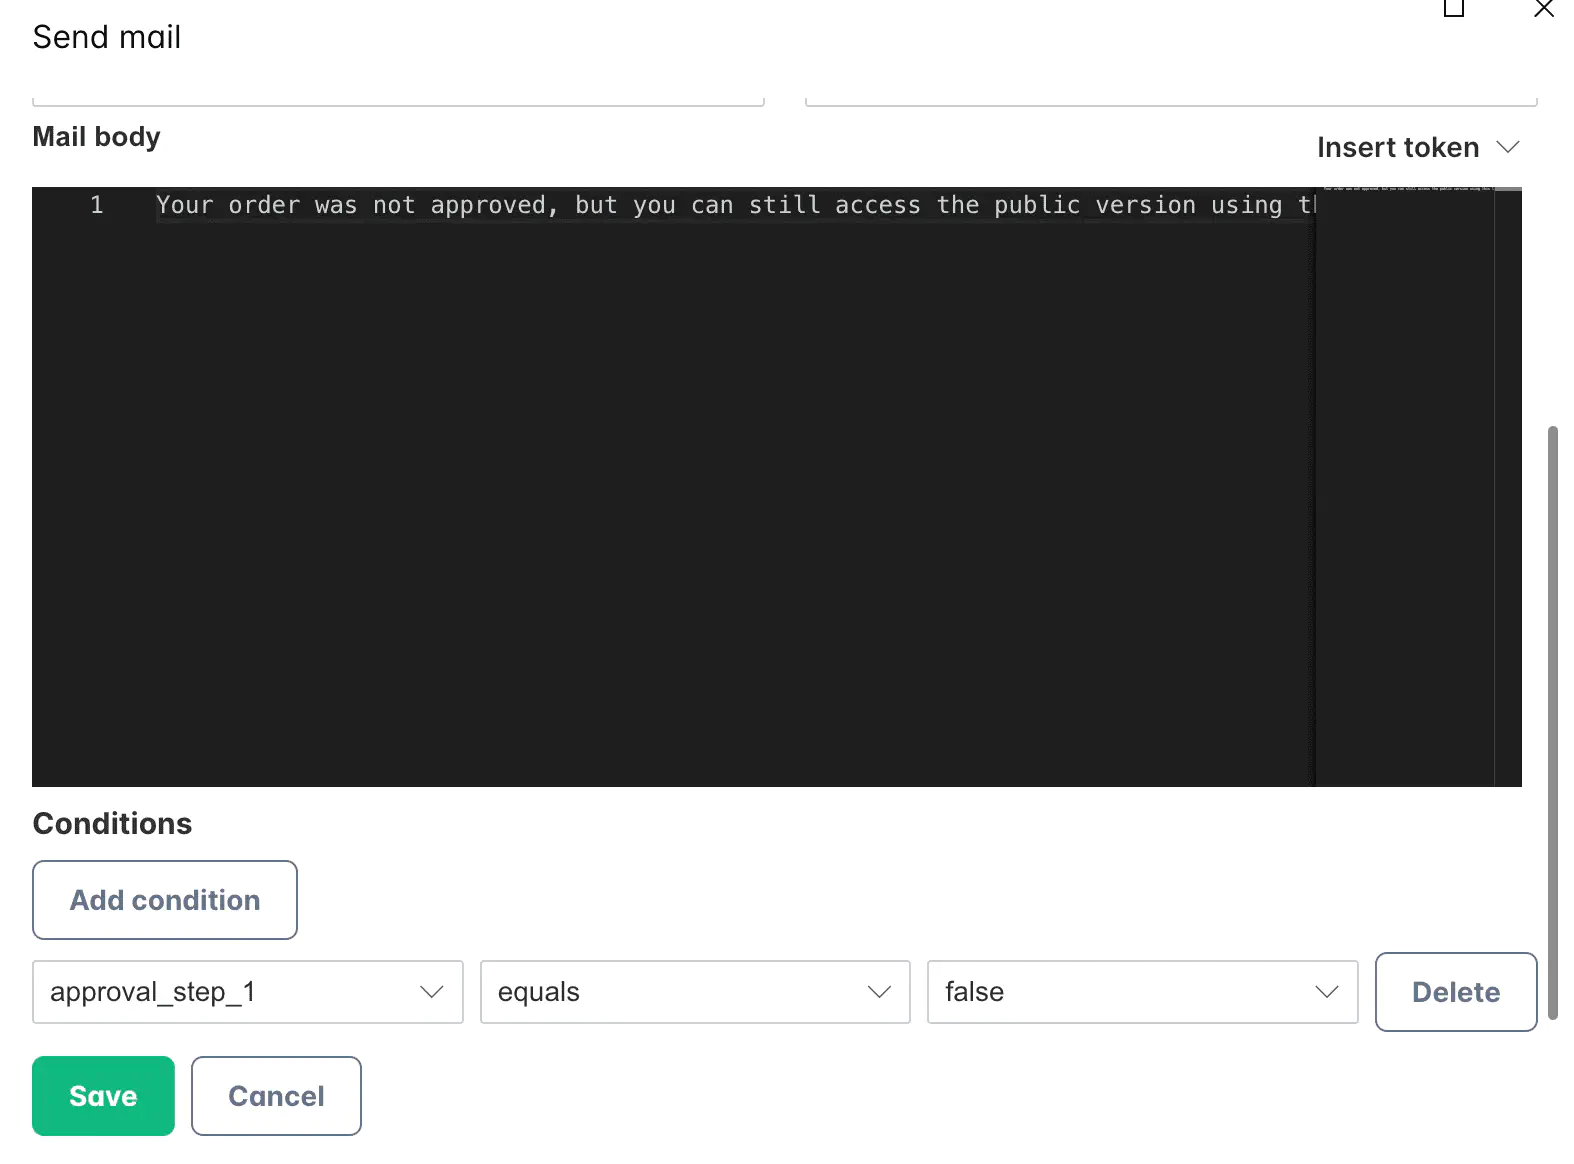
Handling Approver Declines
If you want to continue a process even after a decline, use tokens and conditions.
In this example, the token approval_step_1 is used to trigger follow-up actions such as sending a notification.
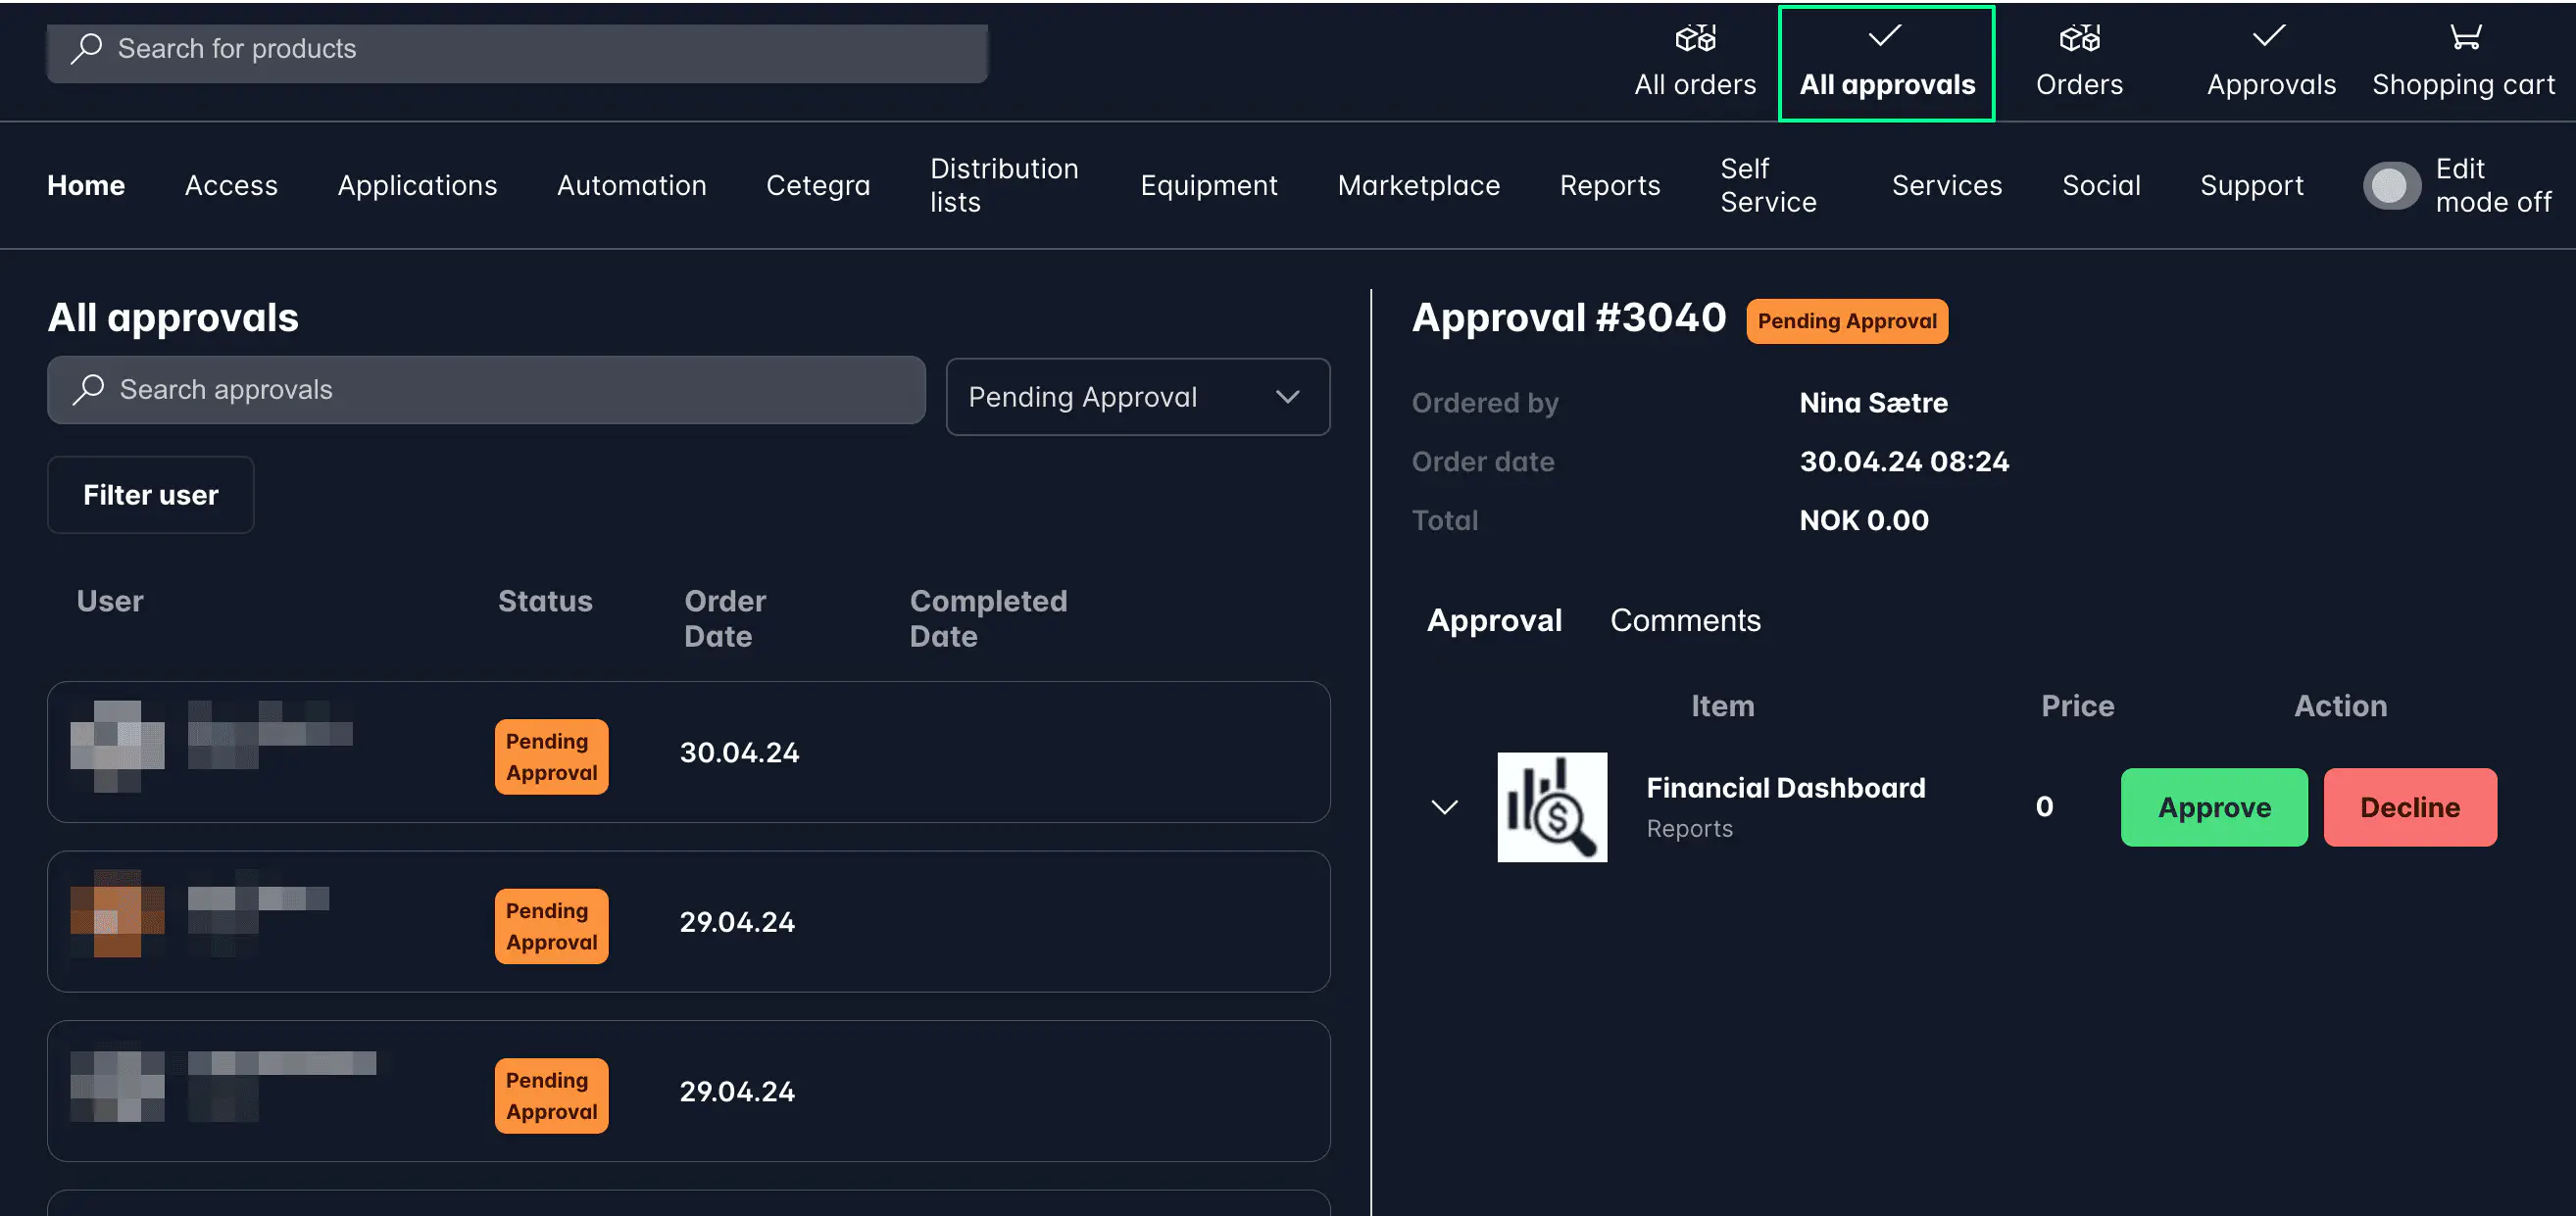
Overriding Approval Steps
If the designated approver is unavailable, a Catalog Manager can override approvals from the All Approvals page.
Token-Based Dynamic Approval
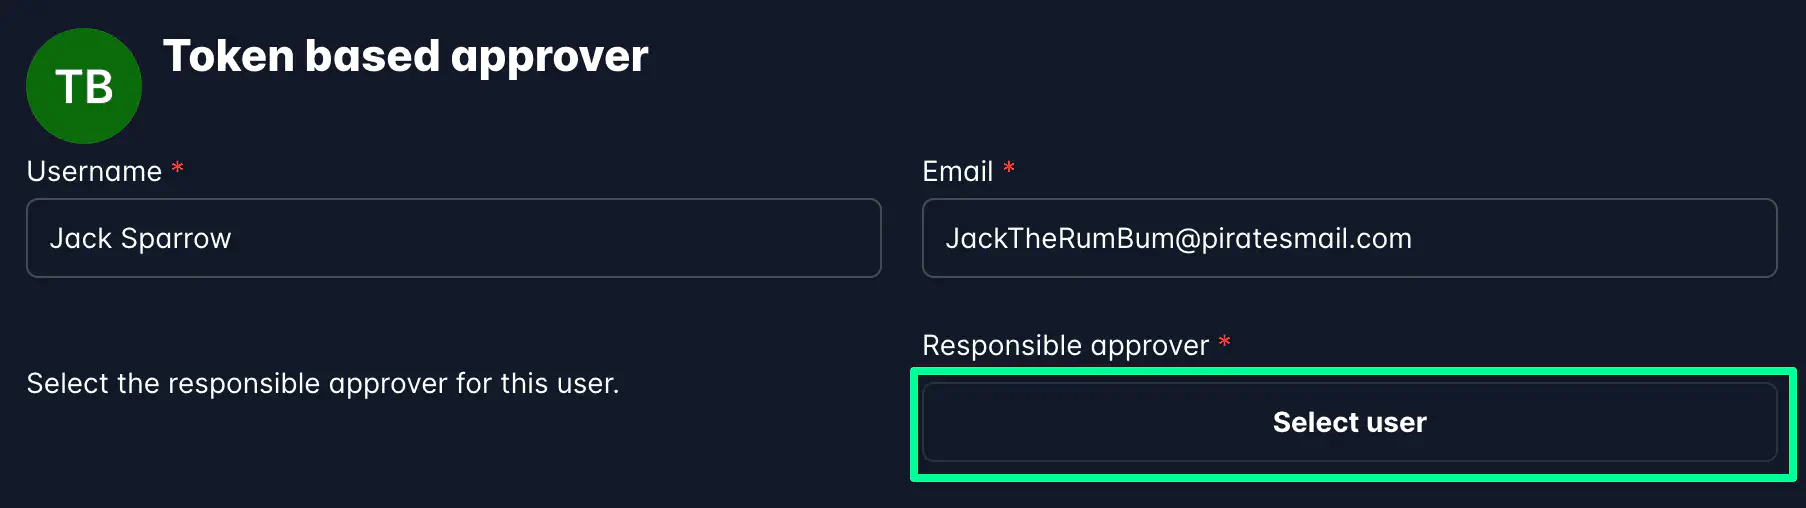
Dynamic approvals use a token-based approach to determine approvers based on form input. For instance, a user select field in the form can decide who approves the request.
Only the User Select input supports token-based approvals.
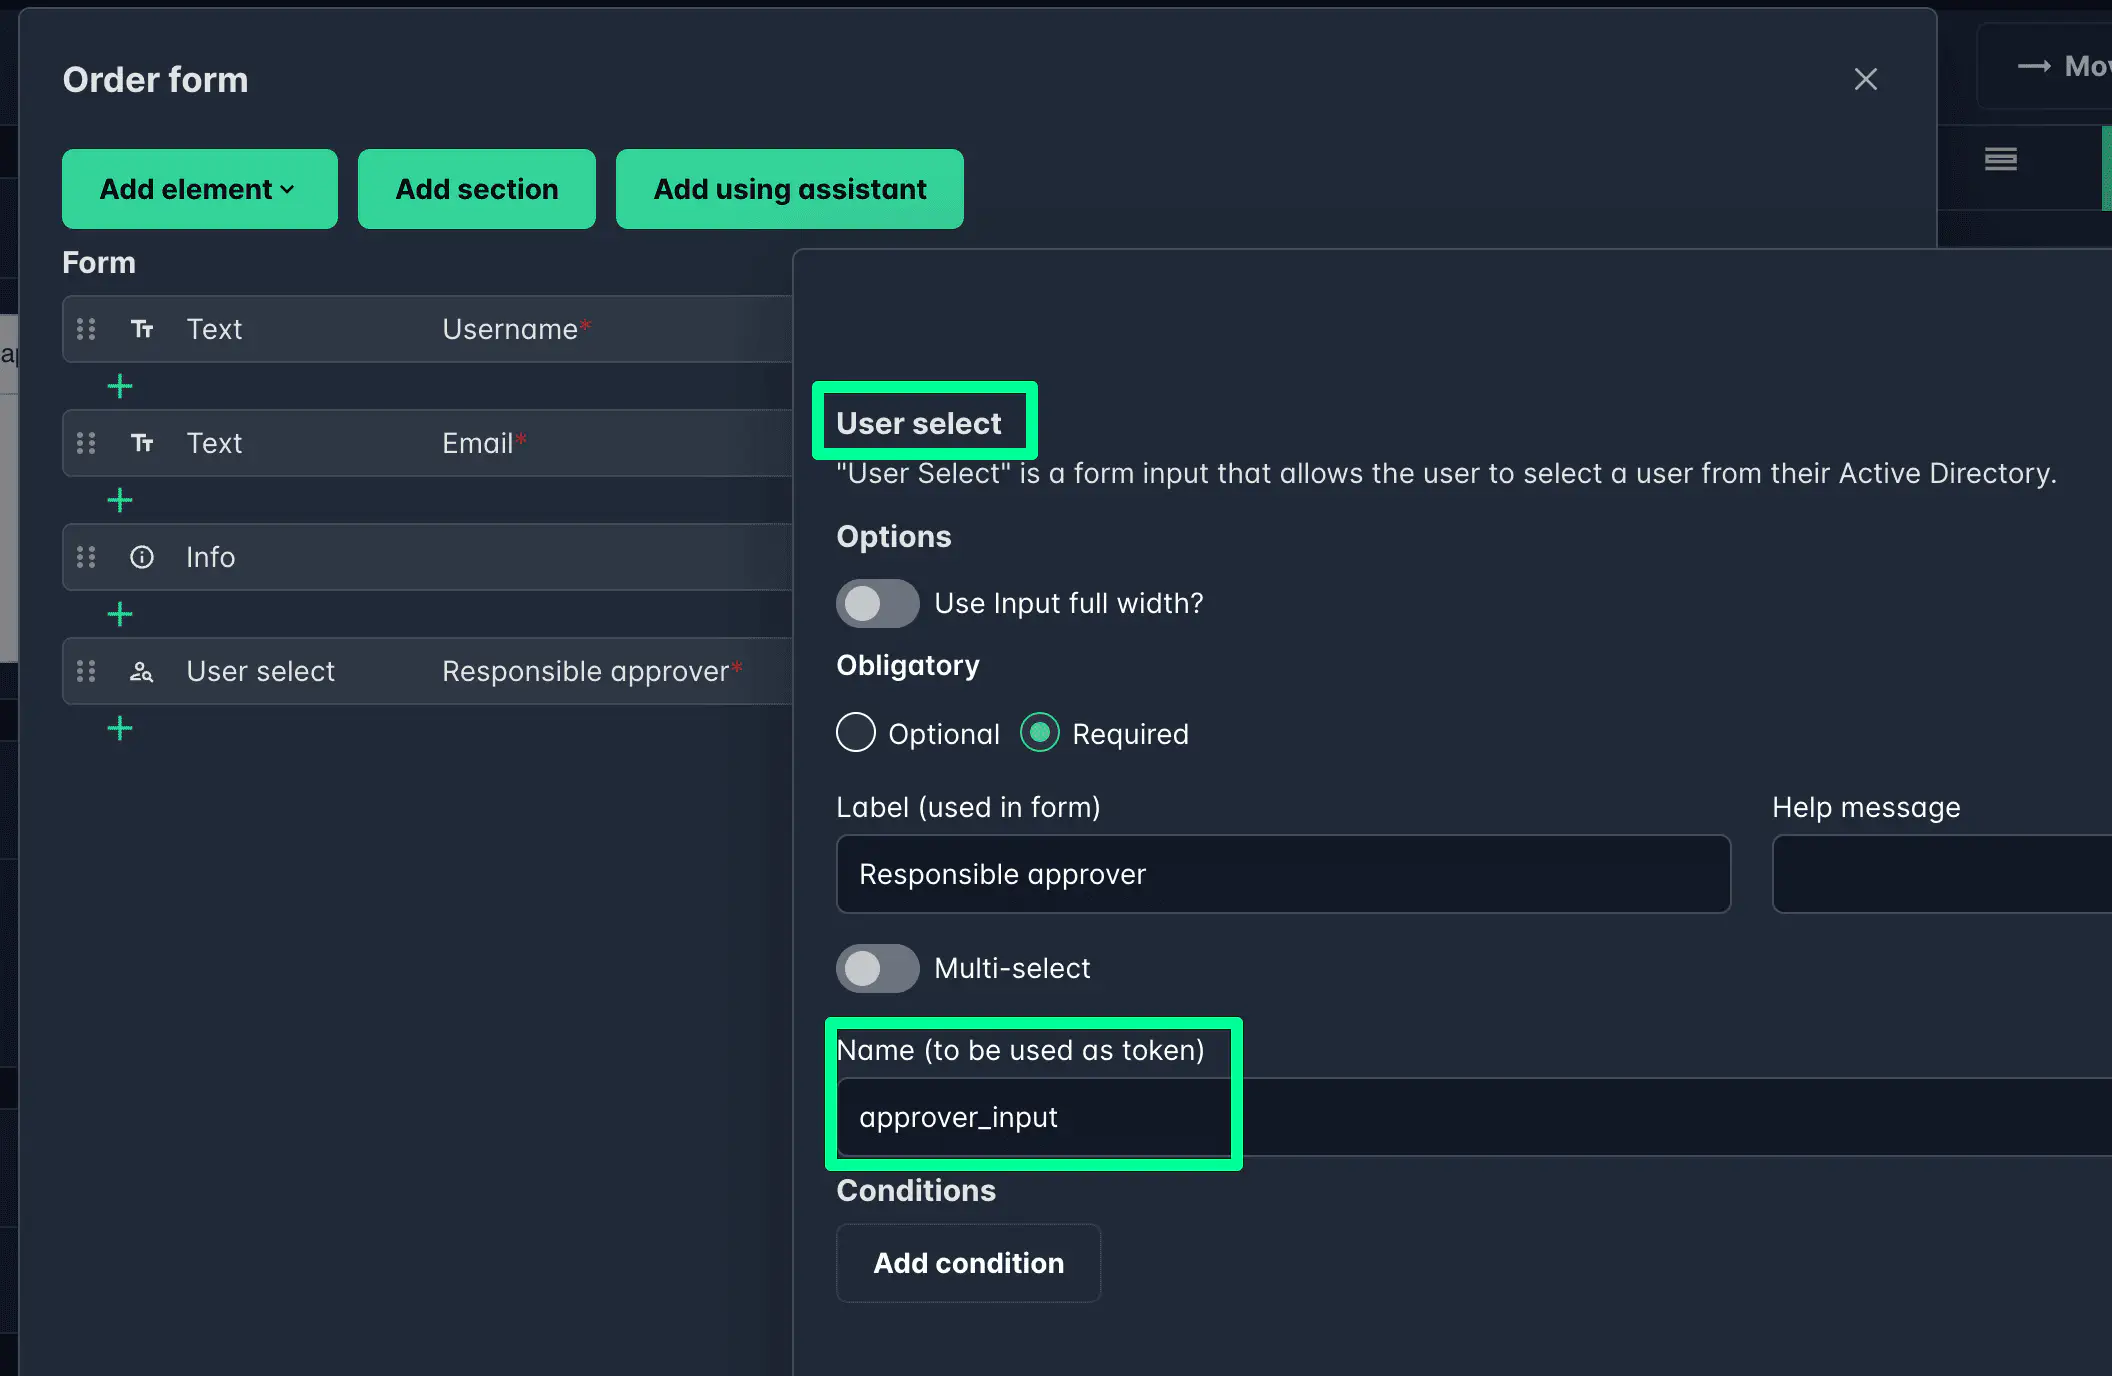
Use the token (e.g., approver_input) as the approval source:
Once configured, the selected approver receives both an email and a task in Workspace.
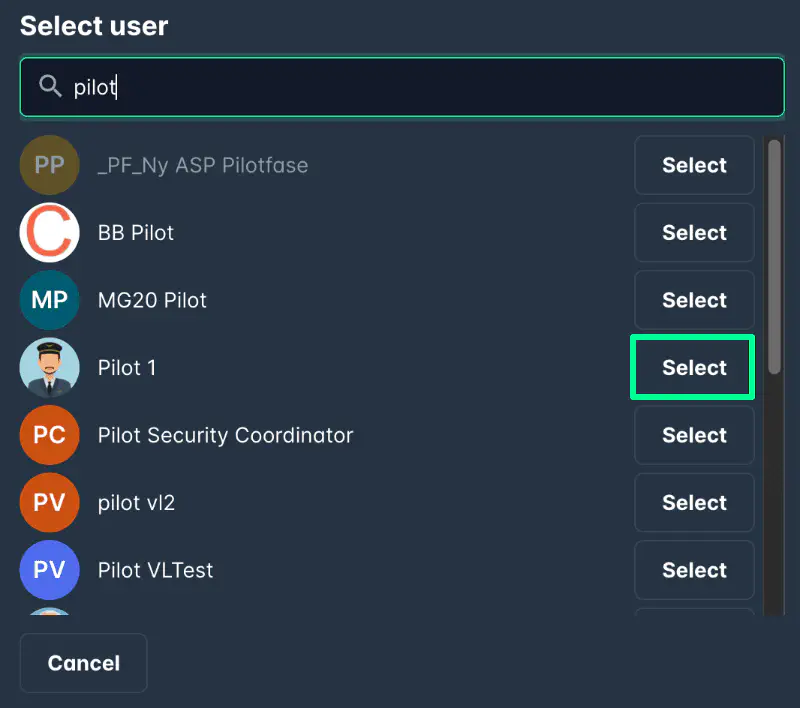
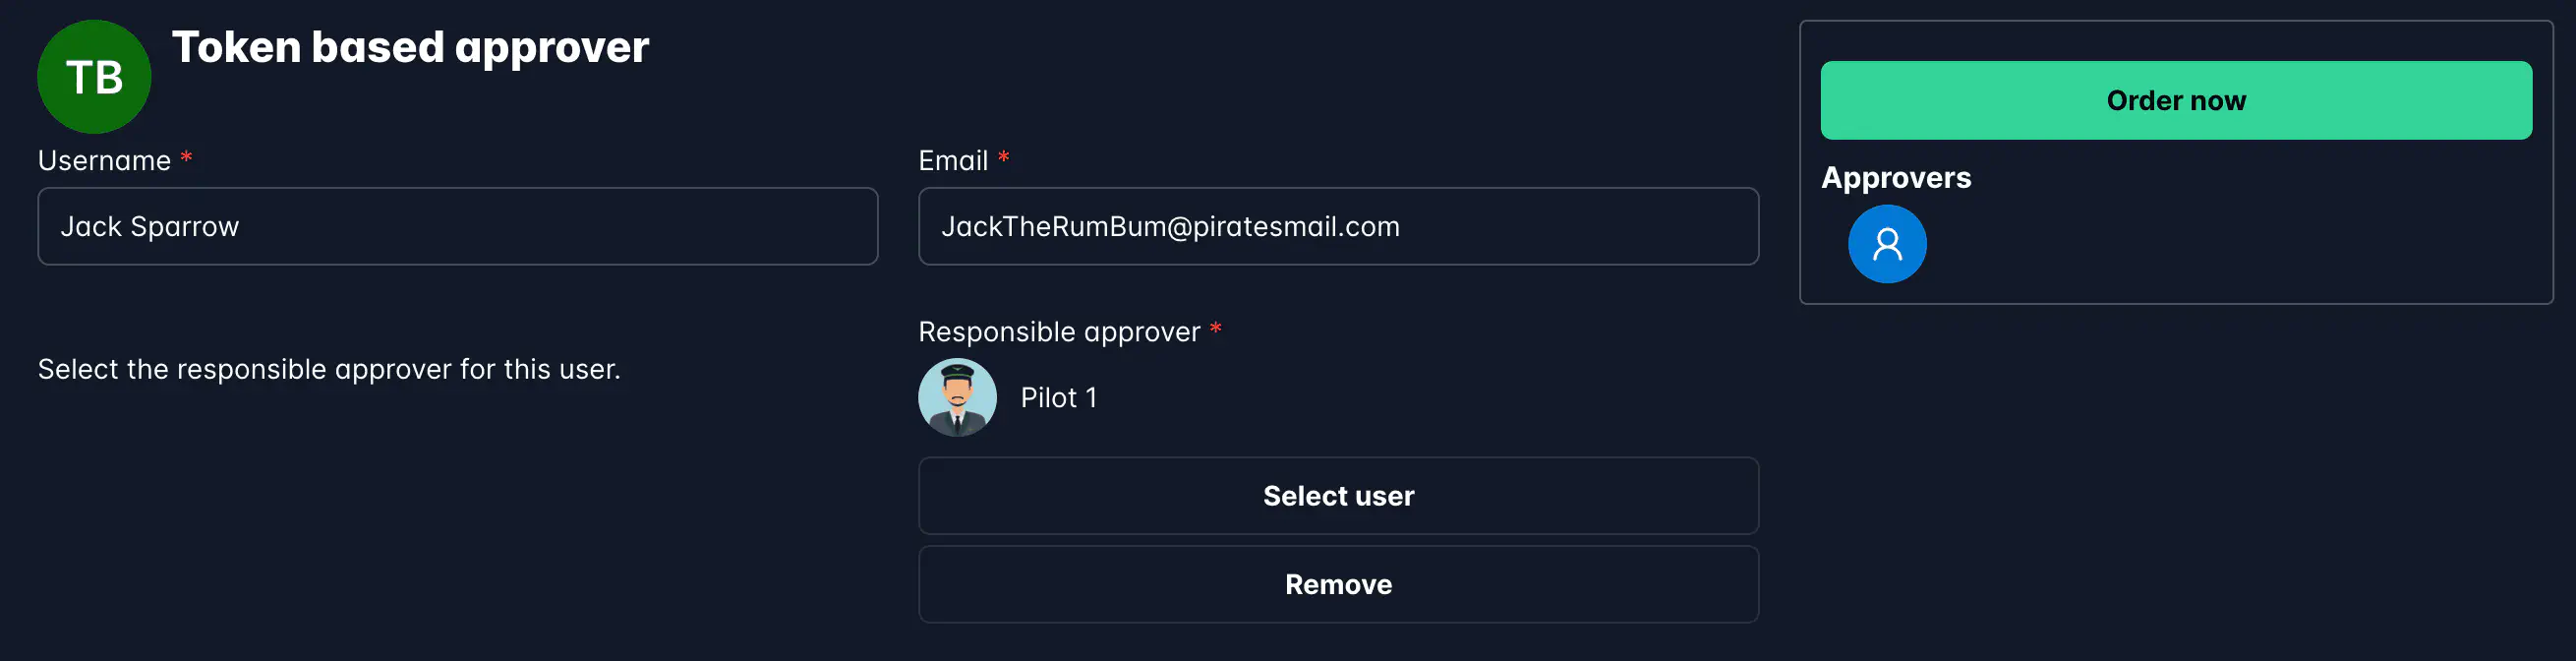
Now, Pilot 1, the selected user, receives the task and can complete the approval directly.
Approval Fallback Mechanism
If a configured approver cannot be found (for example, empty group or missing manager in AD), the fallback mechanism ensures the process continues.
Fallback rules:
- If no approver is detected → the step is assigned to a Catalog Manager.
- If no Catalog Manager exists → responsibility shifts to Workspace Admins.
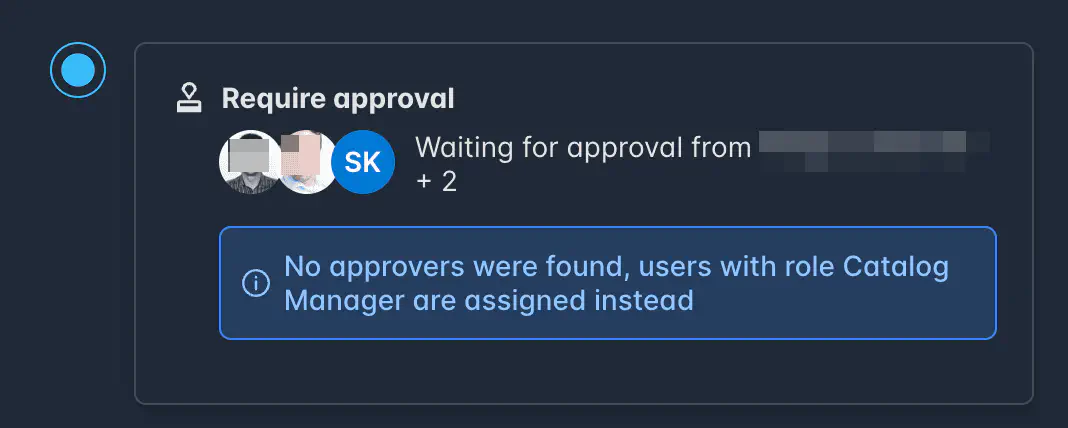
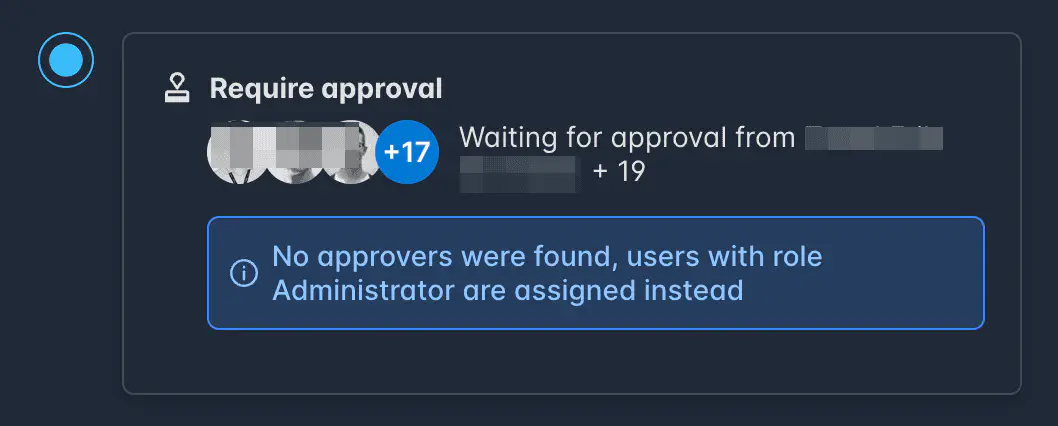
Fallback notifications include context on why it occurred and instructions for reassignment.
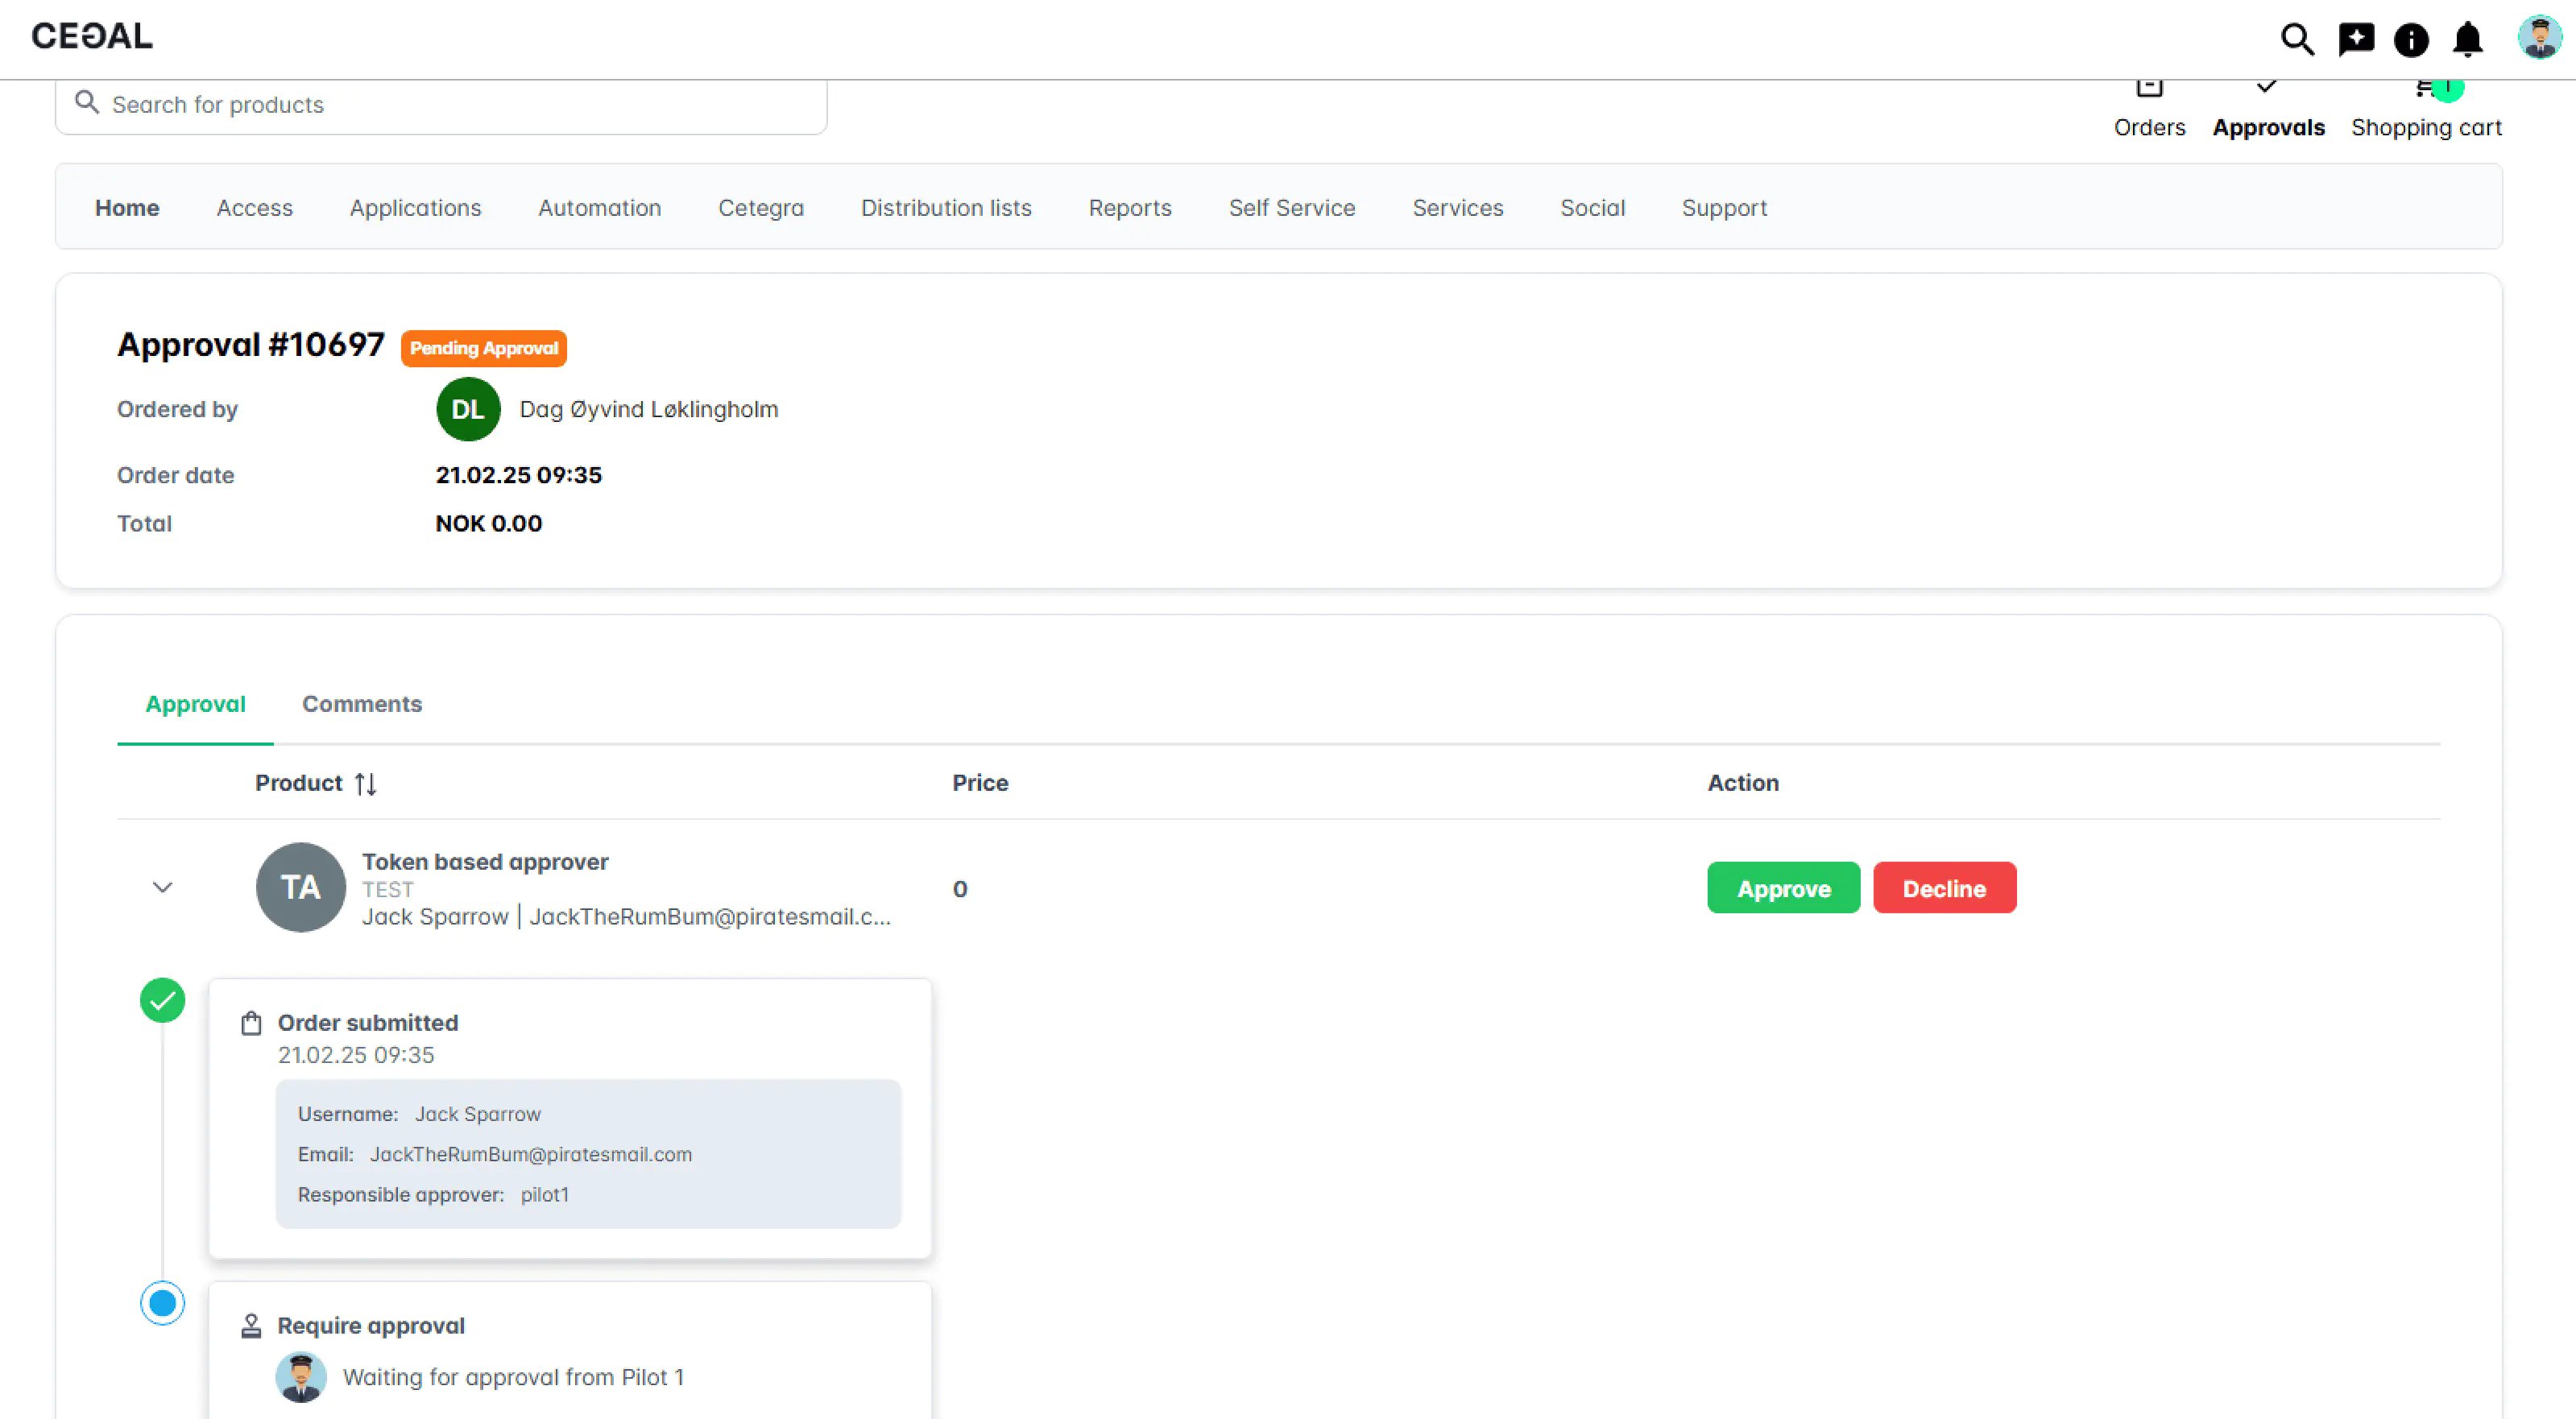
Approver Notifications When an Order Is Already Approved
When a product has multiple approvers and one approver acts on a request, the remaining approvers automatically receive a notification informing them that the order has already been handled.
This prevents other approvers from spending time reviewing an order that has already been resolved, which is particularly useful for products with large or distributed approval teams.
The step is approved as soon as one of the assigned approvers completes the approval. Other approvers receive a notification and do not need to take action.
My Products — Approver Overview
If you are assigned as an approver on one or more Catalog products, you can see all of them in one place using the My Products view.
This gives you a quick overview of your approval responsibilities across the Catalog — without having to navigate into individual categories or products to check.
📷 Add screenshot here
Managing Pending Approvals and Send Reminder Feature
Catalog Managers and Administrators can monitor all pending approvals from the Statistics module. This provides a complete overview of approvals awaiting action — both globally and per product.
In the Pending Approvals table, each row shows:
- User – who placed the order
- Product – with a clickable link
- Approvers – names of assigned approvers
- Created date
- Cart ID – with a direct link to the order
- Action button – Send Reminder
Sending Reminders
If an approval has been pending for too long, click Send Reminder next to the approval entry. This immediately sends a notification to the approver, reminding them to take action.
After a reminder is sent:
- The button changes to “Reminder sent [date/time]”
- A new reminder can be sent again after 7 days, if needed
This feature helps Catalog Managers maintain momentum in workflows and prevent delays in approvals.
Read more about how reminders work in the Statistics module documentation.