Products
A product is an item in the Catalog. It can represent a physical item (like a laptop, T-shirt, or balloons) or a digital item (such as a software license, system access, or form-based service request).
Every product belongs to a category — read more about categories here.
Add a Product
ℹ️ Currently, products can only be added manually. API integration for third-party suppliers is planned for a later phase.
You can add new products in two ways:
- From scratch, by creating a new product inside a category.
- Using a template, available from the Product Wizard.
To add a new product from scratch:
- Go to the category where the product should appear.
- Click Add Product.
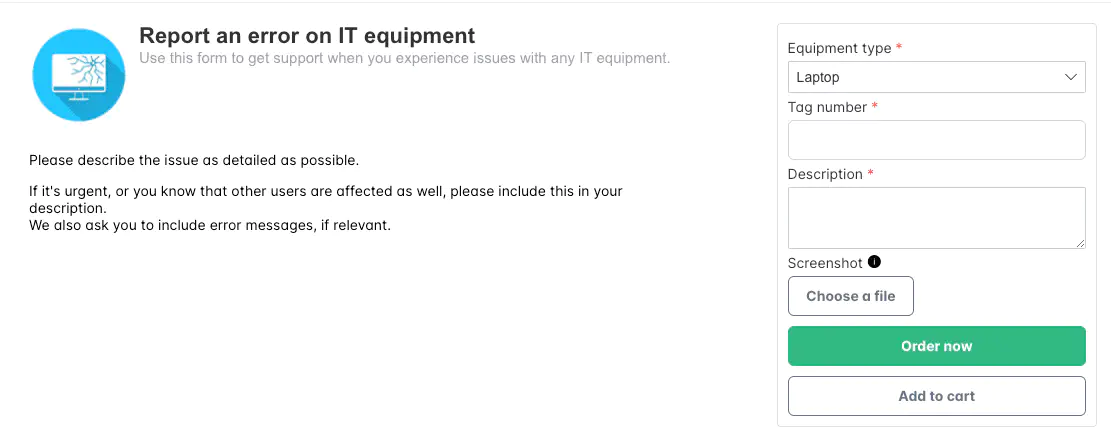
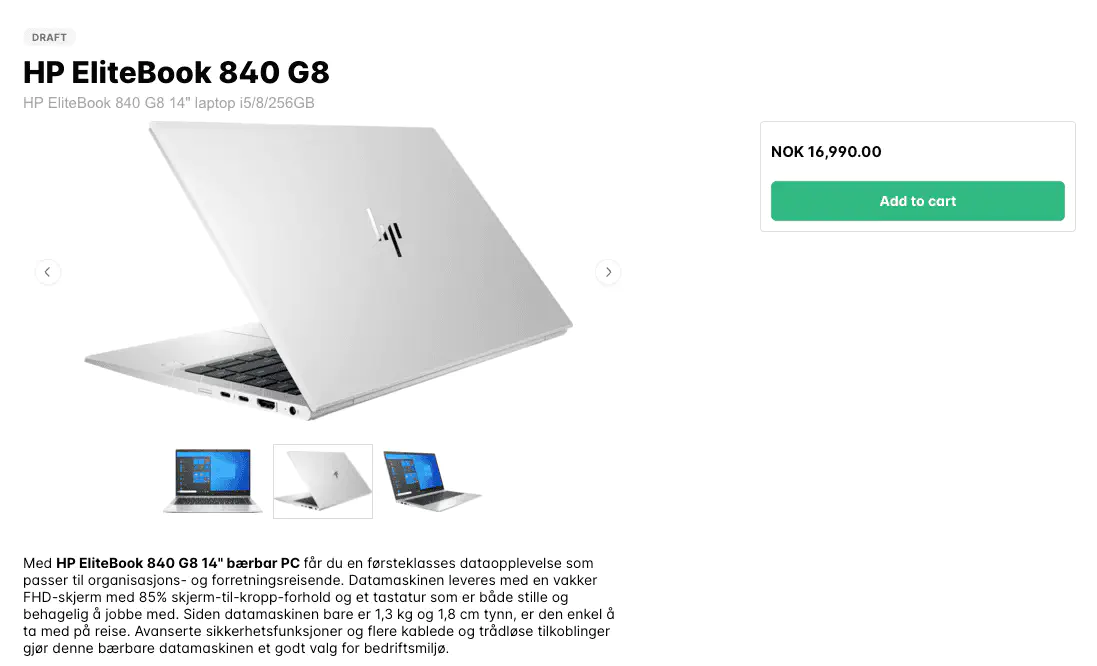
In the example below, a new product is being added to the Laptop category (a subcategory of Equipment).

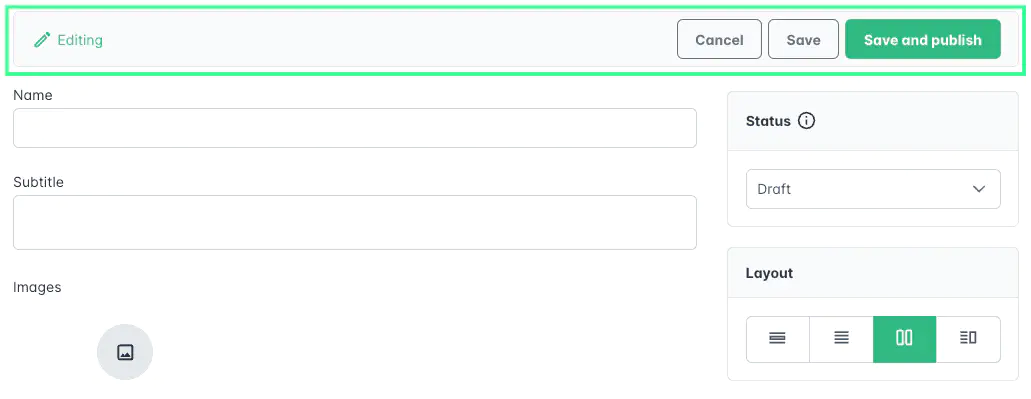
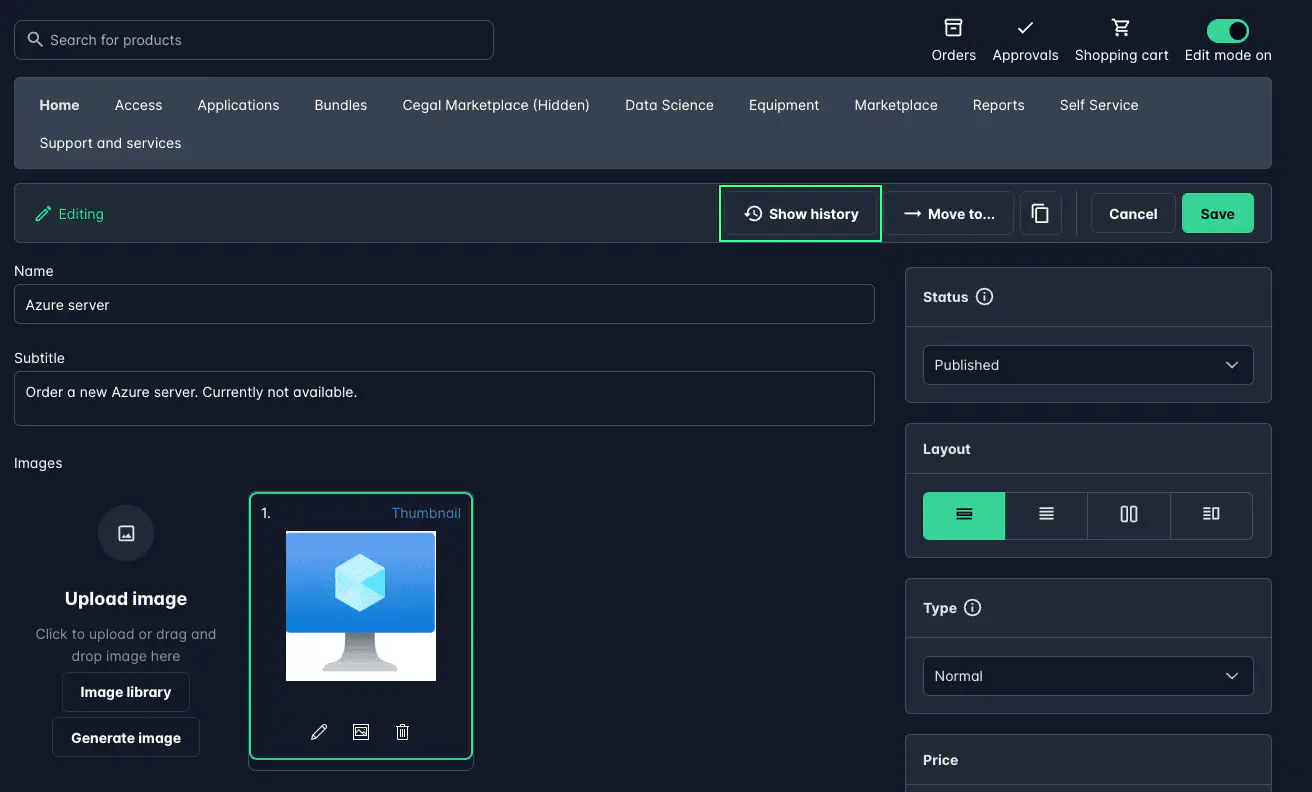
1. General Information
In the General section, add the product’s basic details.
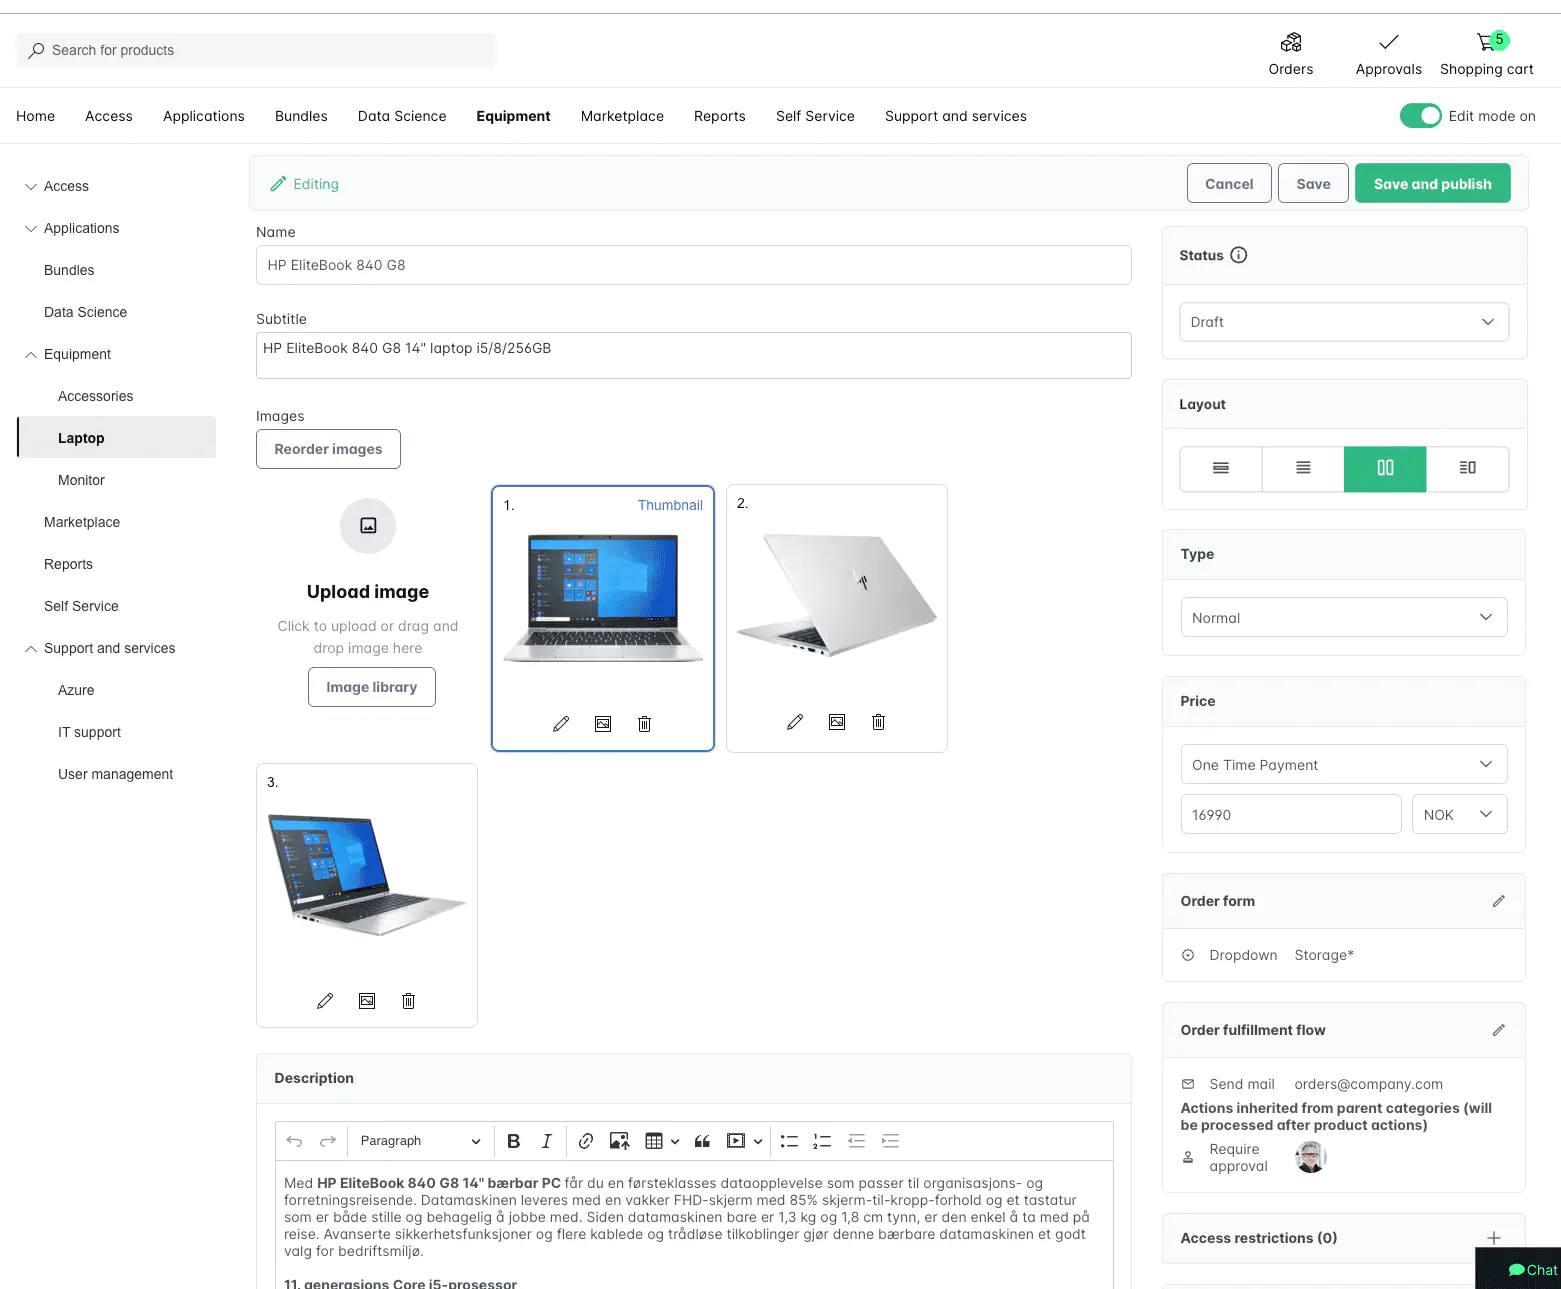
Product Fields
Name: The product’s main title.
Subtitle: Appears directly below the product name.
Description: A text area supporting formatted content (rich text, copy-paste from Word or HTML).
Layout: Choose how the product’s form and images are displayed:
Layout Options
- Spacious form with centered images: Ideal when both images and input forms should be in focus.
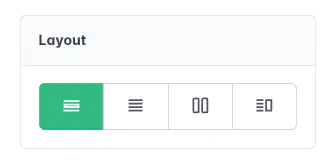
- Spacious form: Focuses on the form with a smaller image at the top-left.
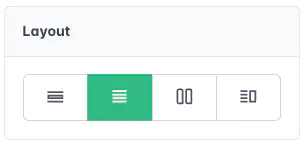
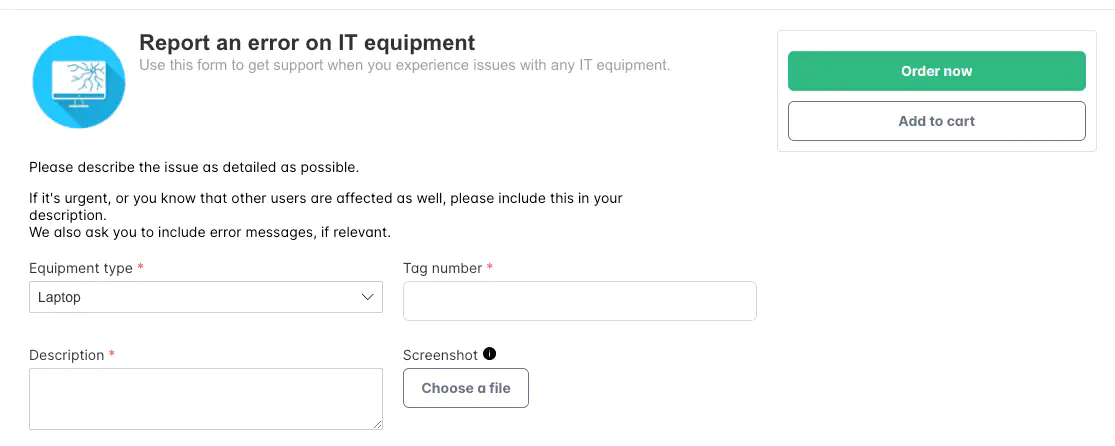
- Compact form with centered images: Displays the form to the right, keeping images in focus.
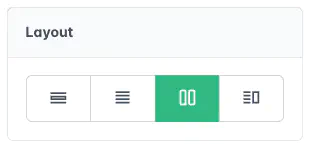
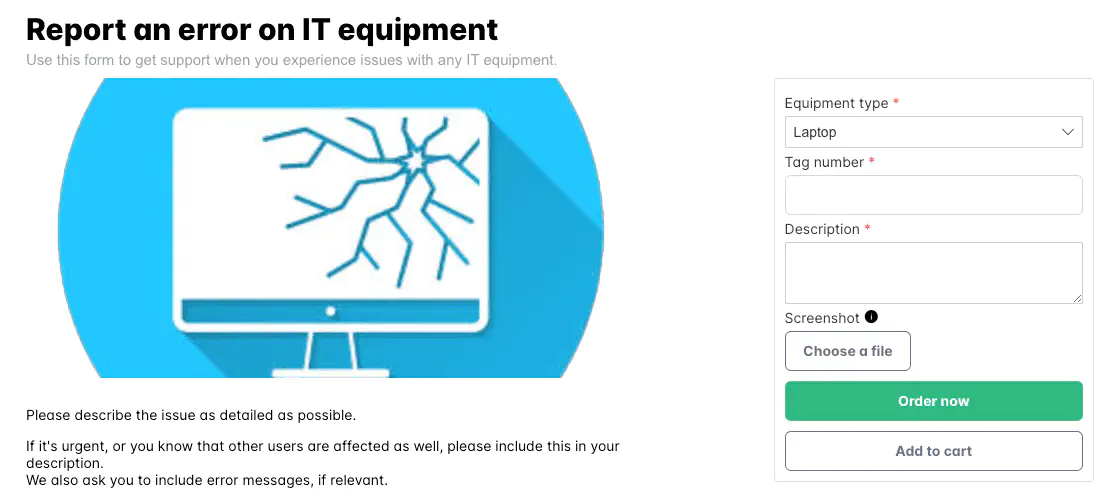
- Compact form with image at top left: Displays the image smaller and keeps the form at the side.
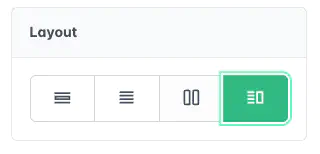
- Spacious form with centered images: Ideal when both images and input forms should be in focus.
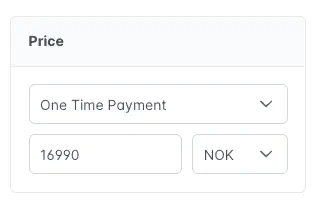
Price/SKU: Enter price and select currency and payment type — Free, One-time, Recurring, or Unspecified. When a product is set to Free, a “Free” badge is displayed on the product page in the Catalog, so end users can immediately see that ordering it incurs no cost.
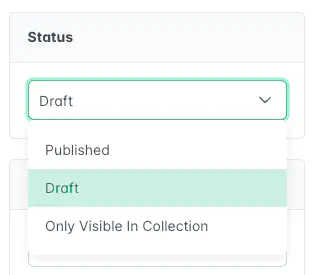
Status:
- Draft – Not visible to end users.
- Published – Visible in the Catalog.
- Only visible in collections – Visible only through product collections.
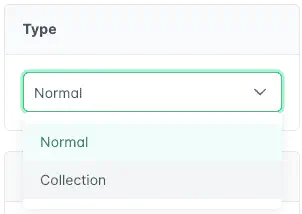
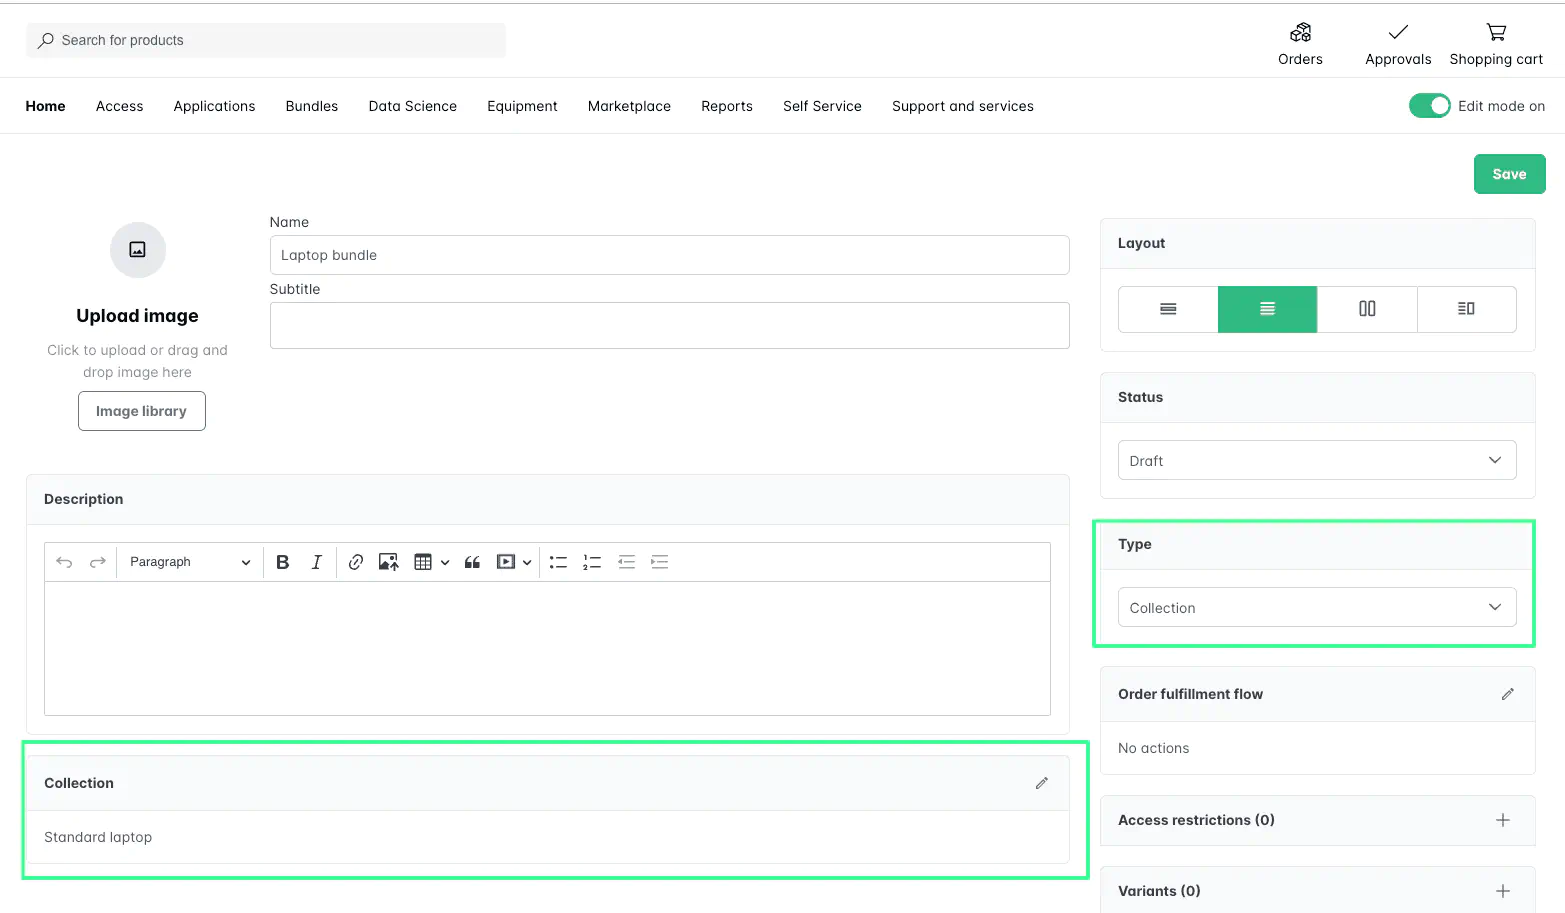
Type:
- Normal – Standard product type.
- Collection – A bundle of multiple products (see Collections).
2. Images
A product can have one or more images. If no image is added, the system automatically uses the product’s initials on a colored background.
You can upload images or choose existing ones from the Image Library. Cropping and editing tools are available — learn more about them here.
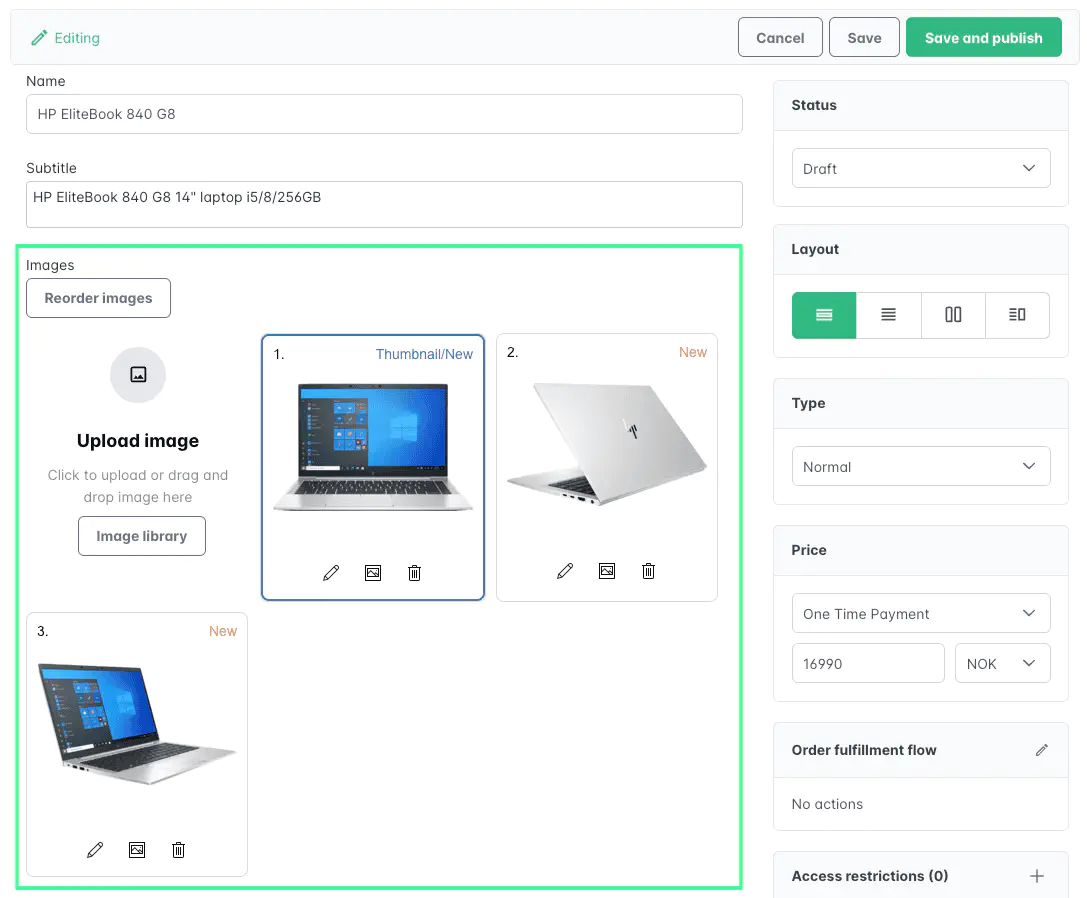
- Click Thumbnail to mark the main image.
- Use Reorder Images to change their display sequence.
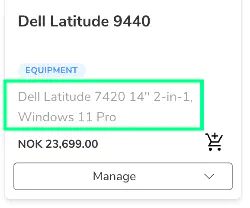
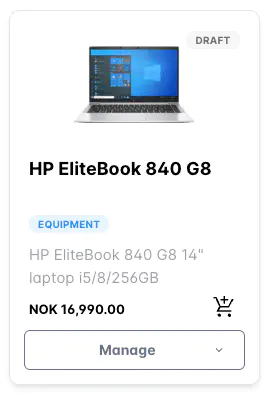
Thumbnail example (as shown in a category):
Full product gallery example:
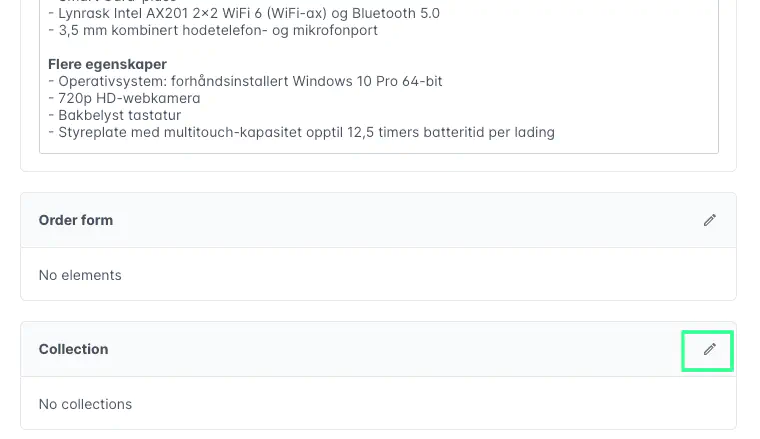
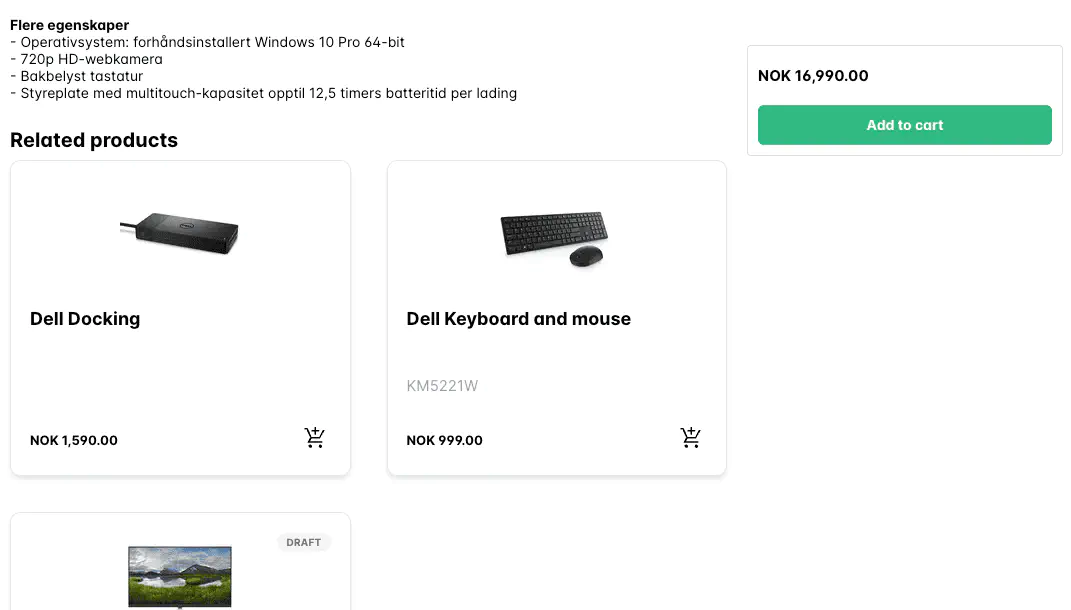
3. Related Products
Related products appear below a product’s description, helping users discover similar or complementary items.
To configure:
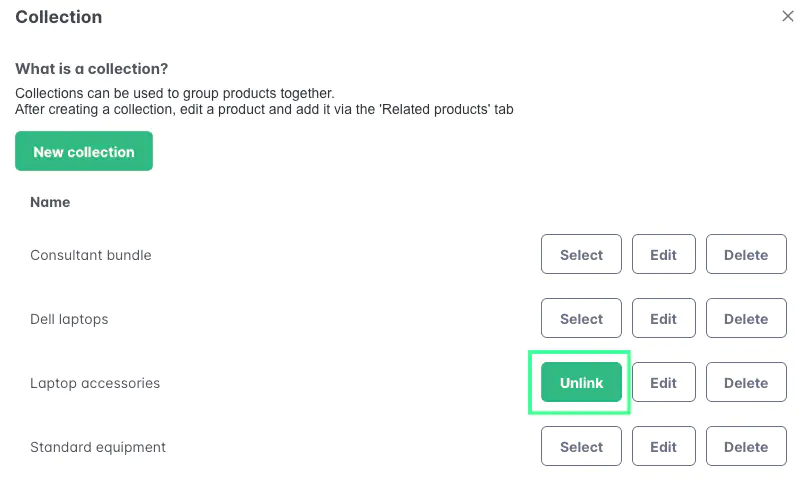
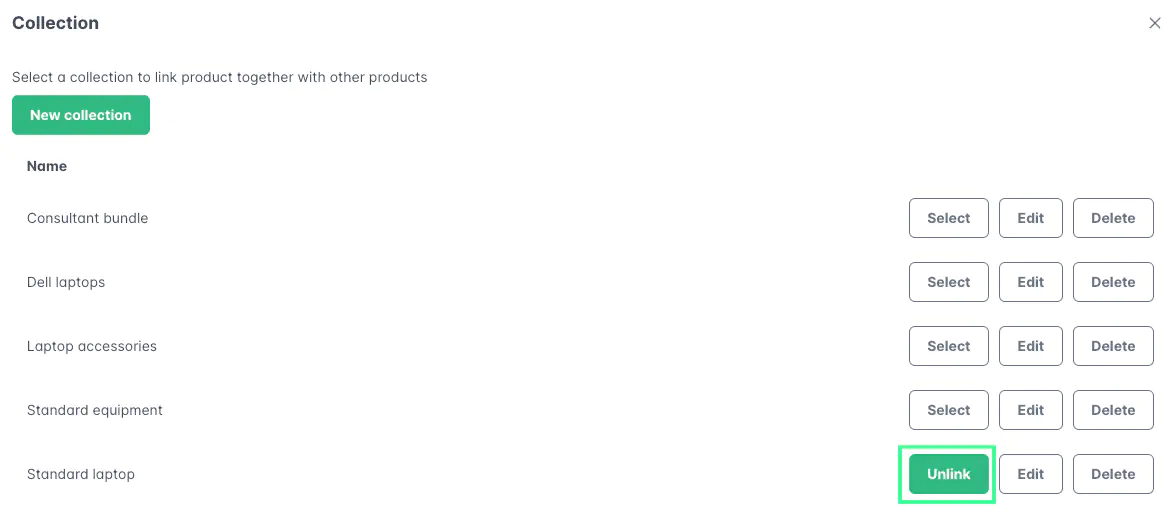
- Scroll to the Collections area in the product editor.
- Click Edit, then select or create a related product collection.
Once linked, related products will be displayed below the main product description:
Read more about collections here.
4. Restrict Access
Products can be made visible only to specific users or groups. Access control is handled through Active Directory (AD) groups.
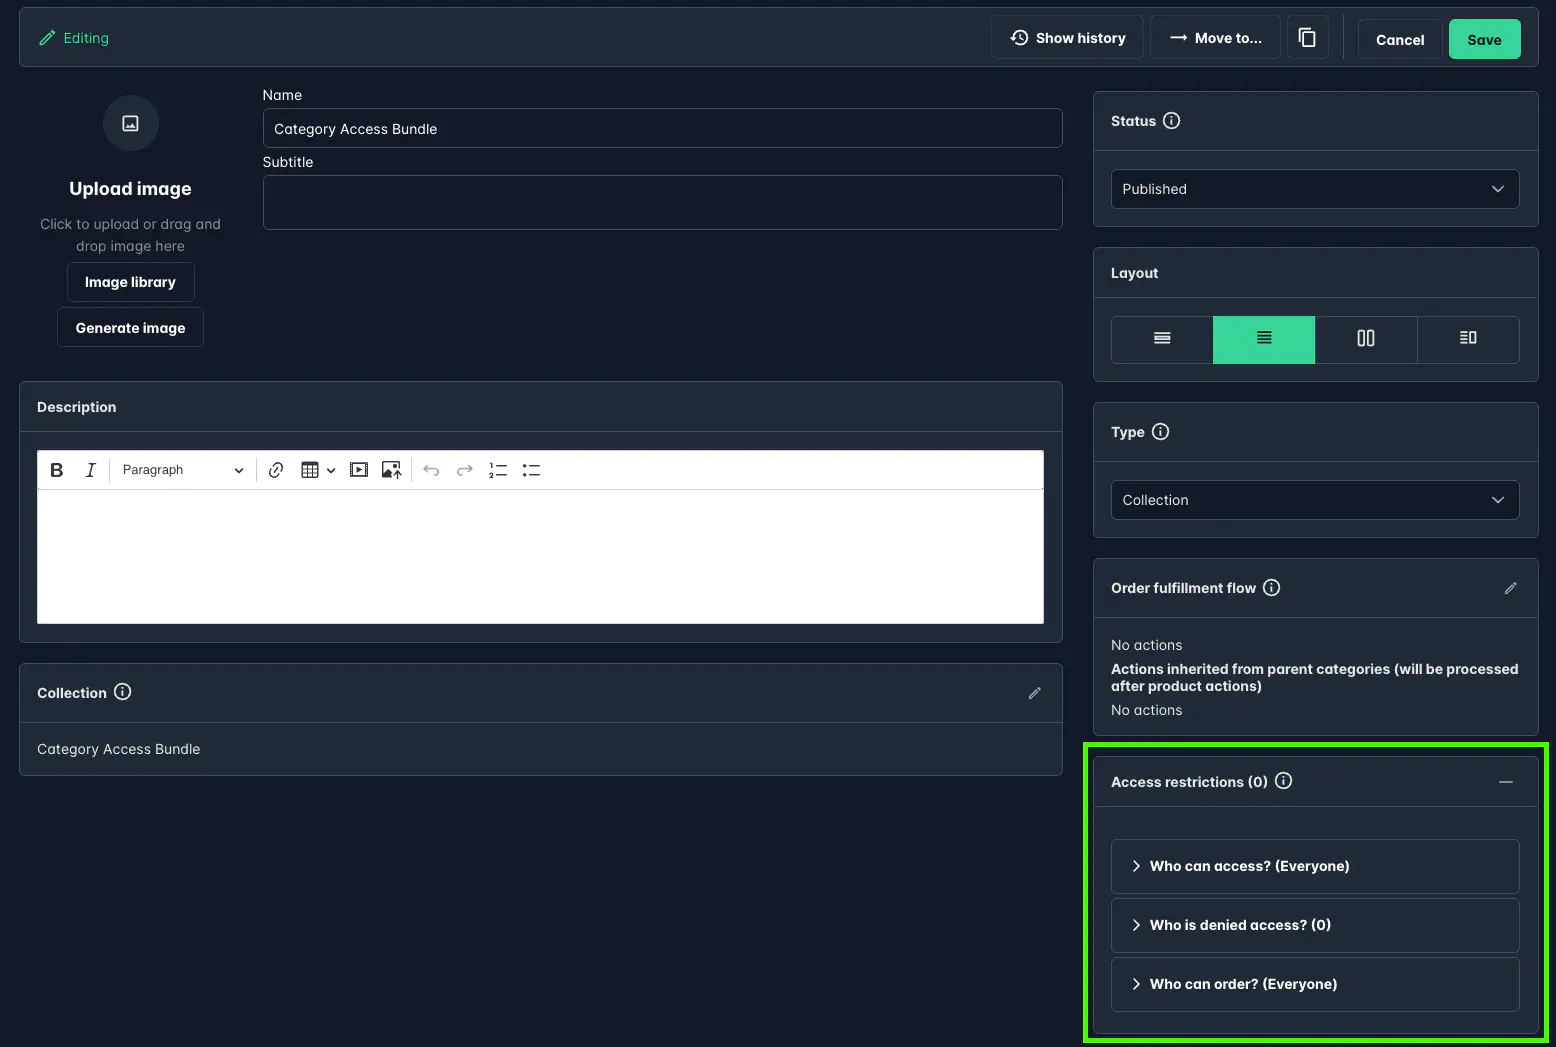
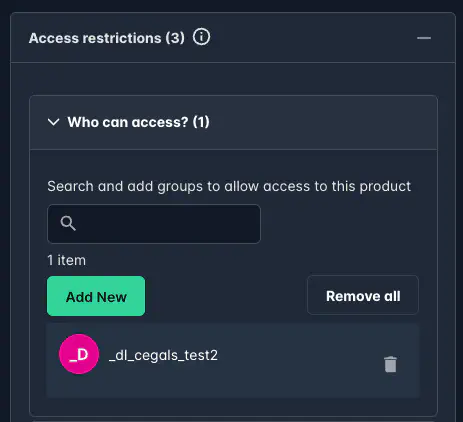
Who can access?
Only members of the selected groups can access the product.
- Click Add New to select one or more groups.
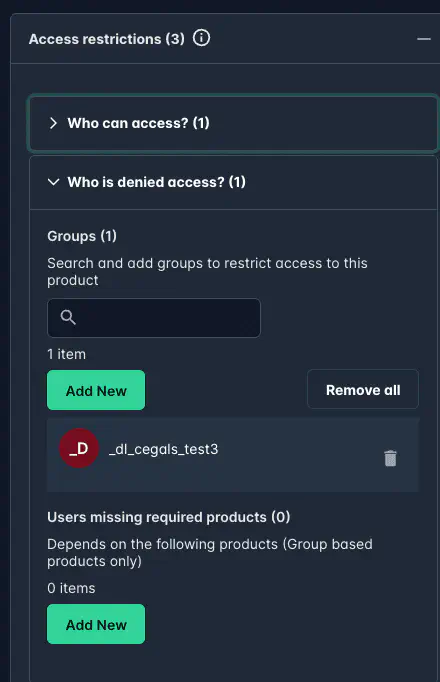
Who is denied access?
Groups
Members of the following groups can not access the product.
- Click Add New to select one or more groups.
Products
Users missing the selected required products cannot access this product.
Note that this is for group based products only.
- Click Add New to select one or more products.
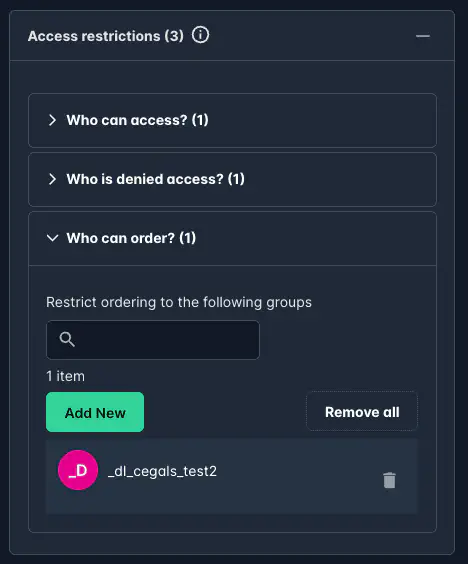
Who can order?
Only members of the selected groups can order the product. The product will be visible for everyone.
- Click Add New to select one or more groups.
5. Order Form
The Order Form lets you gather user input before an order is placed. This is ideal for capturing configuration choices, delivery details, or approval data.
💡 The position of the order form depends on the selected product layout.
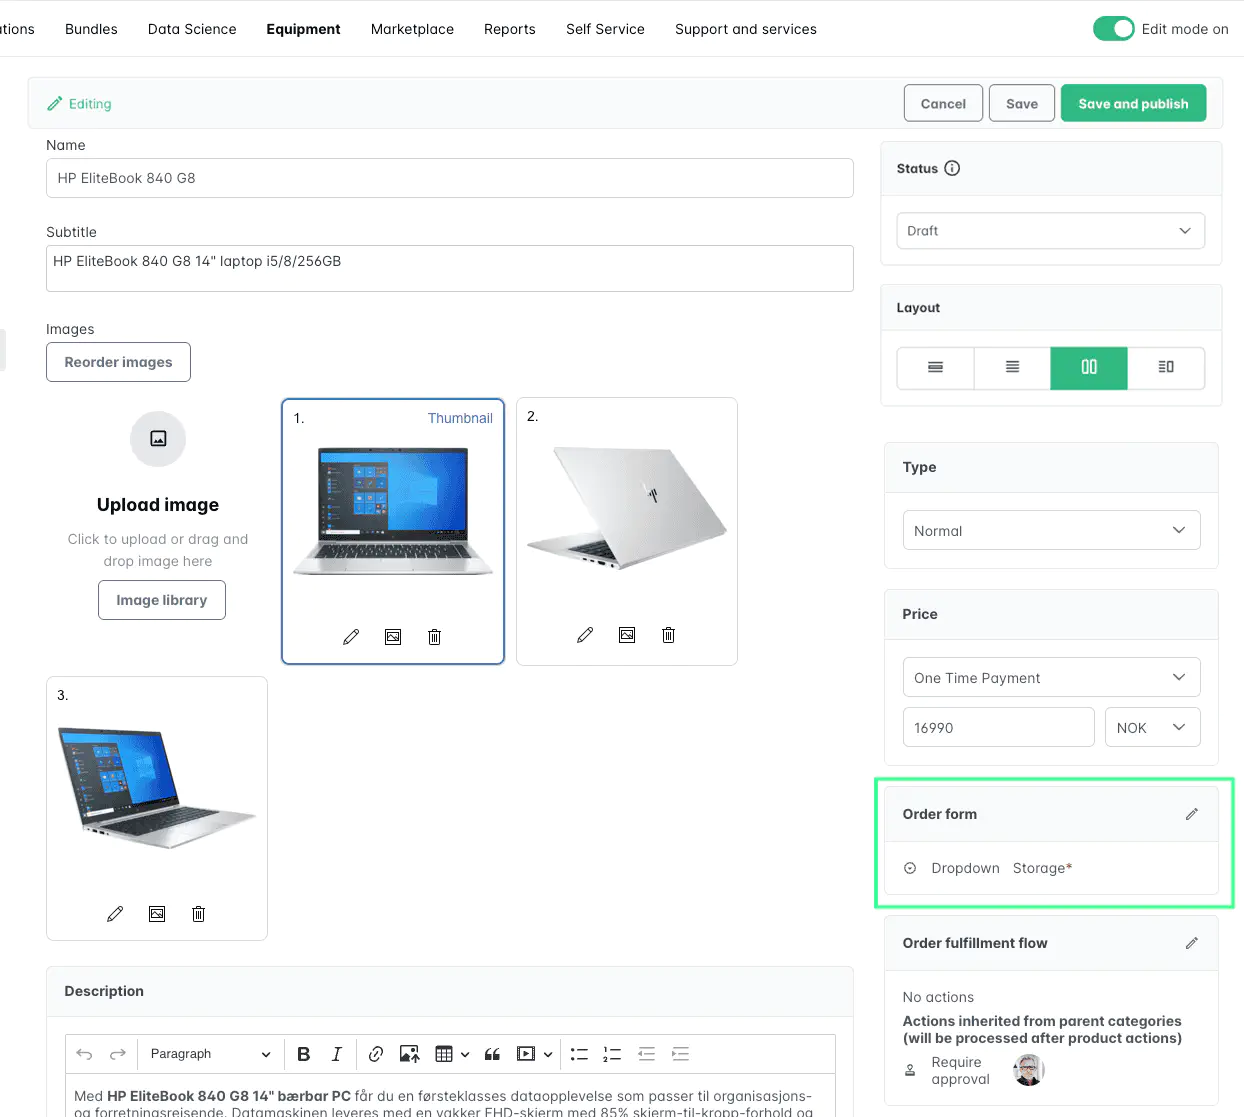
Click Edit to open the form builder and add input elements.
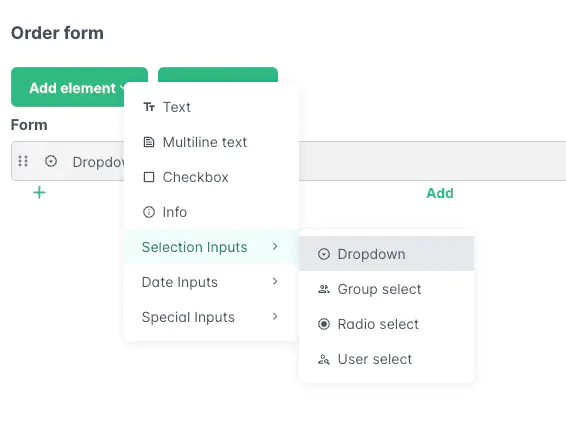
Read more about forms here.
6. Order Fulfillment Flow
The Order Fulfillment Flow defines what happens after an order is submitted.
By default, a product inherits actions from its category (see Category actions). You can disable this inheritance by checking Disable inheritance.
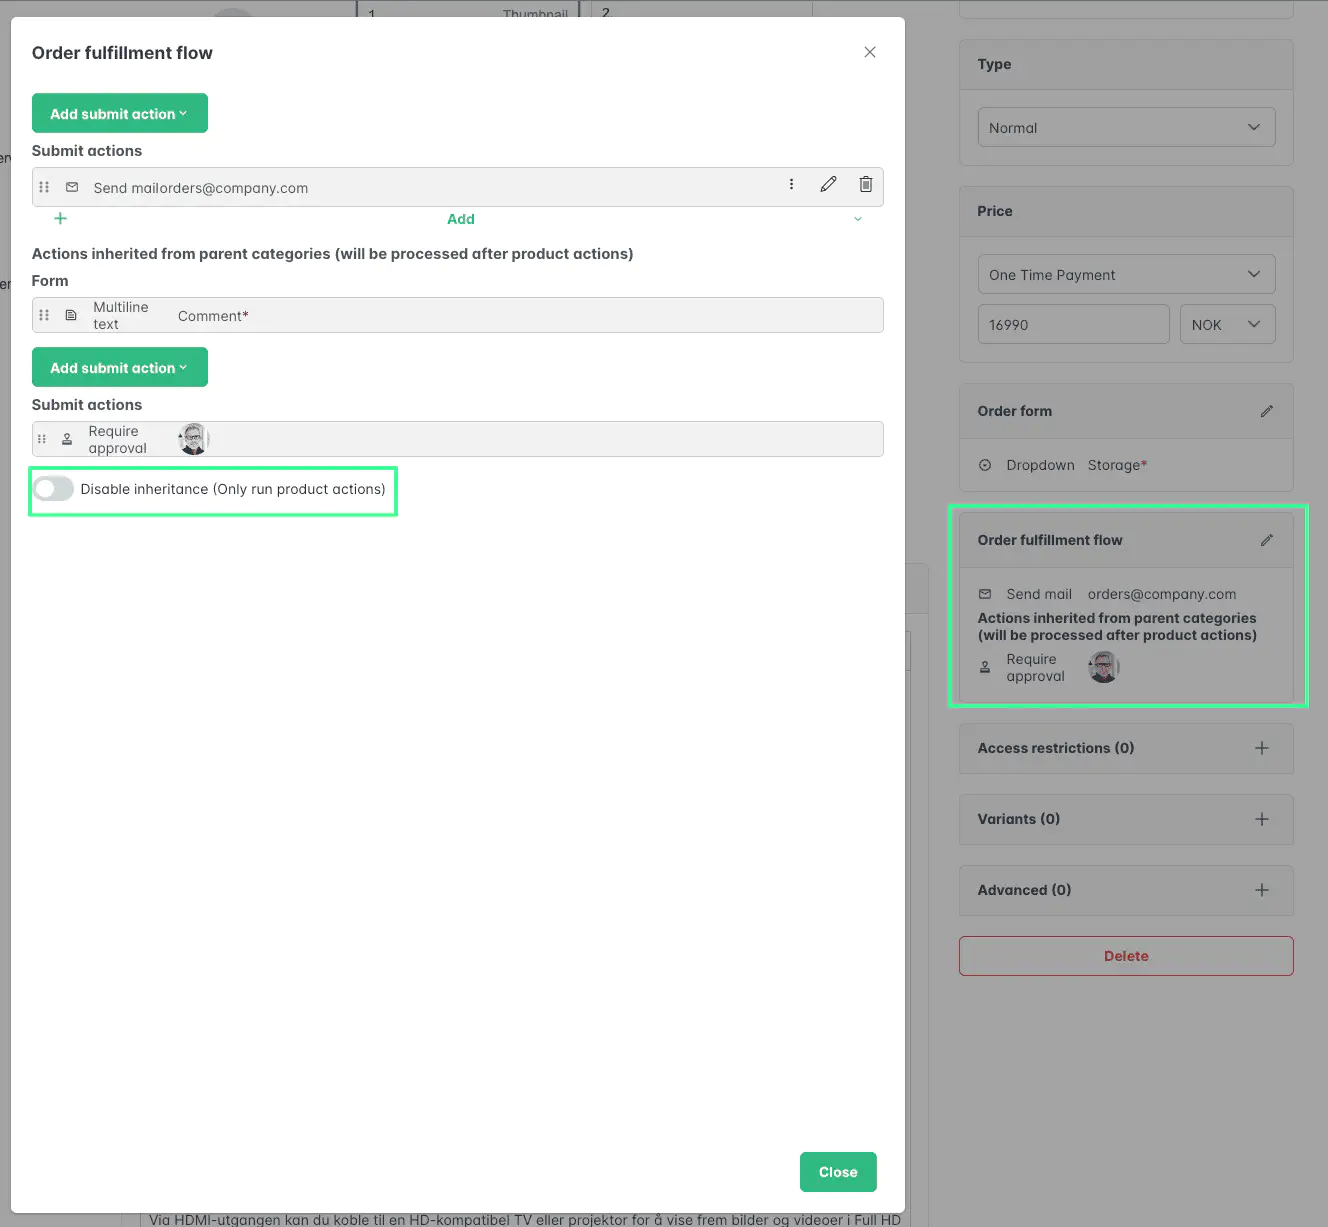
Product-level actions always run before inherited category actions. Read more about fulfillment actions here.
7. Variants
The Variants feature lets you define different prices or images based on user selections in the form (for example, color, processor type, or size).
To use variants:
- Add a dropdown or radio button input in your form.
- Give each field a token name.
- Enable Use field to create product price variant or Use field to create product image variant.
Example: defining variants for Processor and Hard Drive options in a laptop product.
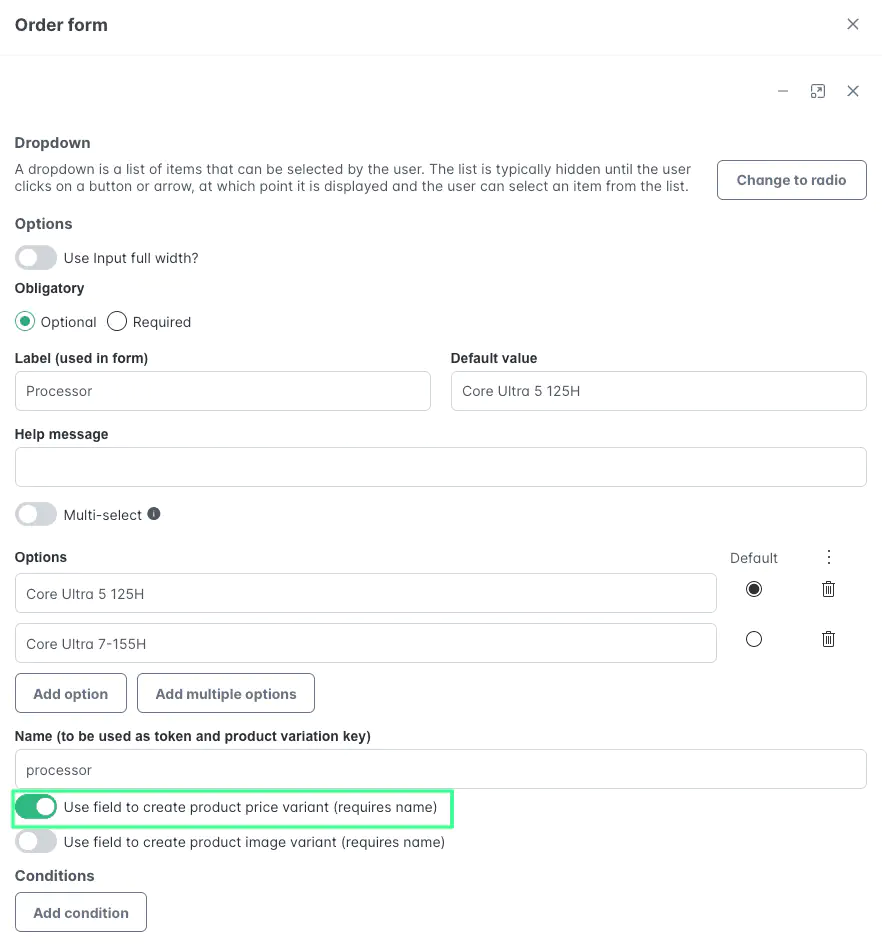
Once configured, you’ll see a table of all variant combinations. Set a price for each or leave blank to use the base product price.
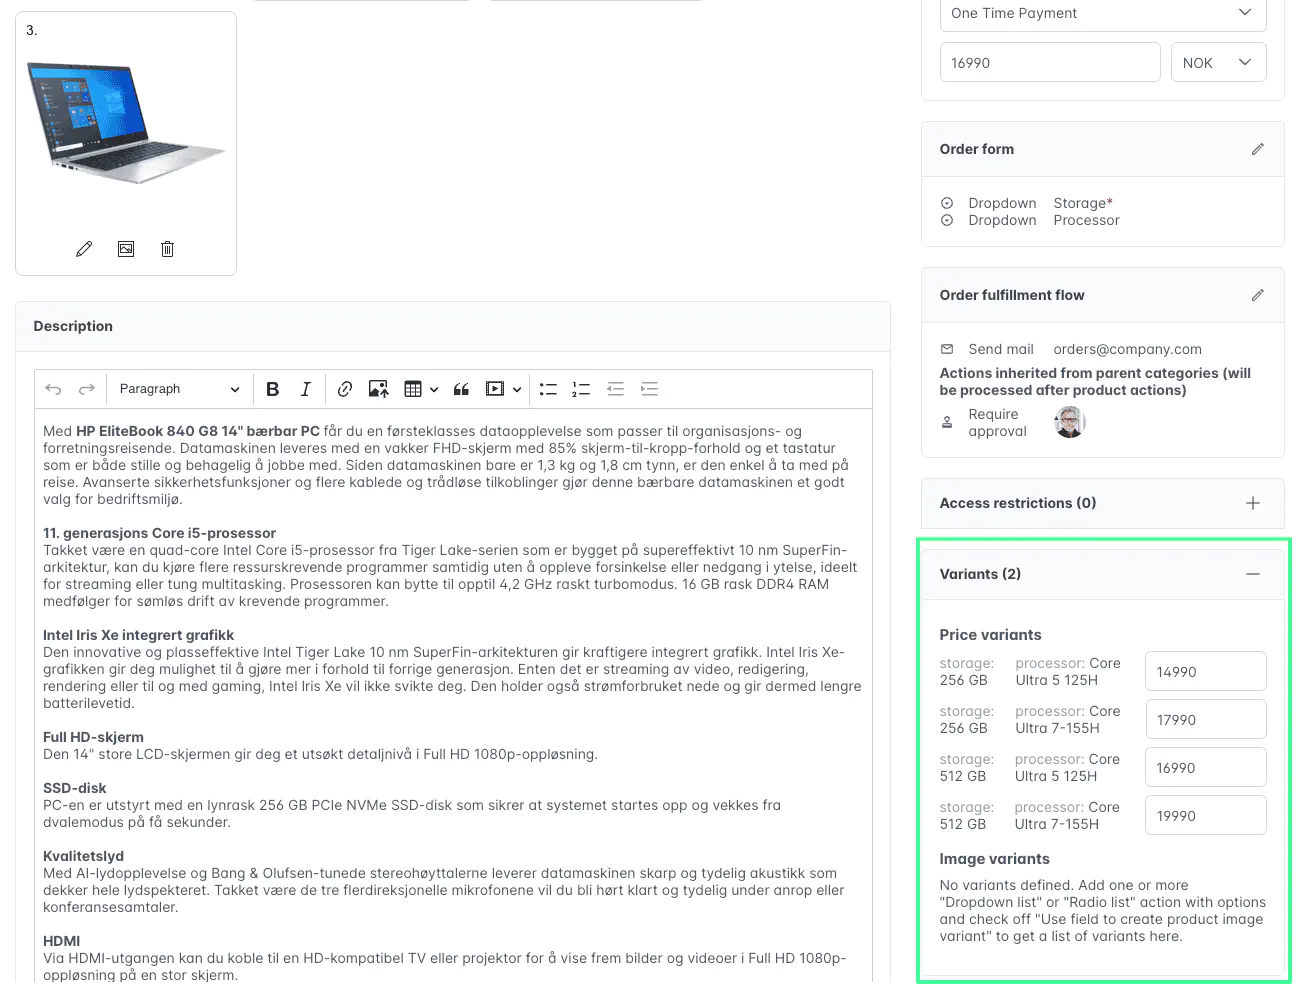
You can also define image variants — for instance, showing different product images based on color selection.
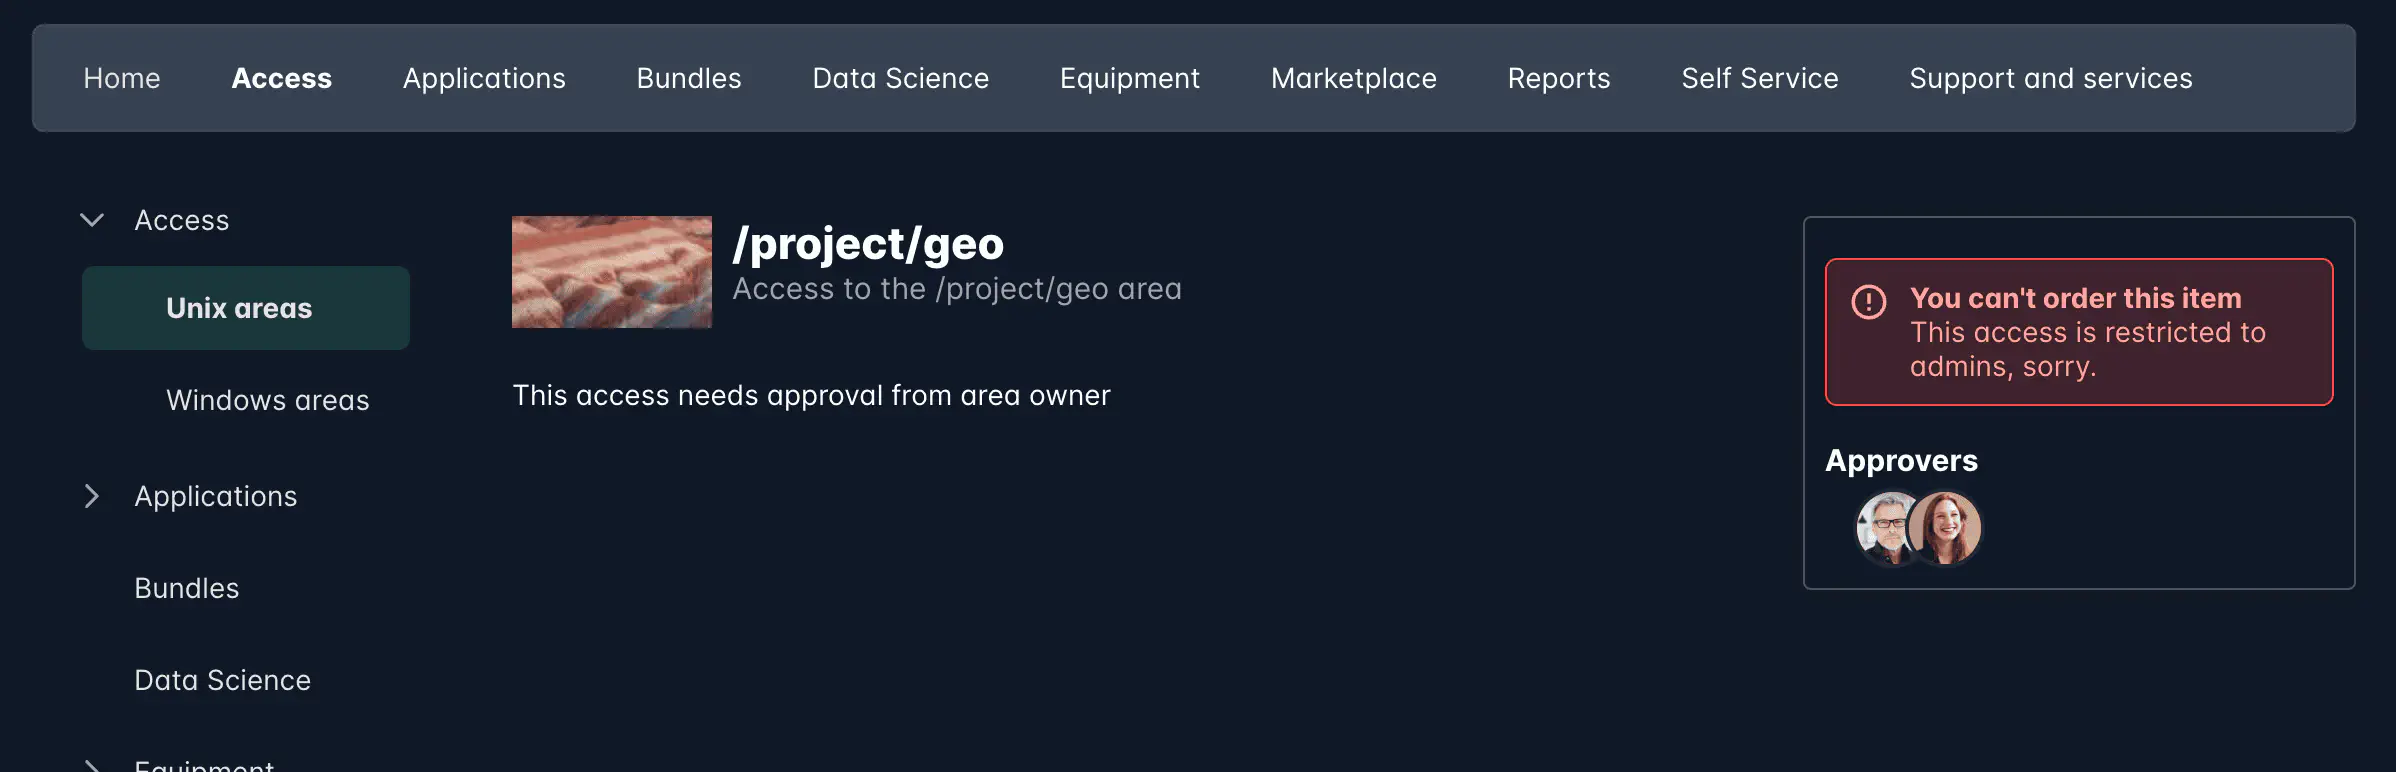
8. Messages
The Messages feature allows Catalog Managers to create custom alerts or notifications that are shown to end users directly on the product page. Messages can be configured to appear under specific conditions, or they can override the default system alerts.
You can find this feature in the Messages section when editing a product. Click + Add message to open the configuration panel.
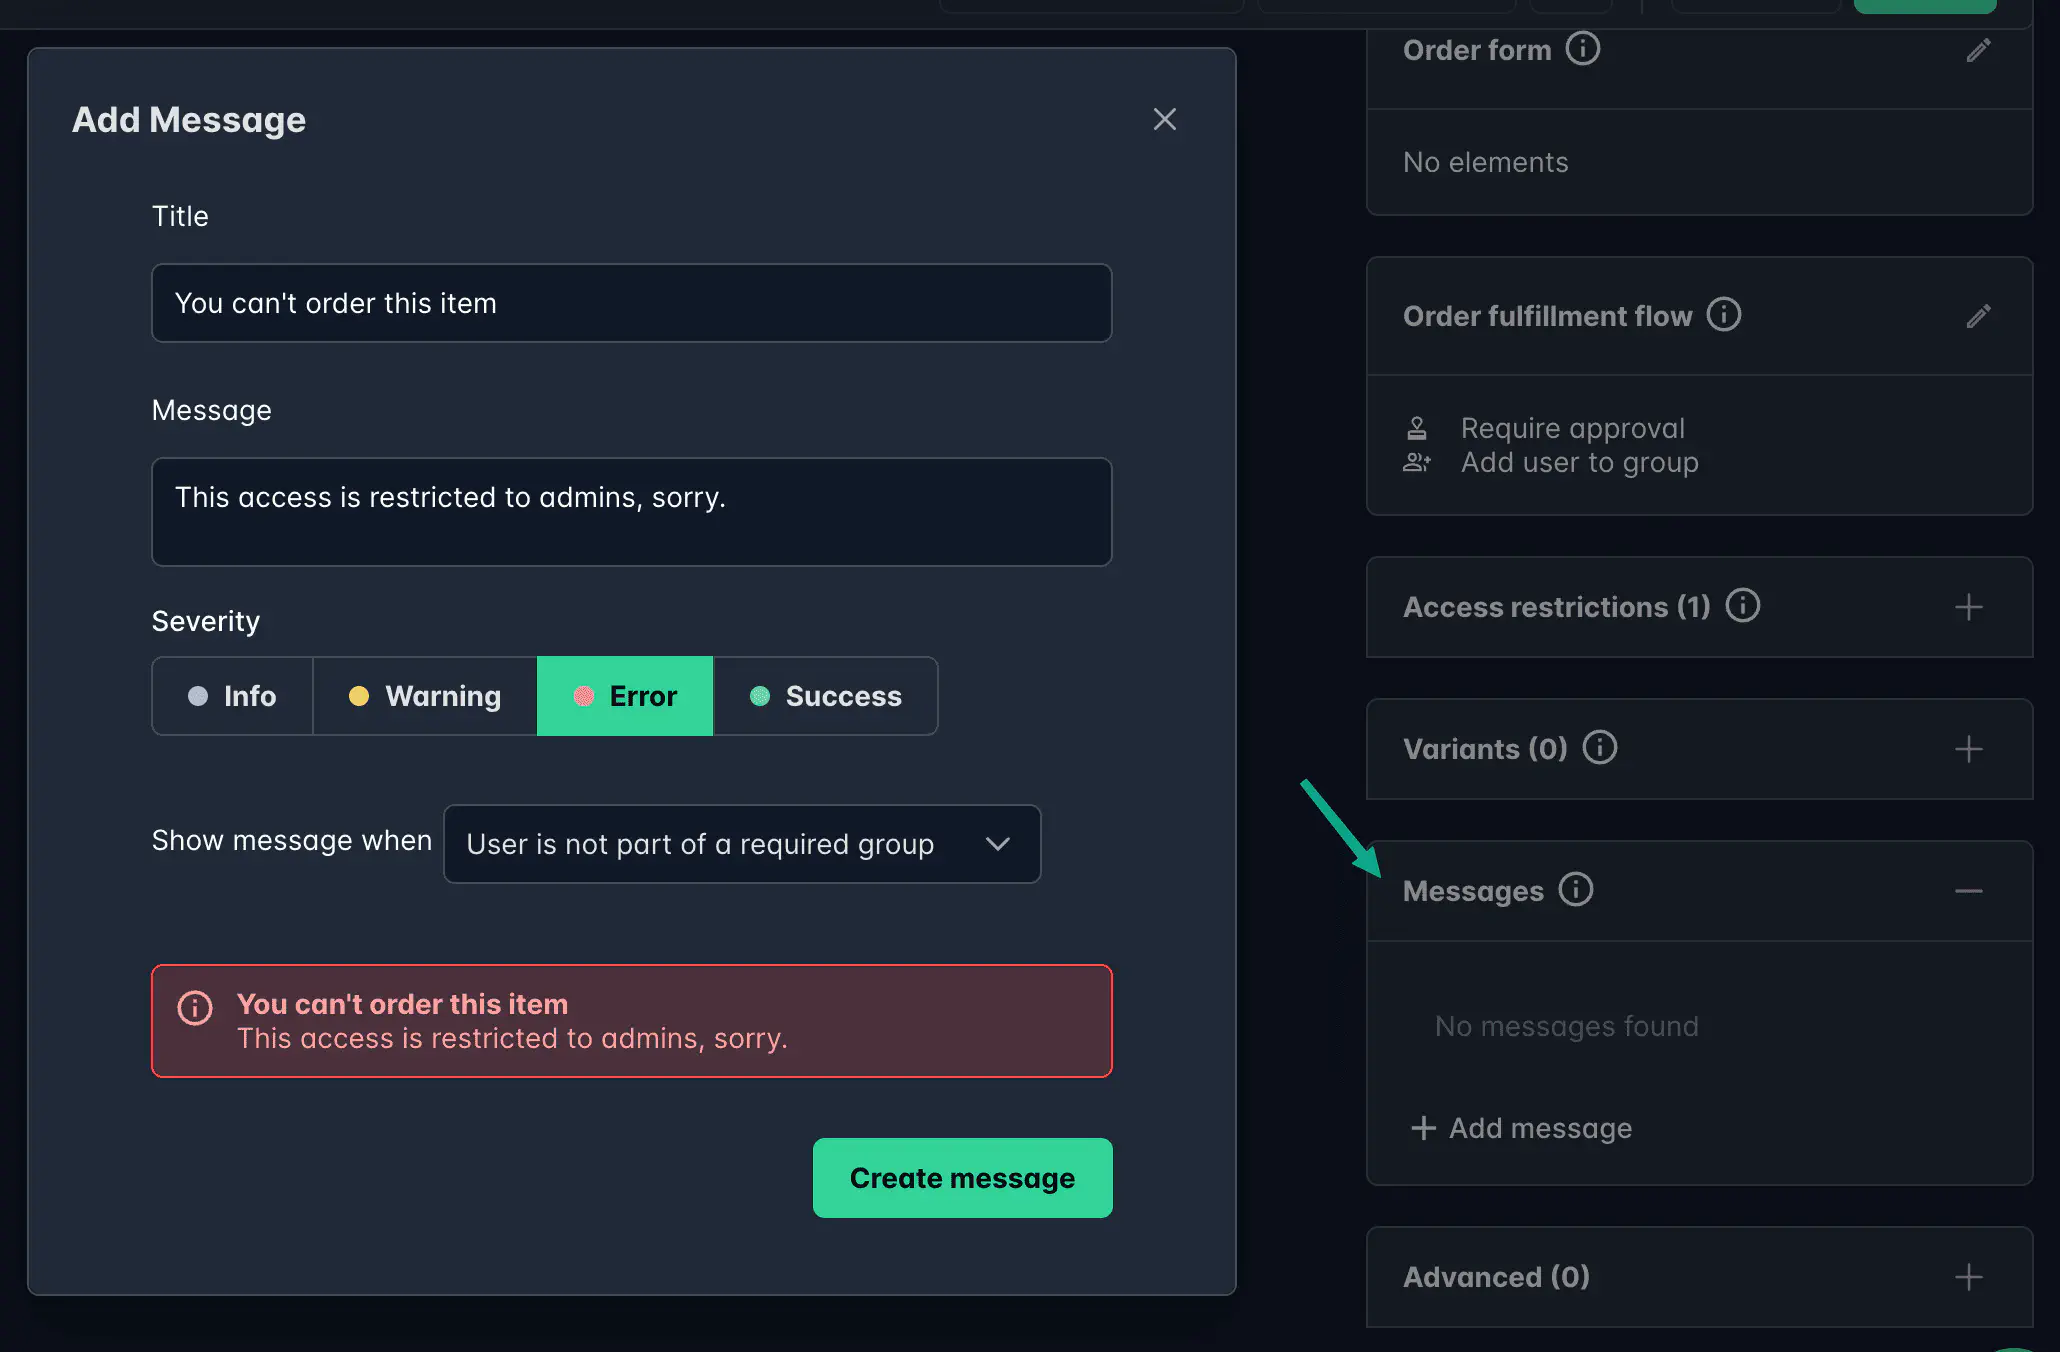
Enter a Title and a Message, and then choose the Severity level:
- Info – Blue color, used for general information
- Warning – Yellow color, used for cautionary messages
- Error – Red color, used for blocking or critical alerts
- Success – Green color, used for confirmations or positive outcomes

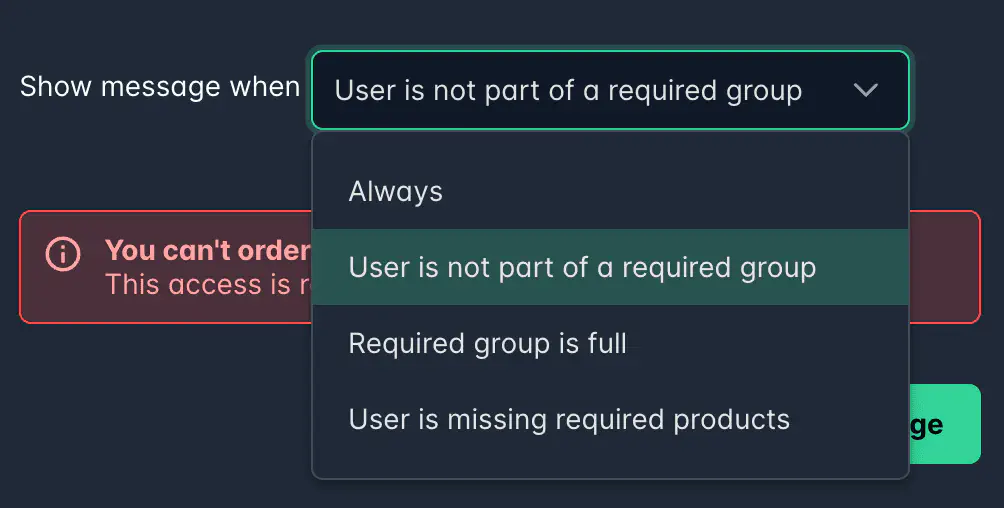
You can control when the message should appear:
- Always – The message is always visible to the user.
- User is not part of a required group – Overrides the default access restriction message if the user is not part of a required group.
- Required group is full – Displays a custom message when a target group (defined in Add user to group actions) has reached its limit and the user cannot order.
- User is missing required products – Overrides the default message when access is restricted because the user is missing prerequisite products.
- Already added to group – Shows a message when the user accesses a product in the Catalog but is already a member of the target group.
The configured message is displayed in Preview mode at the bottom of the configuration window, making it easy to review and adjust the final appearance.
For a normal user, the message appears prominently on the product page:
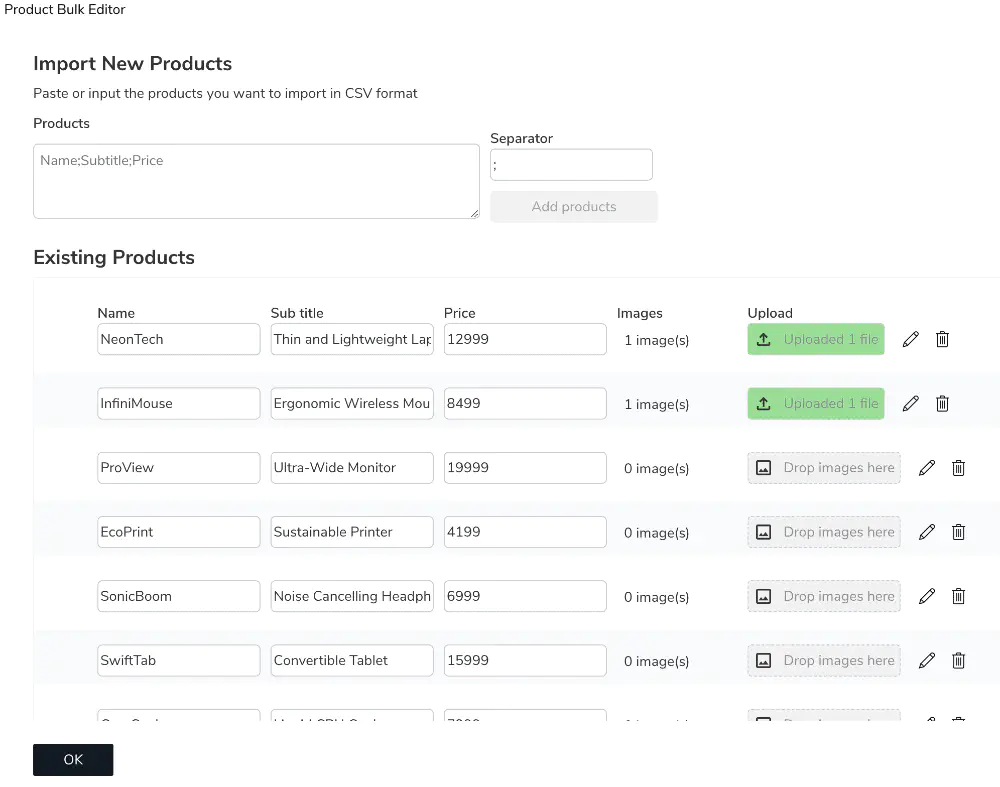
Product Bulk Editor
You can import or edit multiple products at once within a category.
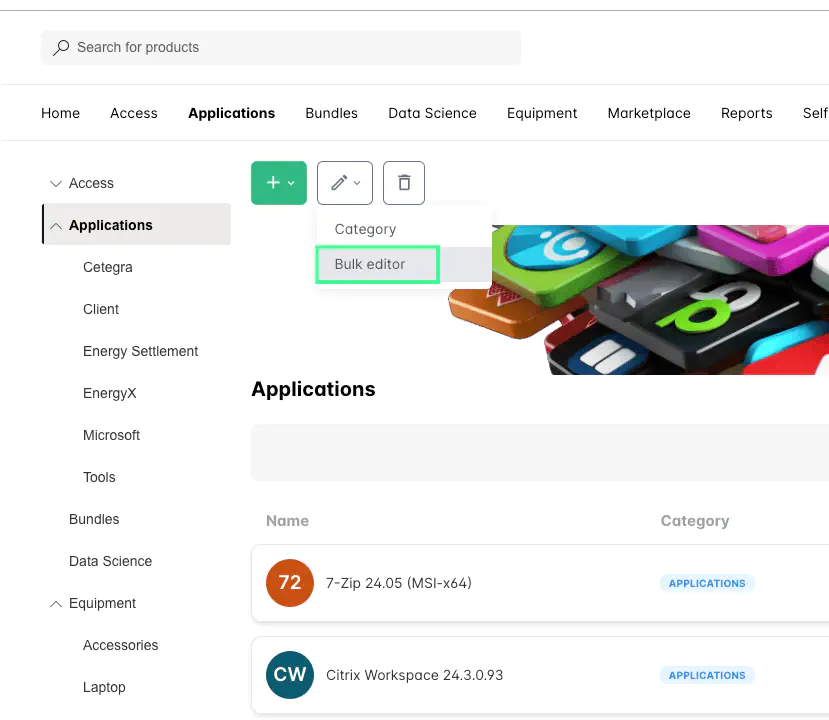
The import format is CSV:
Name, Subtitle, Price
- Use a plain number for price (no commas or currency symbols).
- Choose your preferred separator.
Example importing 20 fictitious IT products:
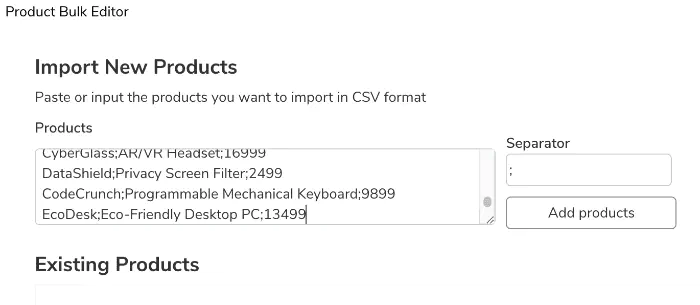
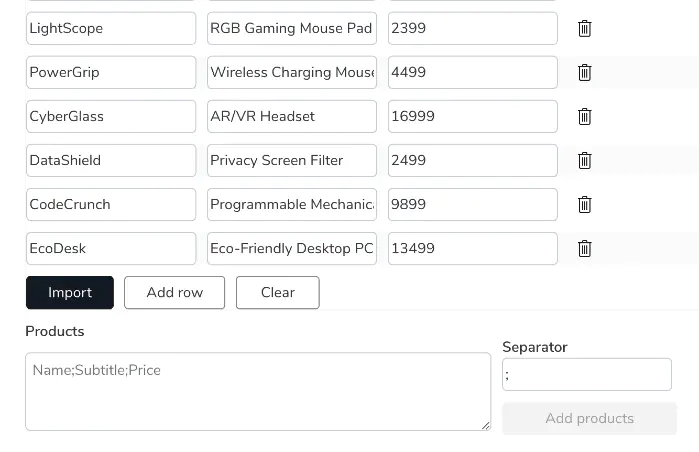
After pasting data, click Add Products. Review and edit the buffered data, then click Import to finalize.
Collections
Collections connect multiple products together — either as related products or as bundled collections that can be ordered as one.
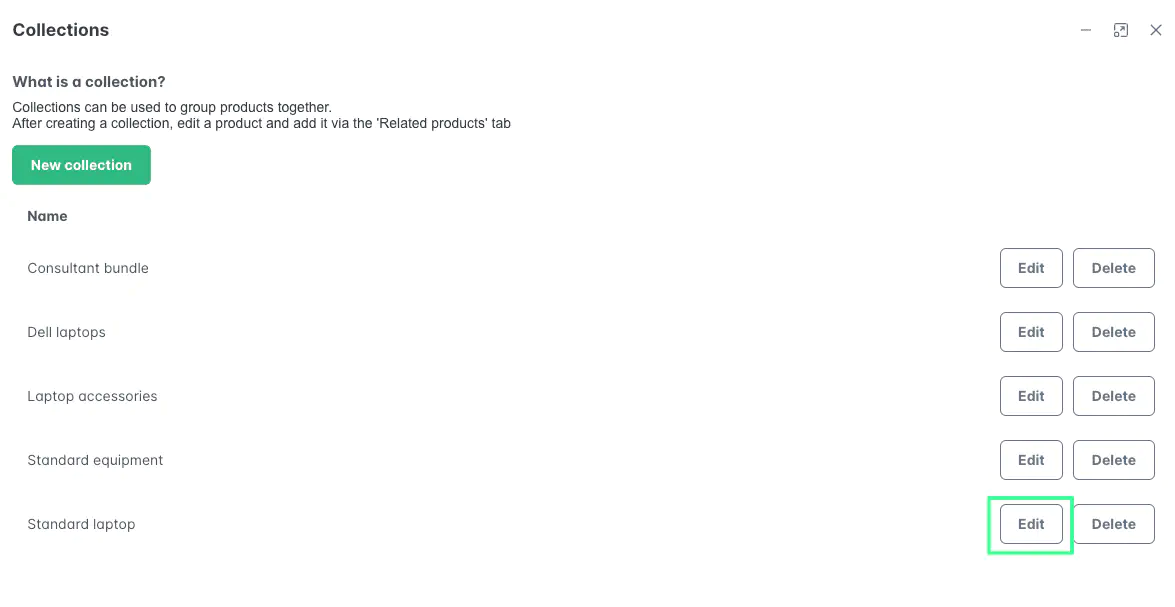
Add a New Collection
To create a collection:
- Click Collections from the front page or inside a category.
- You can also access collection management directly from a product’s Related Products section.
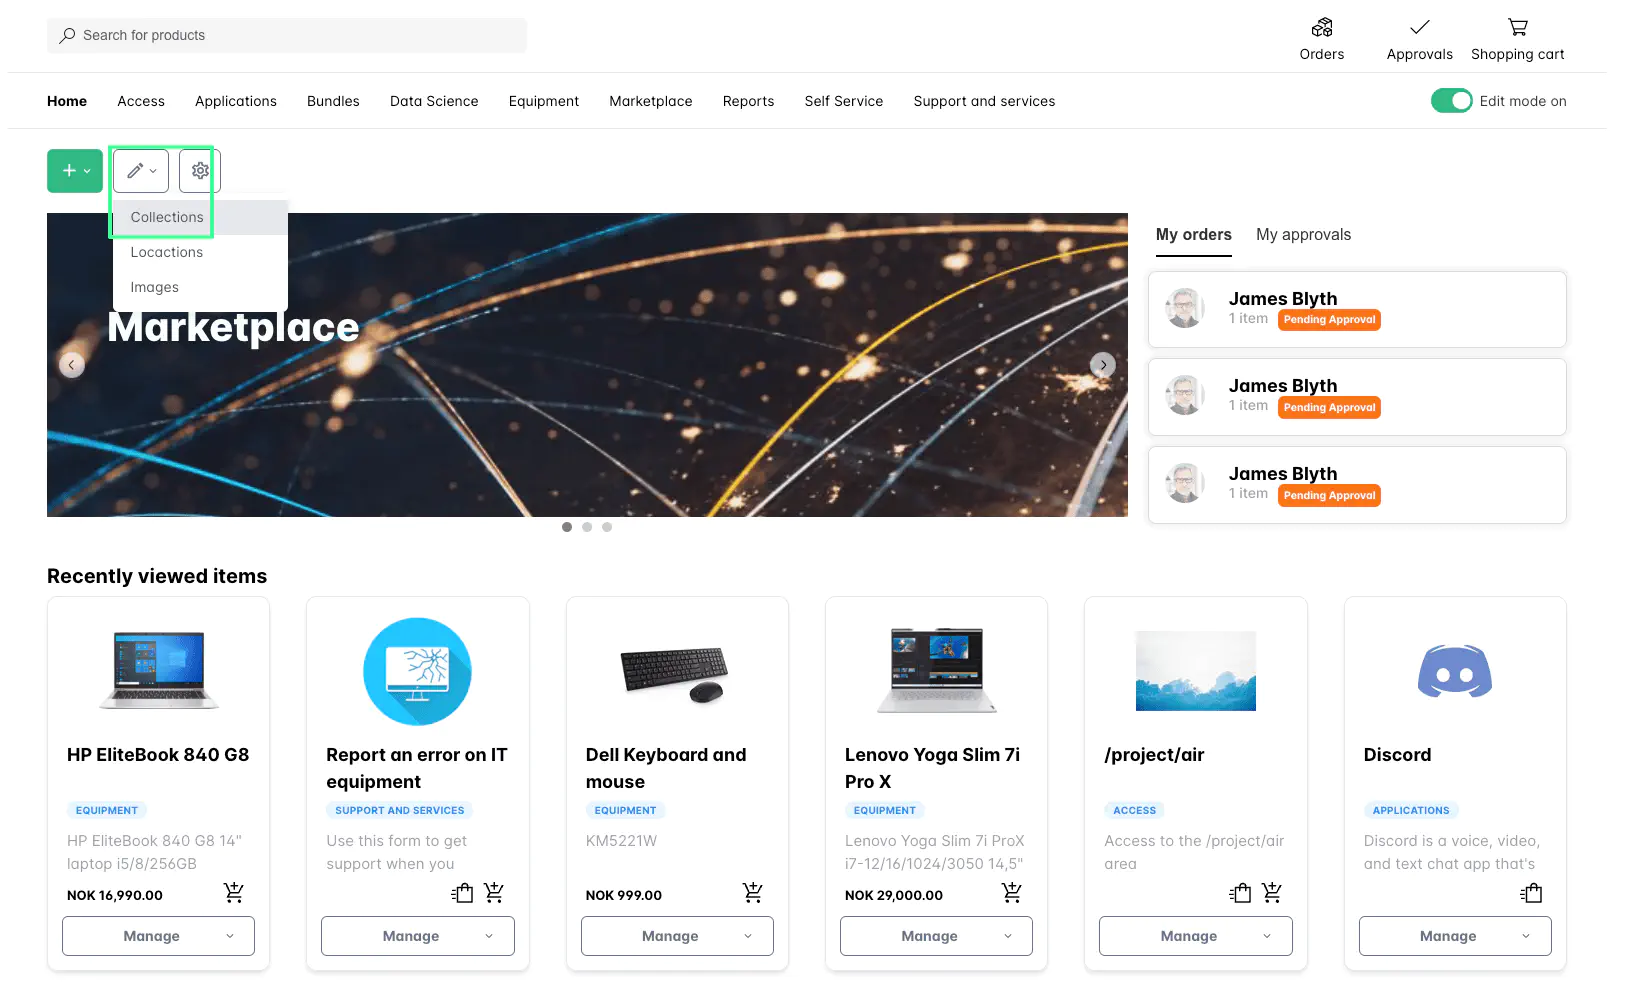
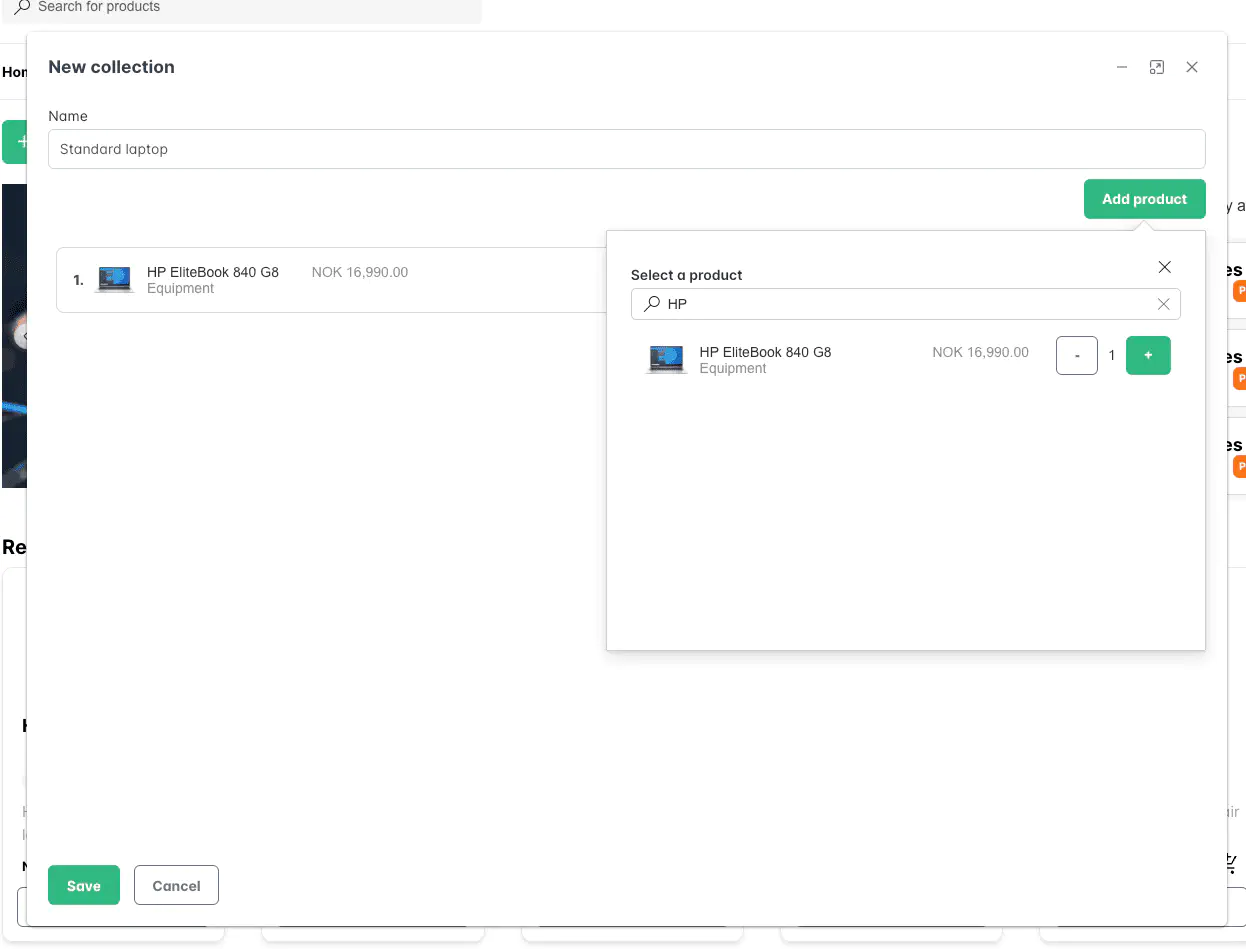
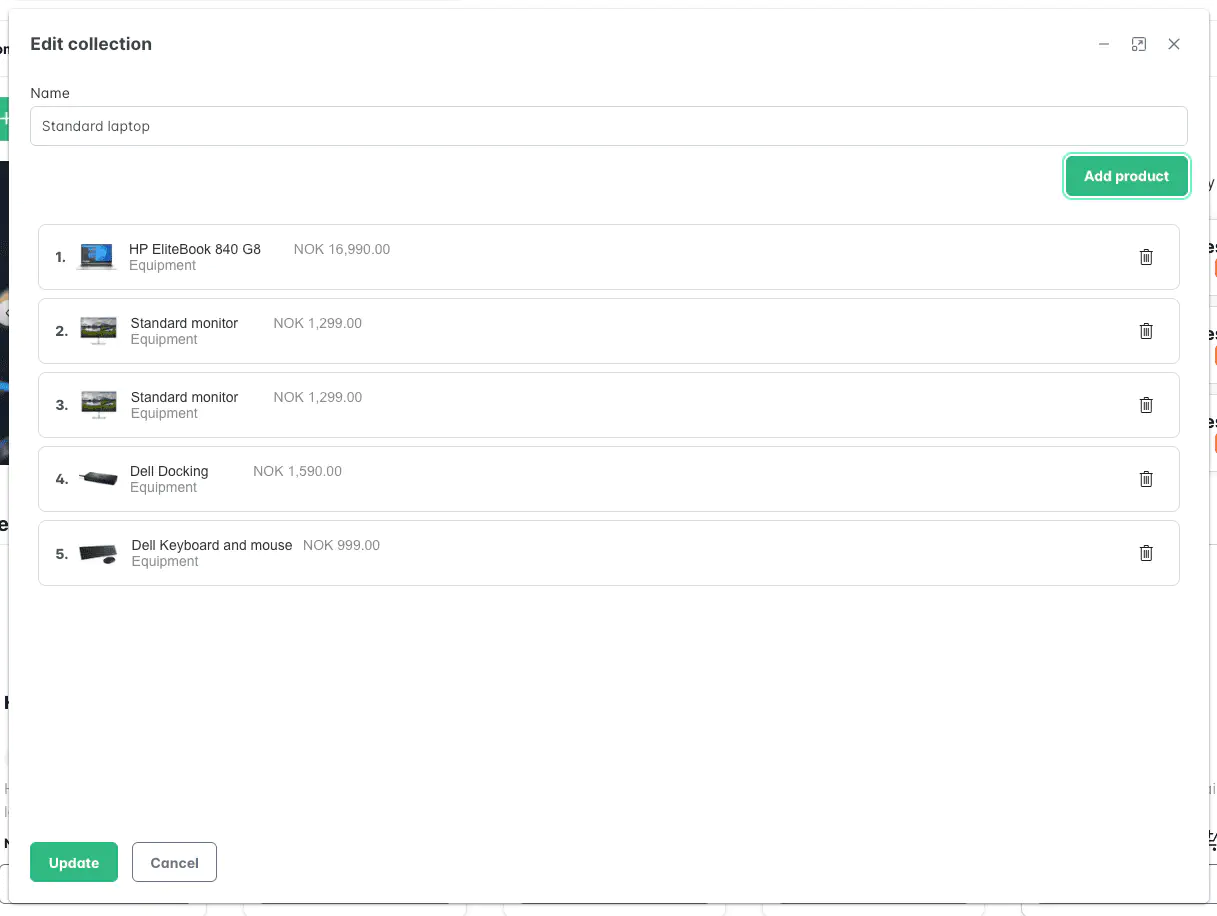
Give the collection a name, click Add Product, and select the products to include. You can even add the same product multiple times.
When selecting products, you can filter by category to narrow down the list — useful when your Catalog has many products across multiple categories.
Product Collections
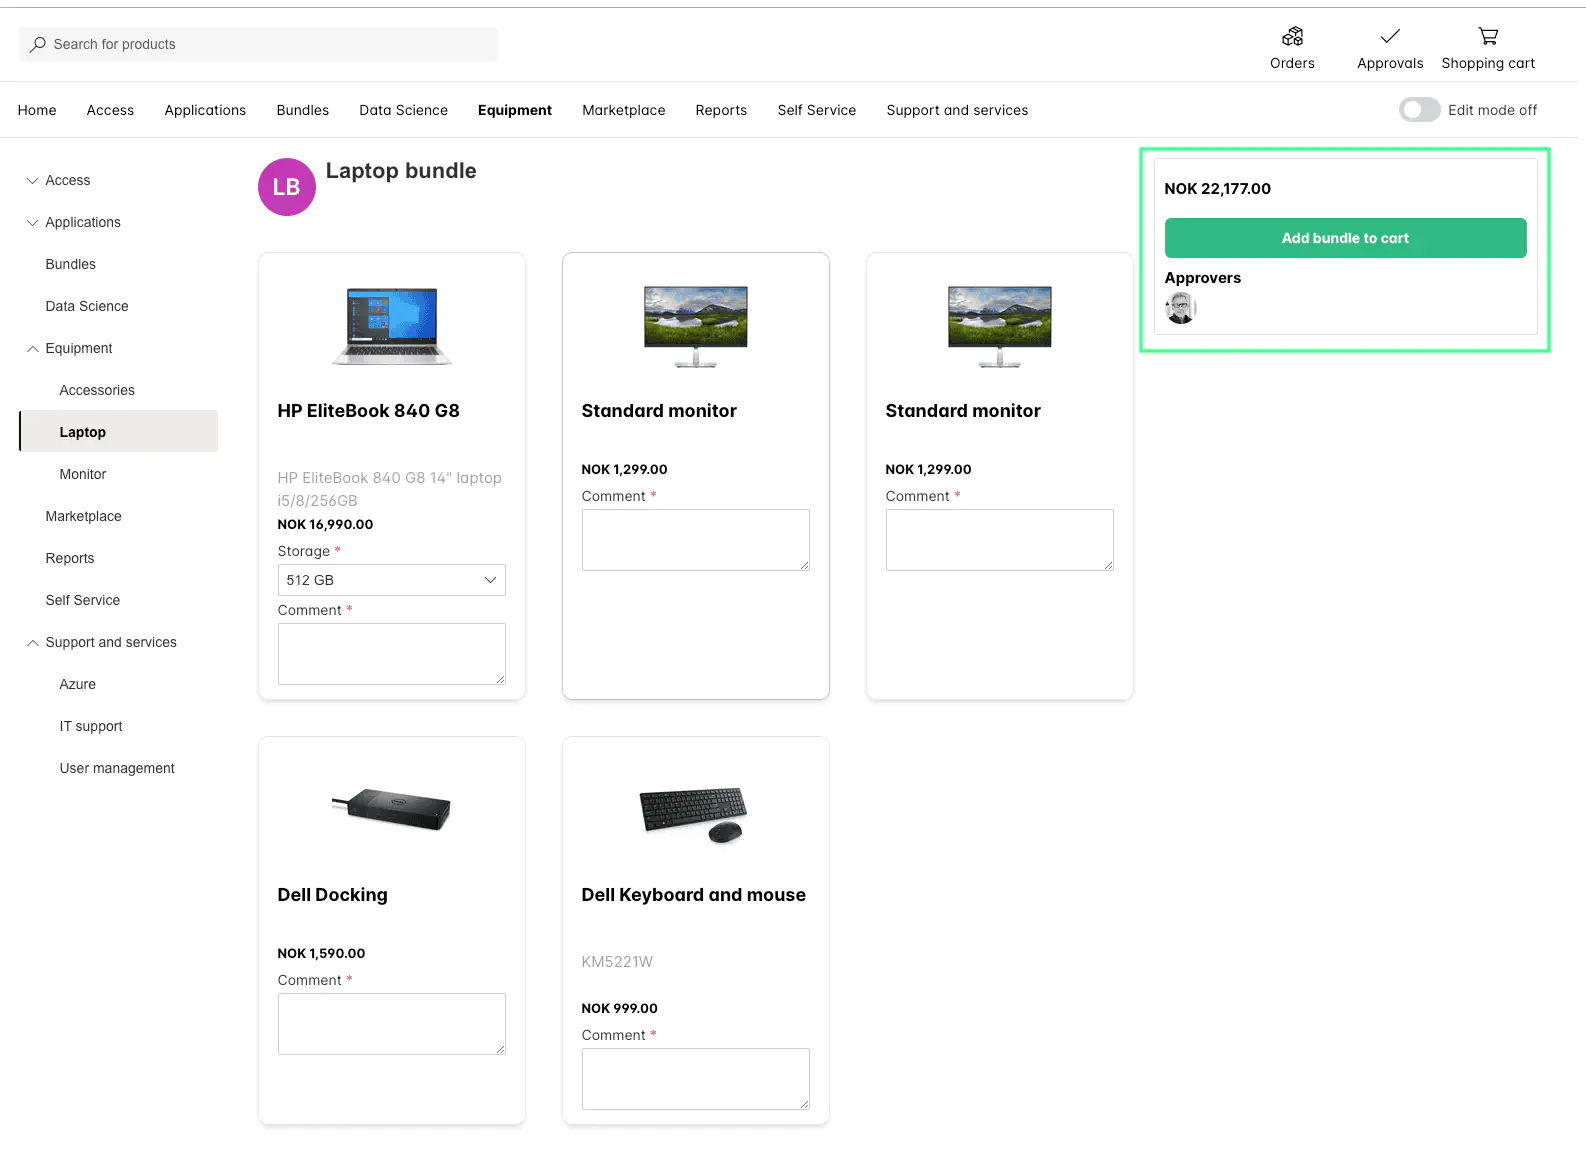
A Product Collection can be ordered as a single bundle — perfect for sets like:
- A laptop with monitor, docking station, and keyboard/mouse.
- “New Employee Starter Pack” including hardware and access.
In this case:
- Set Type to Collection.
- Select which collection should be used.
When users open a collection product:
- All included items appear in a single view.
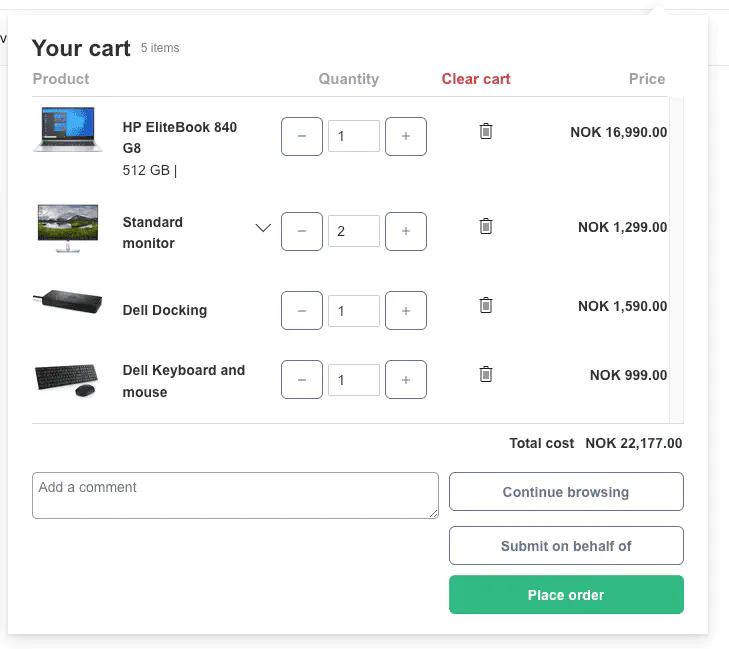
- The total price shows all items combined.
- Clicking Add bundle to cart adds all products at once.
Related Products
Collections can also be used to display related products within the same category. These are shown below the main product description.
Read more about related products here.
History and Versioning
Every change to a product is automatically logged. You can review all updates in the History tab within the product editor.
See all changes with timestamps, types, and the user who made them. You can also restore previous versions when needed.
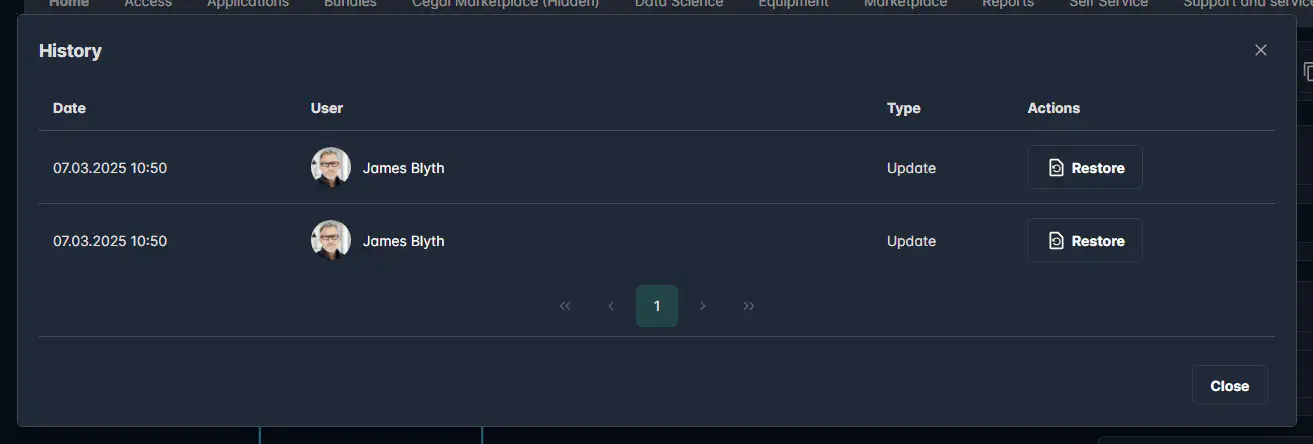
Note: The History feature is in beta testing and may not be available to all users yet. Enhancements and visual updates will be announced in upcoming release notes.
Product Statistics
Each product includes a Statistics view, available when Edit Mode is enabled. Click the Statistics button on the product page to open detailed insights for that product.
The Statistics view provides:
- Order data – number of orders, total cost, and pending approvals.
- Form field analytics – breakdowns of form inputs (for example, selected options or feedback responses).
- Order trends – visual charts showing order activity over time.
- Approval overview – pending approvals with the ability to send reminders.
Statistics can also be exported as CSV or JSON for further analysis.
Read the full guide about the Catalog Statistics module here.