Groups
Groups control access to applications, resources, and features — manage them from Manage → Groups.
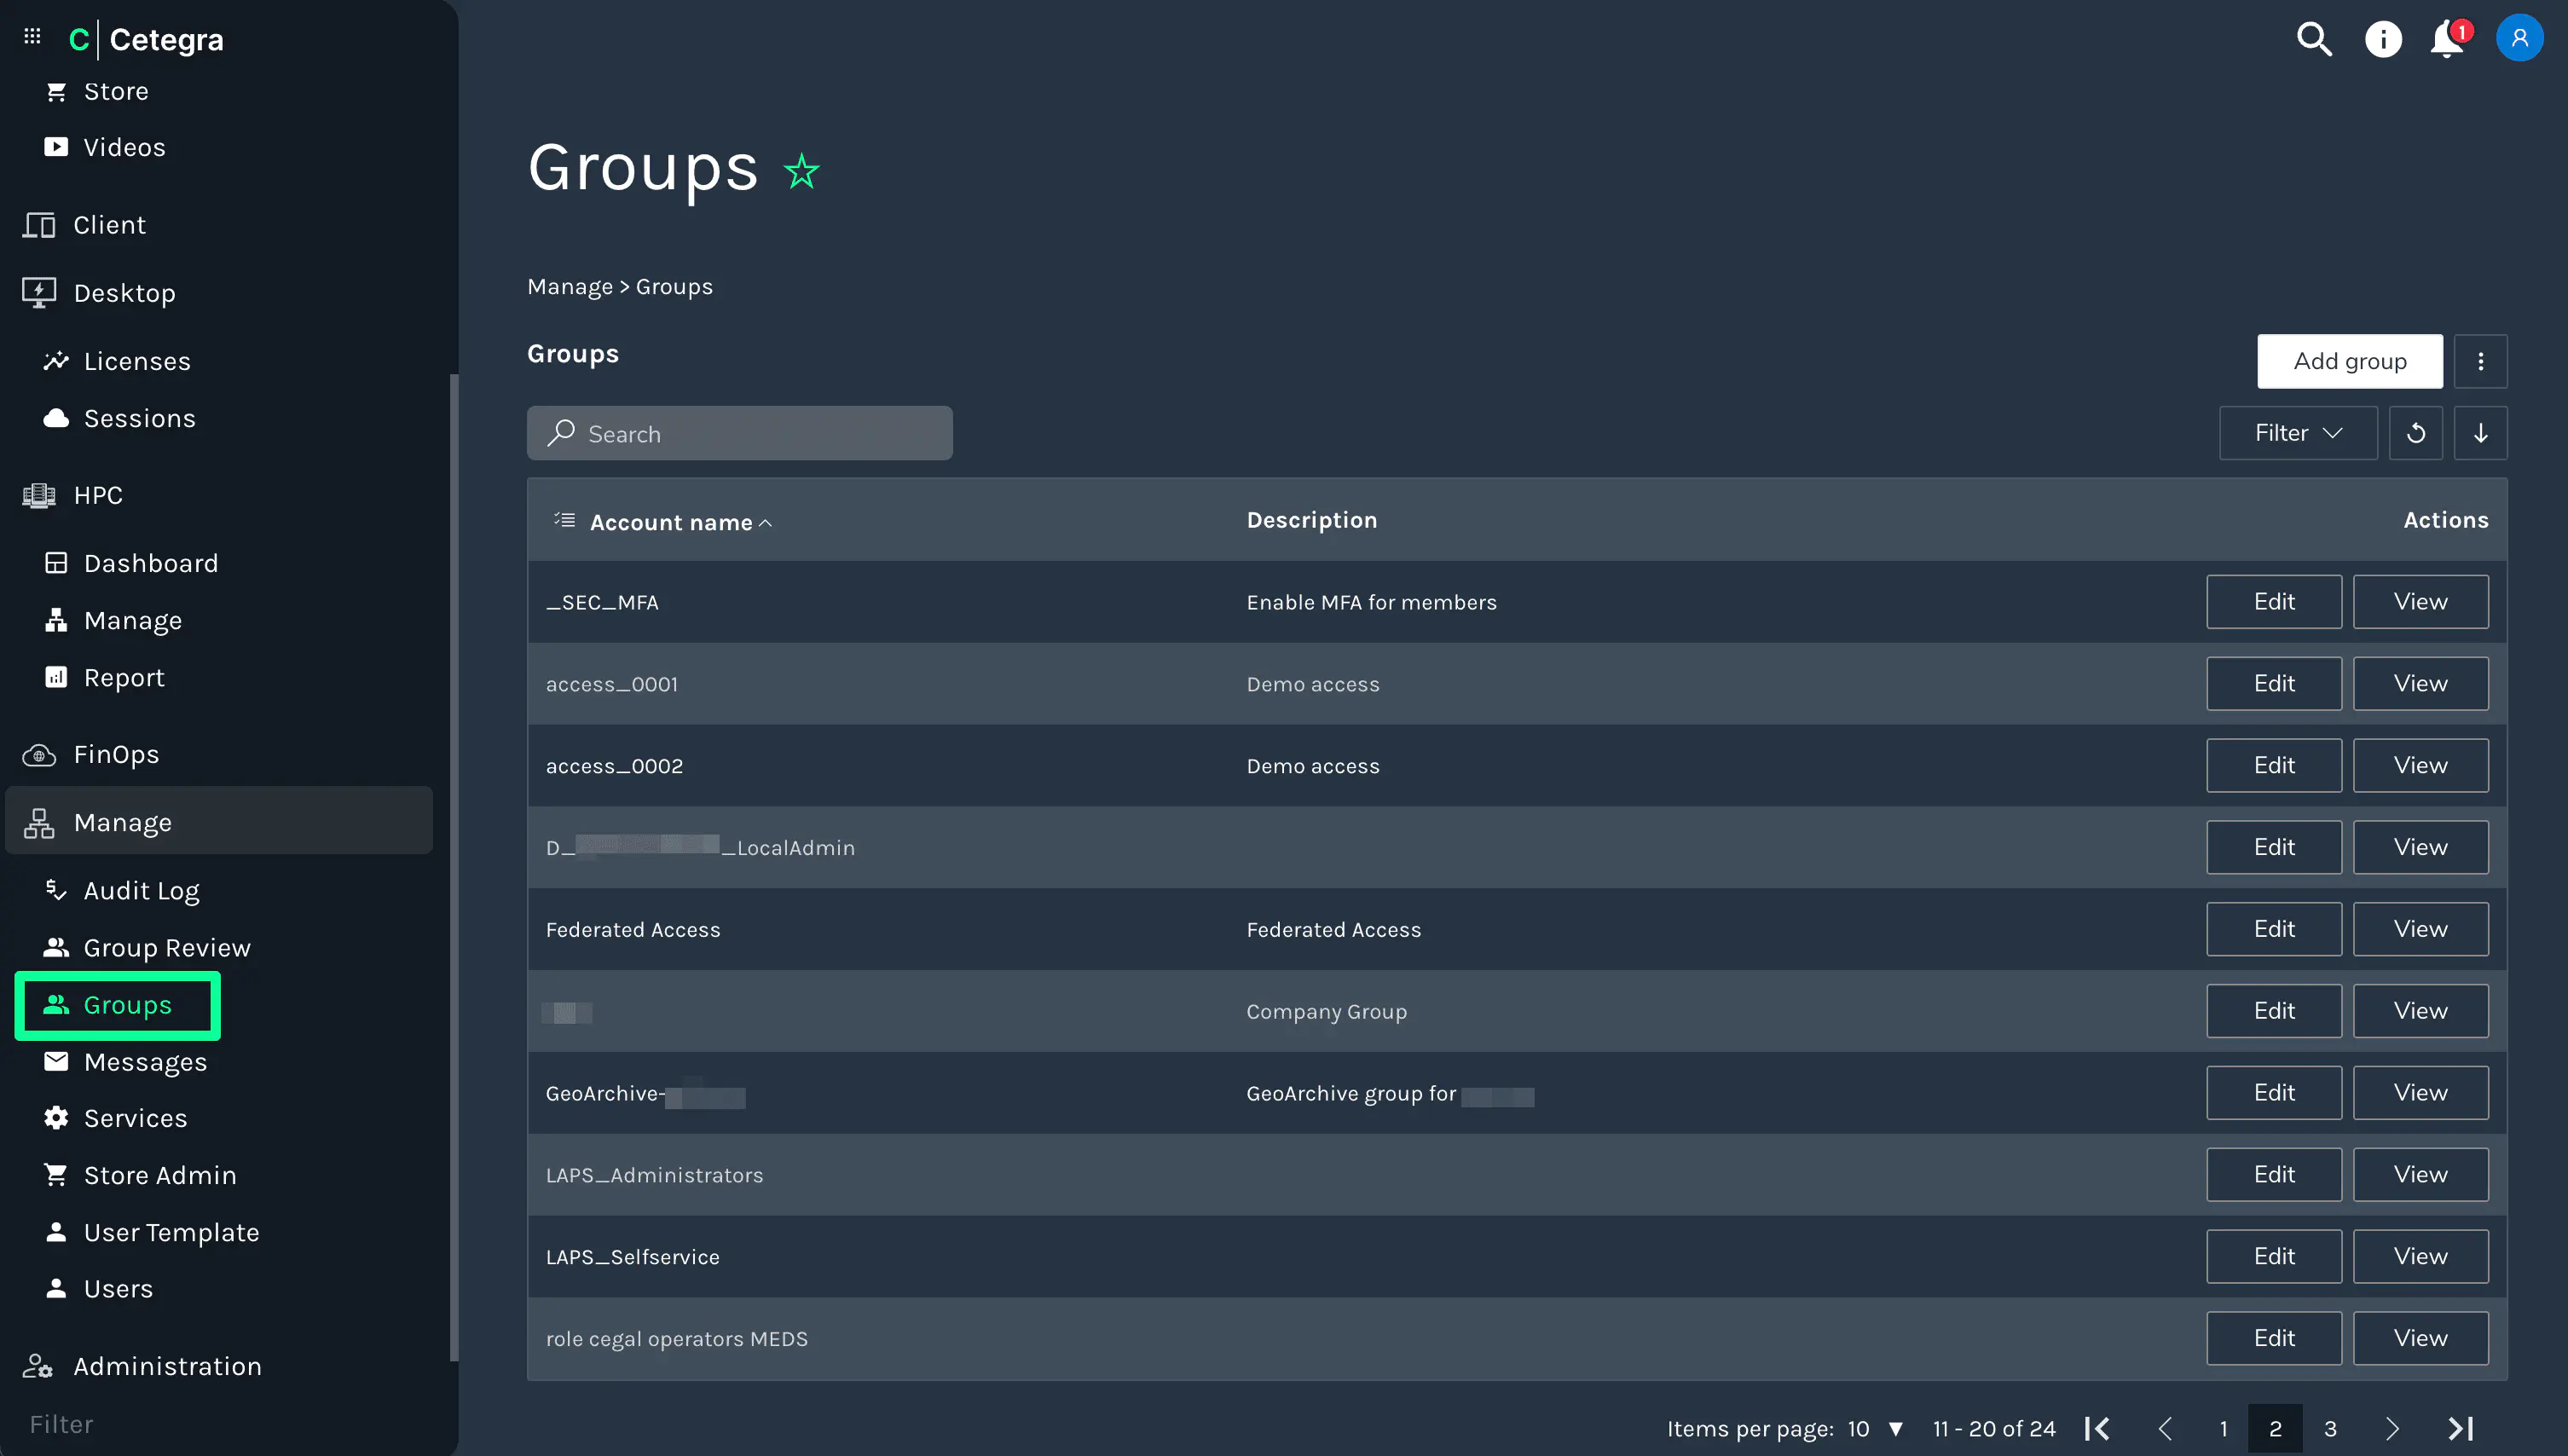
Go to Manage → Groups to view and manage all groups in your Workspace tenant.
Creating a group
Click + Group in the top right and fill in the details:
- Enter a Display Name and a brief Description.
- Optionally add users or nested groups immediately.
- Click Save.
Managing existing groups
Use the search bar or browse the list to find a group. Each group has action buttons for editing, viewing, and deleting.

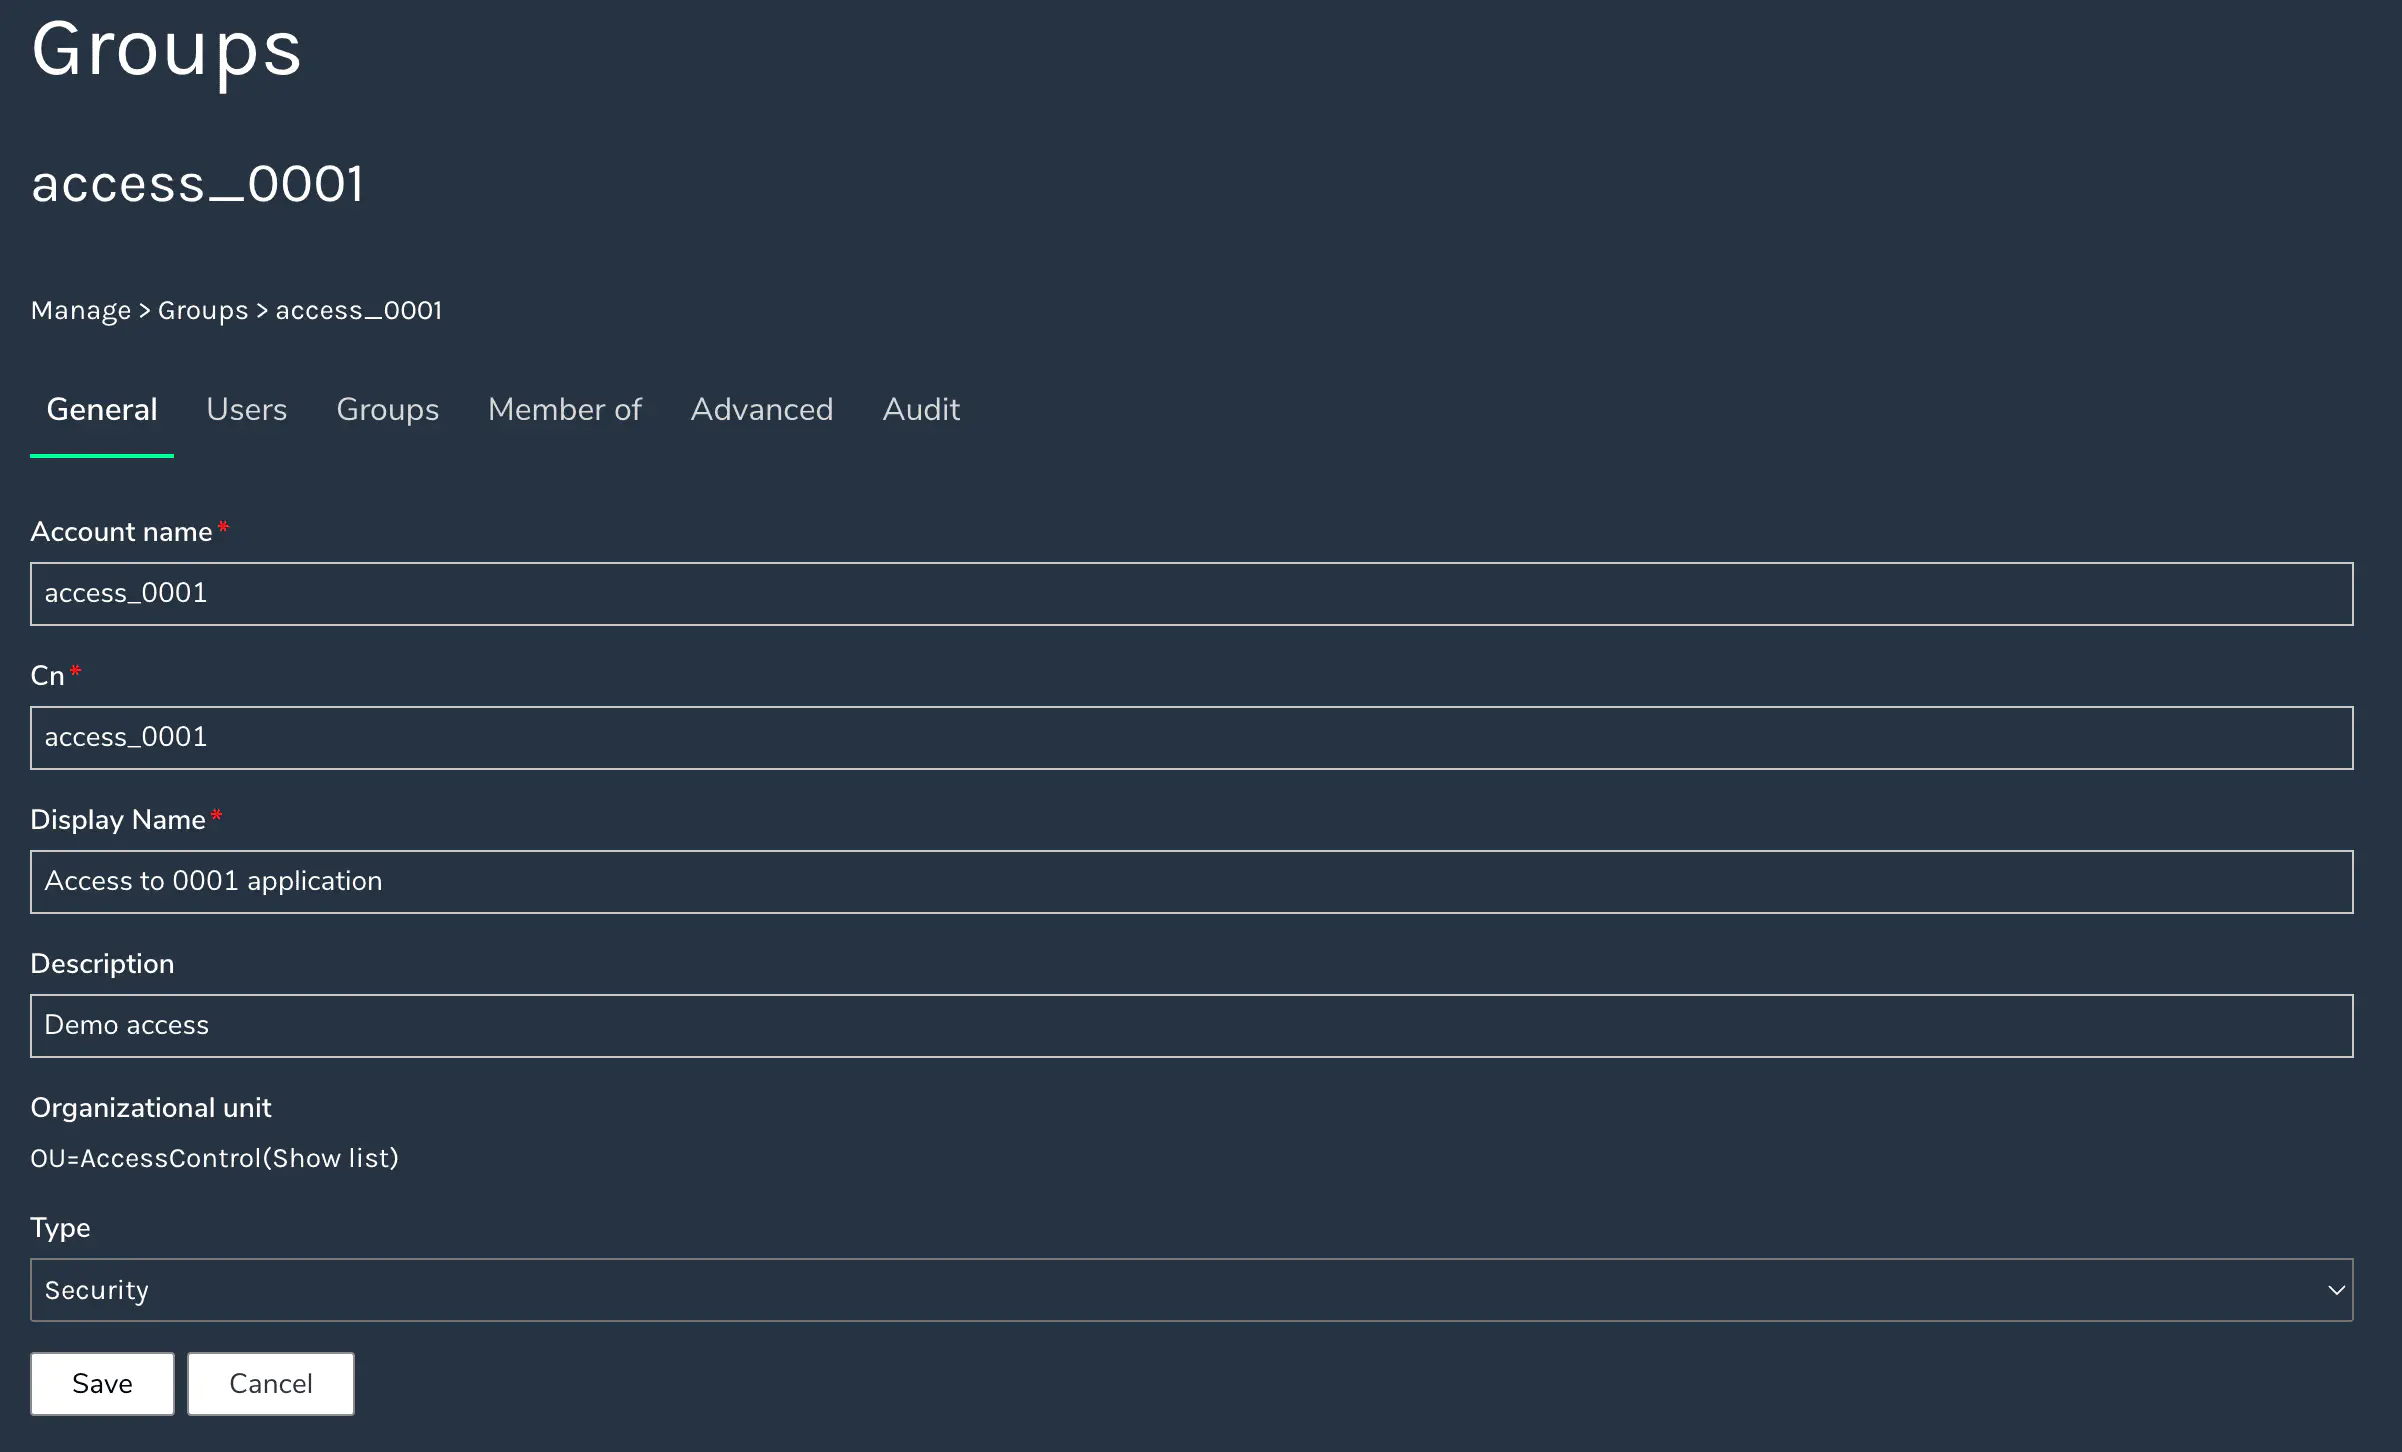
Edit group
Opens the group editor with the following tabs:
| Tab | Description |
|---|---|
| General | Modify the group name, description, and other metadata. |
| Users | View current members and add or remove users. In hybrid environments, the list reflects the currently selected source (AD or Cloud). |
| Groups | View and manage nested group memberships. |
| Advanced | Set a maximum user limit, or enable the User Review feature for periodic membership audits. |
| Audit | A log of all changes made to the group via the Workspace portal. |
| Contacts | Manage the AD user contact feature for this group (not enabled by default). |
View group
A read-only overview of all group details and memberships.
Delete group
Permanently removes the group. This cannot be undone.
User Review
Enabling User Review on a group (under the Advanced tab) lets designated reviewers periodically confirm that every member still needs their access. This is useful for security and compliance purposes.
Read more about Group Review →
Groups with Hybrid Sync enabled
If your organisation has the Hybrid Sync add-on enabled, the group list and detail view gain additional capabilities for working across on-premises and cloud directories.
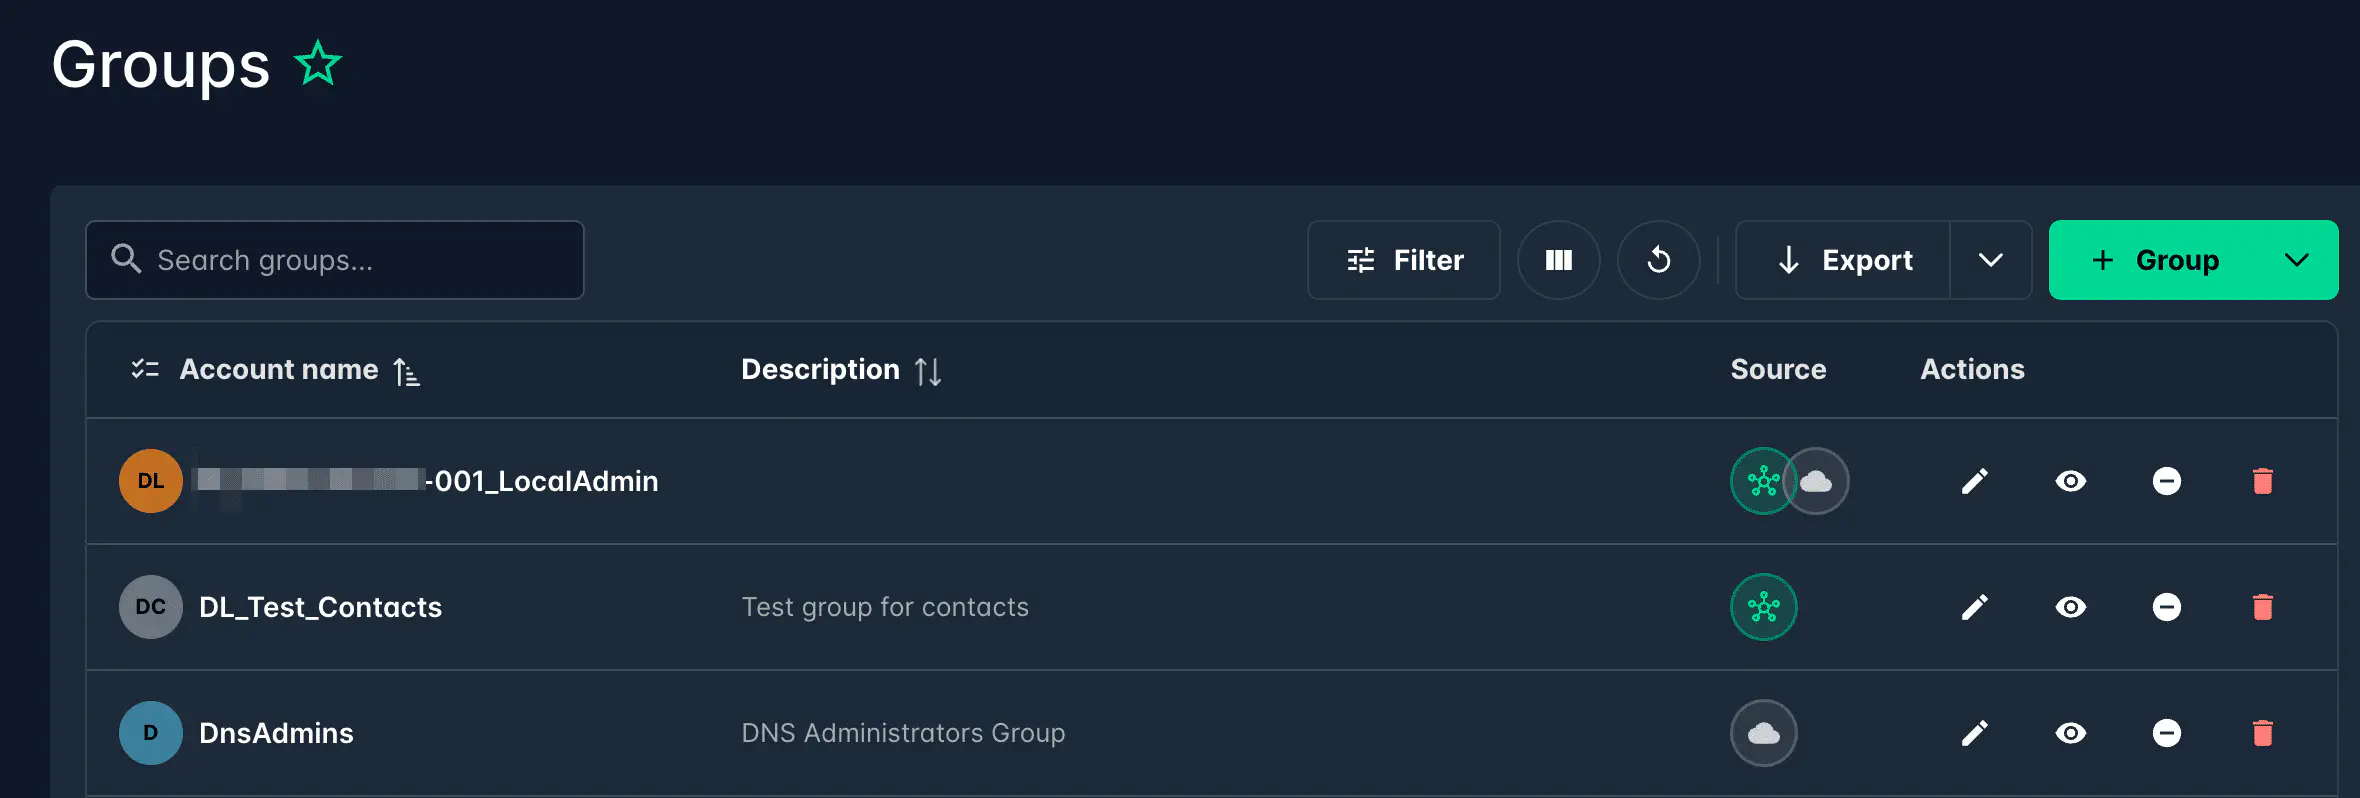
Source column and filtering
Each group shows a Source indicator revealing where the group originates:
| Icon | Label | Meaning |
|---|---|---|
 | AD | Group exists in on-premises Active Directory |
 | Cloud | Group exists in Azure AD / Entra ID only |
 | AD + Cloud | Group exists in both — synced between on-premises and cloud |
Hover over the icon to see the label as a tooltip.
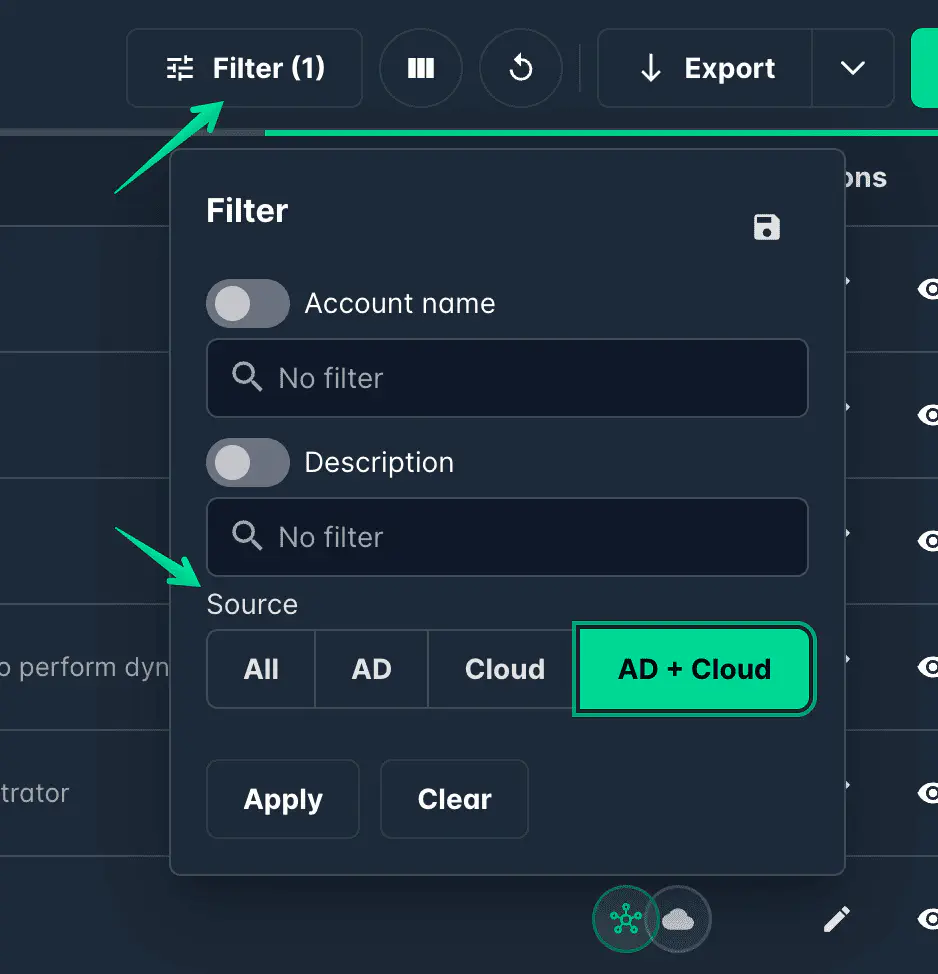
Use the Filter button to narrow the list by source type — choose All, AD, Cloud, or AD + Cloud.
Creating a group in a hybrid environment
When Hybrid Sync is enabled, the + Group button shows a dropdown with two options:
- + Active Directory group — creates the group in the on-premises directory
- + Cloud group — creates the group in Azure AD / Entra ID
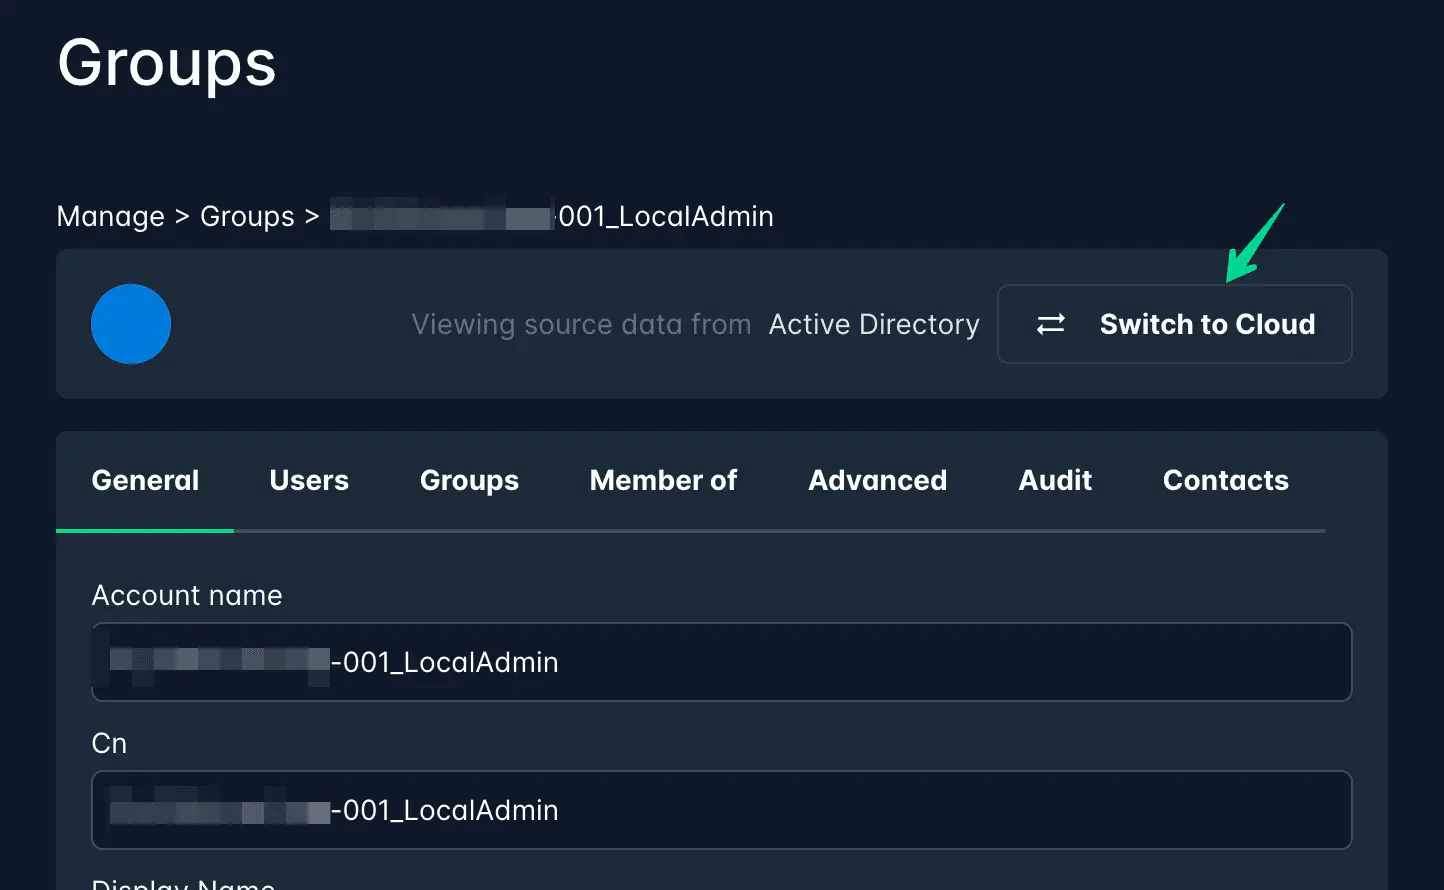
Source switch in the detail view
When viewing or editing a group that exists in both directories, a source switch is shown in the top right of the detail view. This controls which directory context is active — Active Directory or Cloud. The Users tab will show the members from whichever source is currently selected. Toggle the switch to see the membership in the other directory.
Sync behaviour
- Groups imported via sync are created and updated automatically — memberships are kept in sync with the source directory.
- Groups created manually in the portal are not affected by sync.